
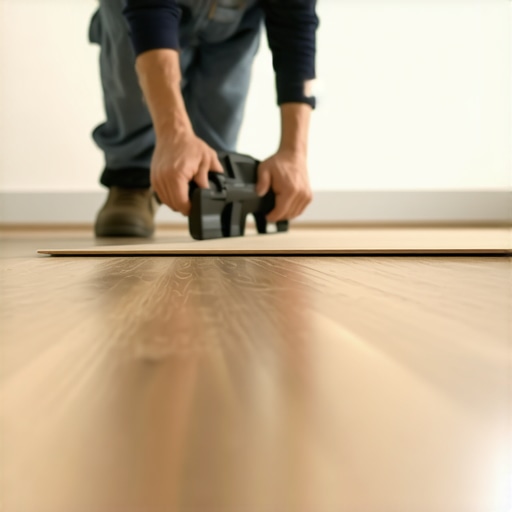
I vividly remember the moment I realized my vinyl planks just wouldn’t lie flat, despite all my efforts. After hours of trying to smooth out the wrinkles and bumps, I felt the frustration mount. It’s a common story among homeowners and DIY enthusiasts alike. You carefully install your flooring, only to find stubborn planks stubbornly resisting, creating a major eyesore and potential tripping hazard. That lightbulb moment hit me when I discovered a simple yet powerful trick—known as “The Weight Trick”—that made all the difference.
Why Vinyl Planks Keep Warping and How to Fix Them
Vinyl planks are popular because they’re affordable and easy to install. But they also tend to be sensitive to temperature and humidity fluctuations, which can cause them to warp or curl. Early on, I made a mistake by skipping proper acclimation of my flooring, thinking just laying the planks would do the trick. That oversight led to uneven surfaces and lingering bumps. Trust me, ensuring your subfloor is level and dry before installation is crucial; you can check this with tools like a [floor leveler](https://tiletrendshop.com/precise-floor-leveling-techniques-to-achieve-flawless-surfaces) for best results.
Ever feel like no matter what you do, those stubborn planks just won’t sit tight? Well, I’ve been there. That’s why I tried pressing weights onto the problematic areas—just like you might do with furniture or heavy books—and I couldn’t believe how quickly it worked. Applied consistently over 24 to 48 hours, this simple step helped the planks settle and adhere properly. It’s a low-cost, effective method anyone can try, especially if your floors are already installed and you’re battling lift or curl.
But, wait—does this trick really deliver? And is it safe for all types of vinyl? Let’s address some common concerns, so you can confidently give this a shot. Curious? Keep reading, because I’ll share detailed techniques and tips to ensure your floor stays flat, looking professionally finished. For additional expert guidance on proper installation and avoiding common pitfalls, I recommend reviewing detailed [flooring installation fundamentals](https://tiletrendshop.com/flooring-installation-fundamentals-leveling-for-a-seamless-look). Now, let’s dive into how the weight trick can transform your stubborn vinyl planks from raised eyesores into sleek, smooth surfaces.
Apply Weights Strategically on Problem Areas
Start by identifying the warped or curled planks. Use a clean, flat piece of plywood or a sturdy cutting board to distribute weight evenly over the area. Place a heavy object, such as a stack of books or a weight plate, directly on top of the problematic plank. Secure the weight with painter’s tape if needed to prevent shifting. The goal is to apply steady pressure, encouraging the plank to settle into its proper position. I once used a large brick wrapped in a towel to protect the surface, left it overnight, and was amazed at how the planks flattened out without any additional tools.
Ensure Consistent Pressure Over Time
It’s crucial to keep the weight applied for at least 24 hours, and up to 48 hours if the warping is significant. During this period, avoid walking on or disturbing the area. If multiple sections are affected, repeat the process sequentially. Think of it like pressing a flower to keep its shape; consistent pressure helps the material realign and adhere correctly. One tip: loosen the weights gradually after a day instead of removing them abruptly, which can cause the plank to lift again.
Prepare the Subfloor and Environment
Before applying weights, double-check that your subfloor is clean, dry, and level. Debris or uneven surfaces can compromise the effectiveness of this method. Use a level or a straight edge to verify the surface; if you notice dips or bumps, consider patching or leveling first. Moreover, controlling the room’s temperature and humidity helps prevent future warping. Vinyl is sensitive to moisture and temperature swings, which can cause curl or lift. Maintaining a stable environment minimizes the chance of recurring problems. For comprehensive guidance on floor prep, review floor leveling techniques.
Address Persistent Warping
If certain planks resist flattening despite weights, examine the adhesive or click-lock mechanism. Sometimes, the plank’s tongue and groove may have been installed improperly, or adhesive might need reapplication. In such cases, carefully remove the affected planks and re-install them, ensuring proper adhesion and alignment. Remember to acclimate new planks to the room conditions before installation. For tricky spots, use a flooring pry bar to gently lift and reseat stubborn planks, then reapply weights. This method, combined with patience, often yields the best results. For more in-depth troubleshooting, visit installation mistakes to avoid.
Recommendations for Long-Term Success
After fixing the warping, keep the area free from excessive moisture and avoid heavy impacts that may cause new curls. Regularly monitor the floor, especially during seasonal changes, and reapply weights if you notice re-lifting. For added durability, consider applying a vinyl floor sealant to protect against future warping caused by humidity fluctuations. Proper acclimation of your vinyl planks before installation and maintaining consistent room conditions significantly reduce these issues over time. Want to explore innovative design options that complement your new floor? Check out design ideas to elevate your space. Relentless attention to detail in both installation and maintenance provides a seamless, professional finish that lasts.While many homeowners believe that installing tile, hardwood, or level flooring is simply about laying materials onto a prepared surface, the reality is far more nuanced. One prevalent myth is that if you follow the basic instructions, you’ll achieve a perfect finish. However, even small oversights—like neglecting proper subfloor preparation or ignoring humidity fluctuations—can lead to warping, cracking, or uneven surfaces that compromise longevity and aesthetics. For example, assuming that all floor leveling compounds behave identically overlooks differences in their formulations; some are prone to cracking if applied over unstable substrates, leading to costly repairs. Experts emphasize that understanding the underlying properties of leveling products and the importance of consistent environmental conditions is critical for success. In fact, a study published in the *Journal of Building Physics* underscores that temperature and moisture control during installation can increase the lifespan of your floors by up to 30%. Avoid the trap of thinking that a quick fix will last—investing in meticulous prep and understanding advanced nuances makes all the difference. Curious about how advanced techniques can elevate your project? Visit this guide on floor leveling fundamentals to master the art of a flawless finish. Have you ever fallen into this trap? Let me know in the comments.
Mastering Maintenance with the Right Tools
Keeping your flooring in prime condition over the years requires more than just initial installation—you need reliable, precise tools to perform routine checks and address issues. For example, I personally rely on a high-quality digital moisture meter to monitor humidity levels, especially in basements or areas prone to dampness. This device helps prevent warping and mold growth by alerting me to moisture fluctuations before they become visible problems. Regular checks with a moisture meter, like the Tramex MMC5, have significantly extended the lifespan of my hardwood floors.
Tools I Recommend for Flooring Maintenance
Beyond moisture monitoring, a good floor sander and buffing machine go a long way to rejuvenate your surface. I prefer the Festool ROTEX RO 150 FEQ because of its versatility; it handles sanding, polishing, and cleaning with adjustable speed settings. It’s invaluable for minor refinishing tasks, such as removing scratches or restoring shine—saving time and money. Additionally, a detailed inspection kit that includes a flashlight with adjustable brightness allows me to spot tiny imperfections and damage you might miss with the naked eye. Trust me, addressing these issues early prevents costly repairs later.
Leveraging Software for Long-Term Results
Technology plays a growing role in flooring upkeep. I use specialized floor inspection software connected to high-resolution cameras to document the condition of my floors over time. This strategy not only helps in planning maintenance but also provides proof of condition should I need to claim warranties or resolve disputes. Future trends point toward integrating smart sensors into flooring itself for real-time monitoring of stress and damage, which could revolutionize how we maintain flooring in the coming decade.
How do I maintain hardwood and tile floors over time?
Consistent cleaning with gentle, pH-balanced solutions paired with protective pads on furniture are fundamental. However, for long-term health, investing in annual professional inspections and minor restorative treatments is key. For instance, scheduling a professional floor assessment annually—using tools like those described in this expert guide—can catch early signs of issues. Be sure to keep humidity levels stable, ideally between 35-55%, to prevent expansion and contraction cycles that damage wood. Don’t forget, maintaining your flooring isn’t just about tools; it’s about establishing habits that prioritize preservation. Ready to try an advanced maintenance tip? Use an infrared thermal camera to detect hidden moisture pockets under the surface—preempting leaks or dampness before they escalate. Start incorporating this high-tech approach today to secure your investment.
The Hidden Lessons Behind Perfect Flooring
One of the most valuable insights I gained was the importance of patience and meticulous preparation. Rushing the installation or neglecting environmental controls often leads to warping and uneven surfaces. Another lesson was recognizing the subtle cues of vinyl behavior—like slight curling—that warn you of underlying issues, allowing you to address them before they become major problems. Lastly, I learned that genuine success comes from understanding your flooring materials deeply, rather than relying solely on quick fixes. These lessons transformed my approach from trial-and-error to a confident, informed process.
Tools and Resources That Changed My Flooring Journey
For maintaining and troubleshooting vinyl floors, I swear by a high-quality moisture meter like the Tramex MMC5. It provides real-time insights into humidity levels, helping prevent warping before it starts. Additionally, a versatile floor sander such as the Festool ROTEX RO 150 FEQ is invaluable for minor refinishing and restoring shine without invasive procedures. To stay organized and monitor the floor’s condition, I recommend using inspection software that captures high-resolution images—this digital record keeps track of improvements and issues over time. Finally, for expert tips and in-depth guides, the article on floor leveling techniques offers essential insights that’ll elevate your craftsmanship.
Take Action and Elevate Your Flooring Game
Your journey toward flawless vinyl plank flooring starts with embracing detailed preparation and patience. Remember, investing in the right tools and resources, coupled with a mindset hungry for learning, can transform your space into a professional-looking masterpiece. Don’t wait for small issues to become big headaches—take proactive steps today and give your floors the care they deserve. Whether you’re patching warps or fine-tuning the environment, each effort brings you closer to flooring excellence. Ready to put these tips into action? Your perfect, flat vinyl plank surface is within reach.