
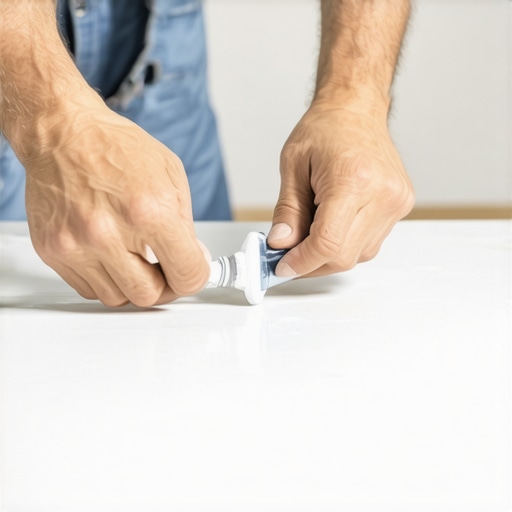
I vividly remember the moment I realized I was wasting hours trying to get those pesky silicone caulk lines to look perfect, only to end up with uneven, messy edges that made my entire project look amateurish. It was Frustration, pure and simple. I’d spend more time wiping and redoing than actually enjoying the satisfaction of a job well done. Then, one day, it hit me—there had to be a better way. And there was. It was all about the taping hack.
Why Struggling with Caulk Lines Is So Common—and So Fixable
If you’ve ever sealed a corner or along a bathtub, you know the pain. Silicone caulk can be stubborn, especially if your edges aren’t perfectly prepared or if your tools aren’t up to par. The typical approach—squeezing, wiping, then hoping for a straight line—is like trying to write with a broken pencil. No wonder so many of us end up with crooked, uneven edges that ruin the entire look.
What surprised me early on is how simple tweaks can make a huge difference. Did you know that proper masking doesn’t just keep your work neat but actually saves you time and money in the long run? According to professionals, taking care to prepare and tape your surfaces can reduce finish work by up to 50% (source). That’s a game-changer. My own mistake was thinking I could freehand it—big error. Once I learned how to tape properly, the results started to look like I’d hired a pro, but I was still in my garage.
So, if you’re tired of your caulk lines looking like a toddler’s doodle, stick around. I’m here to share a little secret—my personal taping hack—that transformed my projects from frustrating to flawless. Ready to turn your DIY fail into a professional finish? Let’s do this.
Are Silicone Caulk Lines Really That Difficult to Get Right?
To be honest, I used to think so. I believed it was just about steady hands, but I learned early on that the real secret lies in preparation and techniques. An embarrassingly common mistake I made was skipping the masking tape, thinking it was unnecessary. Big mistake. Without a neat guide, I was left with jagged edges and dripping silicone. Trust me, a little extra prep work can save hours of redo’s and headaches. Curious about the details? You can find more sealing tips and tricks here.
Prepare Your Surface and Gather Supplies
Before starting, clean the area thoroughly to remove any dust, grease, or old residue, ensuring the caulk adheres properly. Gather high-quality painter’s tape, a sharp utility knife, a caulking gun, and a specialized silicone spatula or finger for smoothing. I recommend using painter’s tape that’s about 2 inches wide for better control. Once I learned this, my lines instantly improved. I applied the tape just outside where I planned to apply the caulk, aligning it carefully along the edges. This initial step prevents messes and gives you a clear guide, much like laying out a stencil before painting.
Apply the Tape Precisely
Carefully press the tape onto the surface, maintaining tight contact to prevent silicone from seeping underneath. For tricky corners or uneven edges, use a utility knife to trim the tape for a perfect fit. I once encountered a jagged edge on plumbing fixtures, which made the tape tricky, but a few careful cuts made a huge difference. Keep the tape straight and flush against the surface; pulling it taut minimizes gaps that can cause uneven lines. Think of this like stretching a rubber band tightly—you want a firm, smooth guide for your silicone.
Execute the Caulking with Confidence
Load the caulking gun with your selected silicone and cut the tip at a 45-degree angle, opening the hole just enough to control flow. Squeeze a steady bead along the tape line, keeping a consistent pressure. My first attempt was too rapid, resulting in blobs; then I slowed down, and the difference was remarkable. As you run the bead, focus on maintaining a smooth trailing motion—think of it like drawing a straight line with a ruler. Keep the gun at a steady angle and avoid stopping mid-flow to prevent gaps or uneven ridges.
Smooth the Caulk for a Clean Finish
Immediately after applying the bead, use a specialized silicone spatula or a moistened finger for smoothing. Lightly press and glide along the caulk, pushing it into the joint for a seamless look. I find that lightly dipping my finger in water or a water-vinegar solution reduces sticking and makes smoothing easier. The key is to work quickly before the silicone skins over. Consider this the icing on a cake—your chance to perfect the surface without disturbing the tape line.
Remove Tape Strategically
Once you’ve smoothed the caulk, wait about 5 minutes—long enough for initial set but before it cures fully. Carefully peel the tape back at a 45-degree angle, pulling slowly to prevent smudging. If any imperfections appear, use a damp cloth or a small brush to clean up edges immediately. For my projects, quick removal of the tape prevented dry silicone from pulling or tearing, giving me sharp, professional edges. Think of it like peeling off a sticker—slow and steady ensures a clean edge without tears.
This tape hack drastically cuts down on the need for touch-ups and sanding later, saving both time and frustration. It takes a little extra effort upfront but results in razor-sharp, professional-looking caulk lines every time. For more tips on surface preparation or advanced sealing techniques, visit our installation pointers page.
Even experienced DIYers can fall prey to misconceptions about flooring installation. Many believe that laying tiles or hardwood is purely about following the basic steps, but actually, there’s a lot more nuance involved that can make or break your project. One widespread myth is that using cheaper materials will save money in the long run; in reality, inferior products often lead to costly repairs and replacements, especially if they aren’t suited for your climate or subfloor conditions. According to flooring expert Michael Anagnostopoulos, selecting materials with the right specifications and quality is crucial for durability (source).
Invest in Quality Tools for Precision and Durability
When it comes to maintaining your flooring, having the right tools isn’t just a convenience—it’s a necessity. I personally swear by a high-powered oscillating multi-tool for precision sanding and detailed repairs, especially when working on hardwood floors with intricate inlays or damage. Unlike standard sanders, this tool allows me to reach tight corners or delicate edges without risking further harm. Contact us to learn more about the specific models I recommend. For larger surface refinishing, I rely on a commercial-grade floor buffer with variable speed control, which ensures an even finish and reduces the risk of gouges. Choosing the right accessories—like specialized pads and brushes—further enhances performance and longevity of your flooring. Regularly updating your toolkit with these reliable equipment pieces will streamline ongoing maintenance tasks and save you significant time and money over the years.
Master Cleaning and Preventive Care Techniques
Proper maintenance hinges on consistent cleaning routines. I advise using a microfiber mop paired with a pH-neutral hardwood floor cleaner to prevent buildup of dirt and grime, which can scratch surfaces or lead to staining. Avoid harsh chemicals or overly wet mops, as excess moisture can cause warping or buckle hardwood flooring. Instead, schedule weekly dry or damp mopping sessions, and immediately wipe up spills to prevent water damage. Additionally, placing felt pads on furniture legs and area rug backings minimizes scratches and indentations. For deeper cleaning, I recommend occasional use of a wood floor-specific stripper and refinisher, especially before applying a protective sealant—this extends the life of your finish and keeps your floors looking vibrant. More detailed steps can be found in our hardwood floor care secrets.
Routine Inspection and Repairs Keep Floors Healthy
Scheduling regular inspections allows you to catch issues early before they escalate. Personally, I inspect my floors every six months, looking for loose boards, creaking sounds, or signs of moisture intrusion. For minor damages like scratches or small gouges, I use a repair kit with matching stain and finish, which I apply with precise brushes for a seamless fix. For more extensive issues such as buckling or warping, it’s often best to consult a professional—especially for floor leveling or structural repairs. Remember, good maintenance isn’t a one-and-done task; it’s an ongoing process that preserves your investment and keeps your floors beautiful for decades. To understand how to maintain floor leveling over time and avoid common pitfalls, see our comprehensive guide on floor leveling upkeep.
How do I keep my flooring installation working as new for years?
A proactive maintenance routine complemented by the right tools will make all the difference. Regularly check for and address issues before they escalate, keep your cleaning methods gentle yet effective, and invest in durable equipment designed for precision and longevity. As technology advances, expect innovations like robotic floor care systems to become more prevalent, offering even more efficient ways to maintain your floors with minimal effort. Implementing these tips now will ensure your flooring remains stunning and functional long into the future. Want to learn more about elevating your flooring maintenance game? Reach out through our contact page and start transforming your approach today.
Lessons that Took Me Longer to Learn Than They Should Have
- One of the biggest surprises was realizing that patience and preparation outweigh speed. Rushing through caulking or surface prep almost always results in imperfections that take even more time to fix later.
- I used to believe that the best tools could compensate for poor technique. Actually, investing in quality supplies like painter’s tape and sharp tools made all the difference in achieving professional-looking results.
- Ignoring the importance of surface cleaning and proper masking led me to repeat work multiple times. Proper surface prep, including cleaning and taping, saved me frustration and money over the long run.
- Many DIYers overlook the value of a smooth finishing technique immediately after caulking. Learning to work quickly but carefully when smoothing caulk elevated my projects from amateurish to polished.
- Finally, I underestimated the power of strategic tape removal. Peeling back tape at just the right time prevented smudges and jagged edges, making my work truly stand out.
Tools and Resources That Steady My Hand
- High-Quality Painter’s Tape: I trust painter’s tape about 2 inches wide for clean, straight lines. Brands like FrogTape offer excellent adhesion and easy removal, which is crucial for perfect caulk edges.
- Precision Caulking Gun: A steady, ergonomic gun helps control pressure, reducing blobs and gaps. My personal favorite is the Newborn brand for smooth application.
- Silicone Smoothing Tools: Specially designed silicone spatulas or moistened fingers create seamless transitions. I prefer small, flexible tools that conform to contours.
- Educational Guides: The comprehensive flooring installation and leveling guide was invaluable in understanding nuances that bridge the gap between DIY and professional work.
- Online Communities and Videos: Platforms like YouTube offer tutorials that visually demonstrate techniques I couldn’t grasp otherwise. Engaging with seasoned pros helped me refine my approach.
Your Next Big Leap in Flooring Confidence
Taking on tile, hardwood, or floor leveling projects can feel intimidating, but with the right mindset, tools, and tips, you’re capable of creating stunning, durable results that last for decades. Remember, every mistake is a stepping stone to mastery. Whether it’s perfecting your caulk lines or choosing materials that withstand the test of time, the key is to stay curious and committed.
So, are you ready to turn your next flooring project into a masterpiece? Keep practicing, use the techniques shared here, and don’t hesitate to reach out if you need a little guidance—we’re here to help.
What’s the one flooring technique you’re excited to try next? Share your plans below—I love hearing about your progress!