

I remember the first time I installed vinyl planks in my living room. I was excited, confident, and eager to see the beautiful, seamless floor I had envisioned. But as I started clicking the planks together, I noticed a persistent gap that just wouldn’t close. No matter how much force I applied, the pieces refused to lock tightly. Frustration set in. I was on the brink of giving up when I discovered the simple yet powerful Rubber Mallet Rule—a game-changer in ensuring a flawless click every time.
Why Proper Tapping Matters More Than You Think
The secret to a professional-looking vinyl plank floor isn’t just in choosing quality materials; it’s in mastering the clicking technique. Using a rubber mallet with the right rule ensures each plank locks securely, preventing gaps and uneven surfaces. An improper tap can lead to tricky gaps later, or worse, damaged planks that won’t lock at all. I learned this lesson early on when I mistakenly hammered too hard, causing the tongue of the plank to crack. That mistake set me back hours and cost me extra money.
Is tapping with a rubber mallet actually worth the hype?
Many skeptics wonder if this approach is just a fancy tip or a real necessity. Believe me, it’s a game of finesse. I’ve seen firsthand how a controlled, firm tap with a rubber mallet—guided by a simple rule—makes all the difference. It’s about applying enough force to click the planks securely without damaging them. This technique has saved me countless headaches and splotches of uneven flooring. Curious to see how it works? Check out this comprehensive guide on floor leveling to understand the foundation of a perfect surface.
Now, let’s dive into the core principles of this rule and how you can master it in your next installation. Trust me, once you get the hang of it, your vinyl plank installation will look professionally done, and you’ll wonder why you ever skipped this simple step.
Applying Controlled Taps with Precision
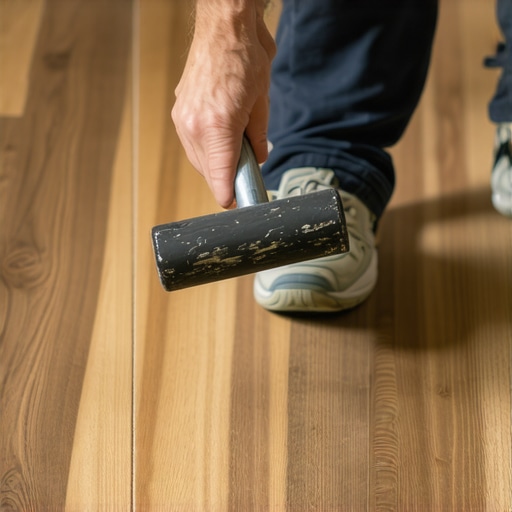
Pick up your rubber mallet and lay out your first few planks. Hold the mallet like a delicate hammer, not a sledge. Visualize the tapping as gently fitting puzzle pieces together—firm enough to lock, gentle enough to avoid damage. Use a tapping block if needed to spread out force evenly, especially along the longer edges. I remember the time I was installing in a tight corner and hesitated, causing uneven locking—so I adjusted my grip, tapped softly, and watched the plank click into place smoothly. This experience taught me the importance of deliberate, controlled taps for a seamless finish.
Perfect the Angle and Force of Your Tap
Imagine trying to close a stubborn drawer. You’d push gently, adjusting your angle until it slides in flawlessly. Similarly, when tapping, angle your mallet slightly inward at about a 45-degree angle to the plank joints. This focus ensures force is transferred directly into locking the tongue and groove. Applying too much force or striking directly from above can cause the planks to crack or pop out of alignment. My earlier misstep involved a heavy straight-on hit that cracked a plank, delaying my progress. Practicing controlled, angled taps makes the process smoother and helps maintain even levels across your surface.
Using the Right Amount of Force to Avoid Damage
Think of trying to open a stubborn jar lid—gentle but firm pressure is key. Similarly, in flooring, your goal is to be assertive without overdoing it. Start with light taps and increase gradually if the planks resist. This approach prevents damaging the locking mechanism or warping the planks. During my last installation, I initially tapped too hard, causing a small crack. Resetting my approach, I dialed back to gentle taps, resulting in a tight, gap-free lock. Remember, consistency beats brute force—your floor’s integrity depends on it.
Leverage the Chalk Line or Laser for Alignment
To keep your rows straight, stretch a chalk line or use a laser level along your starting wall. Think of it as drawing a guide in sports—your compass for accuracy. When tapping, keep the planks aligned with this line to prevent misalignment. In a recent project, I skipped this step and ended up with a crooked floor. When I reinstalled the row, following the guide closely and tapping gently, the planks aligned perfectly. This small step saves hours of correction later and ensures the entire floor is flawlessly straight.
Final Checks and Adjustments
After locking each row, double-check the alignment visually and by running your hand over the surface to feel for unevenness. If you notice tiny gaps or misalignments, use the mallet to tap those specific areas gently. My tip is to work in sections, focusing on small areas, so you can catch and fix issues early. Also, remember to leave room at the edges for expansion, which can be addressed with spacers. This systematic approach guarantees your installation not only looks good but also lasts longer.
By mastering these precise tapping techniques—controlled force, proper angle, alignment guides—you’ll elevate your flooring game significantly. This method transforms what can be a frustrating task into a satisfying craft, producing professional results every time. For more detailed strategies and tips, explore this guide on floor leveling techniques to perfect your surface before installation.
 Many DIY enthusiasts and even some professionals fall prey to misconceptions when it comes to tile and flooring installation, often leading to costly mistakes. One widespread myth is that a perfectly flat subfloor isn’t crucial, but in reality, uneven surfaces are the root cause of lippage, cracked tiles, and uneven grout lines. Experts emphasize that meticulous subfloor preparation is the foundation of a successful installation; skipping this step can cause problems that persist for years. To learn more about achieving a flawlessly level surface, check out this comprehensive guide to floor leveling.
A common misconception is that self-leveling compounds can fix all subfloor issues, yet many underestimate their limitations. Over-reliance on these products without proper priming, mixing, or understanding the underlying cause can lead to pooling, cracking, or future settling. It’s vital to follow the correct protocols, like ensuring proper primer application and avoiding excessive application thickness, which can jeopardize the entire project. For advanced techniques and mistakes to avoid, explore this detailed resource on precise floor leveling techniques.
Many believe that using wider grout lines always masks minor imperfections, but this often results in a less professional appearance and can highlight unevenness if not executed properly. Choosing the right grout width requires understanding the subfloor’s condition and the tile sizes; narrow grout lines demand a perfectly flat surface, whereas wider grout joints provide some leeway but may compromise aesthetic appeal.
Hardwood floors are frequently thought to be less forgiving during installation, but what’s often overlooked is the importance of acclimation. Many assume that just placing hardwood planks in the room for a day or two suffices; however, controlling humidity and temperature over several days ensures that the wood adapts properly, preventing future gaps and buckling. For expert tips on hardwood acclimation, see this guide to hardwood floor refinishing.
An area where many stumble is the temptation to hurry through the installation process, thinking speed saves money. Rushing often leads to overlooked steps like precise measuring, proper mixing, or careful tapping, which can cause persistent problems down the line. Patience and meticulous adherence to best practices—like using a chalk line for alignment and a tapping block for secure locking—are what differentiate a professional finish from a shoddy one.
Finally, don’t underestimate the impact of disregarding environmental factors. Excessive moisture, temperature fluctuations, and poor ventilation during or after installation can adversely affect flooring longevity. Investing in moisture testing and climate control measures can save significant repair costs later. For more insights into environmental considerations, visit this resource on joist flex and its effects.
Have you ever fallen into this trap? Let me know in the comments.Maintaining your flooring’s integrity over time requires more than just careful installation; it demands the right tools, routine upkeep, and a proactive approach to scaling repairs. A reliable inspection light, such as a high-quality LED flashlight, is essential for spotting issues like subfloor high spots or subtle gaps that could compromise long-term performance. I personally favor the SolarFlash LED Pocket Light because its adjustable brightness helps illuminate tight joints and hidden defects during routine checks. Regularly inspecting your floors with such tools ensures early detection of problems, saving you costly repairs down the line.
In terms of maintenance, adopting a consistent cleaning schedule using pH-neutral cleaners preserves the finish of hardwood floors, while special sealants for tiles prevent moisture infiltration. For example, applying a quality grout sealer every couple of years maintains the integrity of the grout lines, preventing bacteria buildup and discoloration. Scheduling annual professional evaluations allows for targeted repairs, whether it’s reapplying sealants or addressing minor shifts before they escalate.
Scaling your flooring project or transitioning to larger or additional areas hinges on planning and the right preparation. Investing in a precision leveling system, like the LevelSmart Laser, can ensure consistent height across expanding sections, thereby avoiding uneven joints or lippage. This laser level projects multiple leveling points, simplifying the alignment process during expansion phases, much like how precise leveling in tile installation reduces future troubleshooting. Incorporating scalable tools into your workflow streamlines growth and minimizes the risk of redoing work due to oversights.
How do I maintain my flooring’s beauty and durability over time?
Establishing a preventative maintenance routine is key. Keep protective pads on furniture to prevent scratching, and avoid high-moisture cleaning methods that can warp wood or loosen grout. Also, schedule periodic detailed inspections using a moisture meter—like the Protimeter Aquant—to monitor humidity levels underneath and prevent issues with hardwood expansion or contraction. Using targeted tools and regular care will prolong your floor’s new-look appearance and structural soundness. For comprehensive tips on keeping your floors in top shape, you might explore this hardwood floor care guide. Remember, a small investment in maintenance tools now saves significant repair costs later—so don’t delay integrating these strategies into your routine. Whether you’re scaling up your project or ensuring your current investment lasts, adopting precision tools like the LevelSmart Laser or inspection flashlights will pay dividends over the years. Start today’s routine check with a quality LED flashlight and watch how early issues reveal themselves, saving time and money in the long run.
Realizations That Changed My Approach to Flooring
One of the biggest lessons I learned is that even the tiniest oversight during installation can lead to long-term issues. Skipping proper subfloor preparation or rushing the tapping process might save time initially but cause costly repairs later. I’ve come to appreciate that patience, precision, and understanding the mechanics behind the click-lock system are essential for lasting durability. These insights didn’t come overnight—they came from experience, mistakes, and a deep desire to do better each time.
Tools and Resources That Elevate My Work
Over the years, I’ve discovered that investing in quality tools makes a tangible difference. The comprehensive floor leveling guide helped me understand the critical role of a perfectly flat surface. My go-to tools now include a reliable laser level for alignment, a precision tapping mallet, and a sturdy inspection flashlight like the SolarFlash LED Pocket Light—each one minimizes errors and boosts confidence. These resources have become invaluable in ensuring each project meets professional standards.
Embrace the Journey of Flooring Mastery
Embarking on your flooring installation journey might seem daunting at first, but remember, every expert was once a beginner. The key is to stay curious, embrace learning through trial and error, and celebrate your progress along the way. Whether you’re leveling subfloors or perfecting the click technique, each step brings you closer to creating a space you’ll be proud of. So, take that first step today—your future flawless floors await.
What’s been your biggest challenge when installing flooring, and how did you overcome it? Share your experience below—I’d love to hear your stories!