
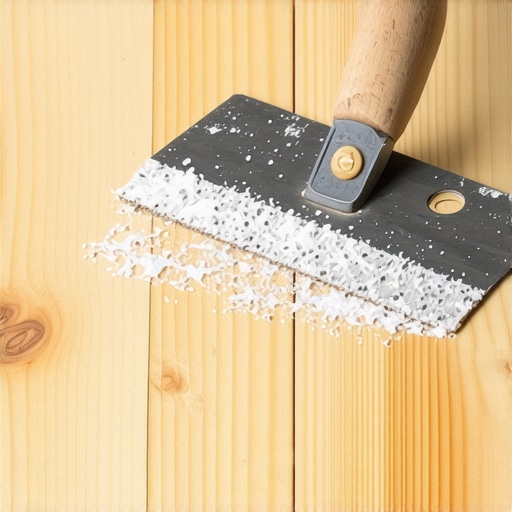
The Putty Knife Trick for Removing Stubborn Adhesive Without Gouging Subfloors
Anyone who has ever embarked on a home renovation project knows that the most satisfying moments – laying down that pristine new tile or clicking together a fresh run of luxury vinyl plank (LVP) – are preceded by the most grueling tasks. Perhaps the most notorious “nightmare” in the flooring industry is the discovery of old, stubborn adhesive. Whether it is decades-old yellow carpet glue, thick black mastic, or hardened thinset, removing this residue is essential for a successful installation. However, many DIYers make the mistake of attacking the floor with heavy-duty chisels or floor scrapers, only to find they have gouged their plywood or OSB subfloor beyond repair.
A smooth, flat subfloor is the foundation of any high-quality flooring job. If you are searching for a KITCHEN REMODELER NEAR ME, they will tell you that shortcuts during the demolition phase lead to failures in the finishing phase. While many reach for the most aggressive tool in the shed, the secret to a perfect prep job is often the “Putty Knife Trick.” This technique, favored by LIVONIA HOUSE PAINTERS and professional floor installers alike, allows you to peel away the toughest adhesives while preserving the structural integrity of the wood or concrete beneath.
Why Subfloor Integrity is Non-Negotiable
Before we dive into the mechanics of the trick, it is vital to understand why we must avoid gouging the subfloor at all costs. In the world of flooring, we talk a lot about “telegraphing.” This occurs when imperfections in the subfloor – such as holes, ridges, or gouges – eventually show through the finished flooring material. This is especially common with modern resilient flooring like LVP or sheet vinyl. Over time, the weight of foot traffic and furniture forces the flexible top layer into the voids of the subfloor, creating visible dents and potential trip hazards.
Furthermore, gouging a plywood or OSB subfloor compromises its structural capacity. Plywood is composed of thin layers of wood glued together in alternating grain directions. When you take a deep “bite” out of the top layer with a chisel, you weaken that specific area, which can lead to localized “soft spots” or squeaks later on. Professionals focus on Flooring Installation Mistakes to Avoid for Lasting Results, and damaging the substrate is at the top of that list. Maintaining a flat, level surface is the only way to ensure your new investment looks and performs as intended for decades.
The Tools: Why a Putty Knife Beats a Chisel
If you look at a wood chisel and a putty knife side-by-side, the difference in their intended use is clear. A chisel is designed to cut into wood fibers; its narrow, sharp edge concentrates immense force into a small area. When used to scrape adhesive, a chisel is almost guaranteed to “catch” a wood grain and dive deep into the subfloor.
The “Putty Knife Trick” relies on a rigid putty knife, typically 3 to 4 inches wide. Unlike a flexible putty knife used for spackling walls, a rigid putty knife (often referred to as a heavy-duty scraper) has a thicker blade that does not bend under pressure. The wide surface area of a 3-inch or 4-inch blade distributes the force of your strike or push across a larger plane. This prevents the tool from diving into the wood. As noted by industry leaders like Leech Adhesives, using a rigid blade is the contractor standard for removing thick layers of vinyl-on-wood adhesive because it provides the necessary leverage without the destructive “bite” of a narrower tool.
- Rigid Putty Knife: 3-inch or 4-inch width is ideal.
- Hammer: For tapping the handle to break the initial bond of hard-set glues.
- Heat Gun: Essential for softening thermoplastic adhesives.
- Sharpening Stone: To keep a clean, square edge on your putty knife (not a knife edge, but a flat, crisp 90-degree edge).
The “Putty Knife Trick” Step-by-Step Guide
Mastering this trick is about understanding the physics of shear force versus downward force. By following these steps, you can remove adhesive with surgical precision.
Step 1: Softening the Bond (The Heat Gun Method)
Most adhesives used in older homes are either water-based or thermoplastic. These materials become brittle over time but can be “reactivated” or softened with heat. Using a professional-grade heat gun, sweep the nozzle back and forth over a 12×12 inch section. You are looking for the adhesive to “bubble” slightly or change color. Be careful not to scorch the wood subfloor. Once the adhesive is pliable, it will offer much less resistance to your putty knife, significantly reducing the risk of the blade catching on the wood grain.
Step 2: The 15-Degree Angle
This is the core of the “Putty Knife Trick.” Most DIYers hold their scrapers at a 45-degree angle, which is the “danger zone.” At 45 degrees, the edge of the blade is directed downward into the subfloor. The “Trick” is to keep the knife at a shallow 15-degree angle. At this angle, the force you apply is directed horizontally – this is called “shear force.” The blade slides along the top of the wood fibers, getting underneath the adhesive and popping it upward. If you feel the blade start to dig, lower the handle closer to the floor immediately.
Step 3: The “Side-to-Side” Shear
Instead of simply pushing the putty knife forward in a straight line, use a slight sawing or “side-to-side” motion as you push. This lateral movement helps the blade find the weakest point in the adhesive’s chemical bond. When done correctly, you will see the adhesive “curling” or “peeling in small chunks” away from the wood. This method is particularly effective for removing thinset or hard-set glues that have become “fossilized” over time. By combining the 15-degree angle with the side-to-side shear, you create a wedge effect that lifts the glue without invading the wood layers.
Dealing with Specific Adhesive Types
Different glues require slightly different approaches. Pressure Sensitive Adhesive (PSA), often found under “peel and stick” tiles, remains gummy for years. For PSA, the “Putty Knife Trick” works best when the blade is kept cool; if the glue gets too hot, it just smears. Conversely, hard-set glues (common under old linoleum) require the “tap and slide” method, where you use a hammer to gently tap the butt of the putty knife handle at that 15-degree angle.
CRITICAL SAFETY WARNING: Black Mastic. If you pull up old flooring and find a black, tar-like adhesive, stop immediately. If your home was built before 1986, there is a high probability that this “black mastic” contains asbestos. Disturbing it by scraping or sanding can release dangerous fibers into the air. For more information on how to handle this safely, see our guide on How to Safely Remove Asbestos Tile from an Old Basement. When in doubt, have a sample tested by a professional before proceeding with the putty knife trick.
BATHROOM REMODELING LIVONIA MI: When to Call a Professional
While the putty knife trick is a lifesaver for small rooms or localized patches of glue, large-scale projects can be physically overwhelming. If you are tackling a full-home renovation or a complex BATHROOM REMODELING LIVONIA MI project, the sheer volume of adhesive removal might require professional intervention. Professional crews, such as OAK PARK HOUSE PAINTERS or specialized flooring contractors, have access to walk-behind floor scrapers and diamond grinders with HEPA-filtered vacuum systems that can clear a thousand square feet in a fraction of the time it takes to do it by hand.
For residents seeking BATHROOM REMODELING CANTON MI or KITCHEN REMODELING CANTON MI, hiring a pro ensures that the subfloor is not only clean but perfectly level. In areas like BATHROOM REMODELING TROY MI and BATHROOM REMODELING FARMINGTON HILLS MI, high-end tile installations are the norm, and these require a level of precision that is difficult to achieve if the subfloor has been damaged by improper DIY scraping. Furthermore, if your project involves INTERIOR PAINTING NOVI MI or EXTERIOR PAINTING NOVI MI, having a clean, dust-free environment is essential for a flawless paint finish. Professional remodelers manage the “dust envelope” to ensure your home stays clean throughout the process.
Final Cleanup: Removing the “Ghost” Residue
Once the bulk of the adhesive has been removed using the “Putty Knife Trick,” you will likely be left with a thin, tacky film often referred to as “ghost residue.” Even if the floor looks flat, this residue can interfere with the bond of new adhesives or underlayments. For this final stage, we recommend a citrus-based remover like Goo Gone Pro-Power or mineral spirits. Apply the solvent sparingly to a small area, let it sit for five minutes, and then use your putty knife one last time – at that same 15-degree angle – to squeegee away the liquified remains.
Wipe the area down with a damp cloth and allow it to dry completely. If you were dealing with cementitious materials, you might need to consult our specialized guide on The Best Way to Remove Thinset from a Plywood Subfloor. Ensuring every bit of chemical residue is gone is the final step in preparing a “pro-grade” surface for your new floor.
Conclusion & Call to Action
Removing stubborn floor adhesive doesn’t have to result in a ruined subfloor. By ditching the chisel and mastering the “Putty Knife Trick” – focusing on a rigid blade, a 15-degree angle, and lateral shear force – you can achieve a perfectly smooth surface ready for any flooring material. Remember, patience is your greatest tool. If a section is particularly difficult, apply a little more heat and keep your angle shallow.
Ready to transform your home but feeling overwhelmed by the demolition? Whether you need an INTERIOR PAINTER NEAR ME to refresh your living space or a full BATHROOM REMODELER NEAR ME to handle the heavy lifting, TileTrendShop is here to help. Our team of experts understands the nuances of Michigan homes, from LIVONIA HOUSE PAINTERS techniques to advanced flooring prep. Contact TileTrendShop today for expert guidance and professional remodeling services that stand the test of time.