
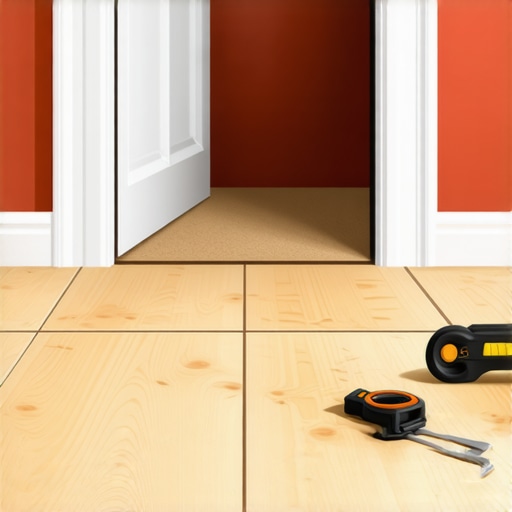
Ever had that frustrating moment when a seemingly minor unevenness in your flooring turns into a major headache? I remember sprawled on my hands and knees, cursing the uneven surface that made my newly installed tile and carpet transition look sloppy. It was one of those lightbulb moments where I realized that doing it the right way from the start can save tons of time—and headaches—later on.
Why Small Flaws Sabotage Your Flooring Projects
Every DIY enthusiast or seasoned pro knows the pain of uneven floor transitions. Whether you’re jumping from sleek tile to plush carpet or hardwood to laminate, miscalculations can lead to tripping hazards, unsightly gaps, or worse, damage to your flooring down the line. A misaligned seam not only ruins the aesthetic but can compromise the integrity of the entire area.
Is the Plywood Undercut Hack Actually Worth the Hype?
I used to dismiss these tips as overhyped tricks, but my early mistake—skipping proper subfloor preparation—taught me otherwise. I once tried to save time by cutting corners, only to find that my tile edges cracked, and my carpet edges frayed within months. That mistake was a costly wake-up call. Since then, I’ve dug into solutions like the plywood undercut hack and learned how small tweaks can make a huge difference. Want to learn how this simple technique can transform your project? Keep reading!
For more expert insights on flooring techniques, check out this comprehensive guide to floor leveling. It’s packed with tips that help you avoid common pitfalls and achieve that perfectly seamless finish every time.
Ready to get into the nitty-gritty of making your transition flawless? Let’s dive into the practical steps that, based on my experience, will save you time and stress—starting with the crucial first move: undercutting your door jambs and trim for smooth floors.
Undercutting Door Jambs and Trim Effectively
My first attempt at undercutting door jambs was a backfiring mess — I used a shaky hand saw and rushed the cut, leading to uneven edges that made the flooring look unprofessional. To avoid this, secure your door and door frame firmly, then use a high-quality handsaw or a oscillating multi-tool with a fine blade. Mark the cut line carefully with a pencil, ensuring it’s slightly below the finished floor level. Slowly and steadily cut along this line, applying even pressure. Once done, test fit your flooring; it should slide underneath smoothly, leaving no gaps. This precision allows your baseboards or trim to sit flush, creating a clean, seamless look. For detailed techniques, see this guide. I once rushed the process, and the uneven cut caused a noticeable step-up, which I then had to sand down, adding hours to the project.
Preparing the Subfloor Before Laying Floorings
Next, I tackled the subfloor. A bumpy subfloor is like a crooked canvas — it ruins the entire masterpiece. First, I used a straightedge or laser level to identify high and low spots. For high spots, I employed a sander or grinder, focusing on areas that stuck out more than an eighth of an inch. For low spots, I applied a self-leveling compound. I poured it carefully using a gauge rake to spread it evenly across the surface. Evidence of success? When I checked with a long level, the surface was perfectly flat, much like a smooth tabletop. Remember, rushing this step leads to tile lippage or cracked hardwood later. For precision, consult this detailed resource. I learned this the hard way when I skipped leveling and ended up with uneven tile edges that cracked under use.
Applying the Right Adhesives and Levelers
Choosing the correct adhesive or leveling compound is crucial. I once used a generic thinset for a porcelain tile job, only to see it start to crumble after a few months. Today, I use specific products like high-quality tile thinsets or hardwood adhesives suited for the material and environment. For self-leveling underlayment, I followed the recommended mixing ratio carefully — too thick, and it won’t flow into gaps; too thin, and it will drain prematurely. I poured the mixture slowly, guided by a spike roller, to eliminate air bubbles and ensure a uniform surface. This step guarantees a durable, even substrate. This article illustrates common pitfalls and how to avoid them. I once ignored proper mixing, which led to bubbles and weak spots that caused cracks later on.
Leveling and Fine-Tuning for a Perfect Finish
After laying the leveling compound, I used a straightedge or flashing level to verify flatness. If I found dips or humps, I added a thin layer of leveling compound to the low spots or sanded down the high areas once hardened. Precision at this stage is like tuning a musical instrument — small adjustments make a big difference. The goal is a surface so flat that tiles or hardwood planks rest perfectly without lippage or gaps. Recent projects benefited from using a laser jig, which offers visual confirmation of flatness across large spans. For expert tips, see this guide. I recall a project where neglecting this step resulted in tiles that felt uneven underfoot and had to be replaced later, costing extra time and money.
Securing the Final Surface
Finally, I seal and cure the surface according to product instructions. Proper curing prevents movement or cracking. I avoid heavy traffic or placing furniture until the material fully hardens — usually 24 to 48 hours. This patience pays off with a firm, level surface that provides a flawless foundation for your chosen flooring material. Remember, every step in this process builds toward a seamless transition, making your space look professionally finished.
While many believe that floor leveling is a straightforward process of applying self-leveling compounds and ensuring a flat surface, the reality is far more nuanced. Most amateurs overlook the subtle interplay of moisture, substrate preparation, and material-specific behaviors, which can lead to failures down the line. Let’s delve into some common misconceptions and advanced pitfalls that even experienced DIYers often miss.
Don’t Fall for the Myth of Perfect Subfloor Flatness
It’s widely assumed that a slight dip of less than an eighth of an inch is negligible, but research indicates that even minor imperfections can cause tile lippage or hardwood gaps, especially over large spans. Expert-level floor leveling emphasizes the importance of measuring and correcting these imperfections meticulously, rather than dismissing them as insignificant. Rushing this step often results in an uneven, unprofessional finish and can accelerate joint failure.
Why Moisture Matters More Than You Think
Many overlook that subfloor moisture can drastically affect the adhesion and longevity of flooring. A common mistake is to assume that a surface is dry enough after initial testing, but moisture vapor transmission can continue over time, causing adhesives to delaminate or tiles to crack. Moisture testing protocols recommend using a calcium chloride test or a pin-meter for accurate readings, especially in basements or areas prone to humidity. Ignoring this can lead to costly repairs and re-installations.
Laminating, Hardwood, or Tile: Does the Technique Change?
Each flooring type interacts differently with the substrate. For instance, hardwood floors require a properly acclimated subfloor with controlled humidity, whereas tile installations depend heavily on the proper substrate prep and thinset selection. A mistake often made is applying a one-size-fits-all leveling approach across materials. Material-specific installation tips can significantly improve results. Misapplication not only causes aesthetic issues but also reduces the lifespan of the floor, leading to costly replacements. Remember, taking the time to understand these nuances ensures your investment stands the test of time.
In fact, even seasoned professionals benefit from staying up-to-date with advances in materials and methods, as highlighted by industry leader expert refinishing techniques. Don’t underestimate the complexity beneath those seemingly simple surfaces.
Have you ever fallen into this trap? Let me know in the comments or reach out via our contact page. Remember, mastering these subtle elements can elevate your project from amateur to expert level, ensuring lasting quality and beauty.
Maintaining flawless flooring over time requires not just initial precision but also the right tools and a solid maintenance routine. As someone who’s installed and refined wood and tile floors for years, I can attest that investing in quality equipment and adopting best practices ensures longevity and saves you money in the long run.
Choosing the Right Equipment for Durable Results
First, I swear by a high-quality laser level, like the Bosch GLL 3-80, for its accuracy over large spans—crucial when checking for subtle dips before laying new layers. Using a laser level minimizes errors that can lead to uneven wear or tile lippage down the line. For floor preparation, a modern oscillating multi-tool with specialty blades (like the Fein MultiMaster) allows precise doorway undercuts and trim cuts, ensuring seamless transitions that prevent moisture infiltration and floor shifting.
When it comes to adhesives, I prefer premium products such as Schluter®-KERDI-BOARD for waterproofing in tiled areas, which not only secures tiles but also prevents water damage—a common long-term issue. Incorporating these tools into your workflow makes the installation more consistent and less prone to future problems.
Maintaining Floors for a Lasting Finish
Long-term maintenance hinges on regular cleaning and protective measures. For hardwoods, I recommend using a pH-neutral cleaner like the Bona Hardwood Floor Deep Clean, which preserves the finish without stripping protective coatings. Applying a rejuvenating finish every few years, as advised in this guide, can extend the life of your flooring significantly.
Tile floors benefit from periodic sealing with an appropriate penetrating sealer, which prevents stains and reduces wear. I personally use a product like AQUA-X Tile & Grout Sealer, applied with a lambswool applicator for even coverage. These routine touch-ups keep your floors looking brand new for decades.
Predicting Future Trends in Floor Maintenance
Looking ahead, automation and smart sensors will play an increasing role in floor upkeep. Sensor-embedded mats will alert homeowners to moisture buildup or early signs of wear, enabling preemptive action before damage occurs. Additionally, advances in self-healing finishes may soon reduce the need for frequent recoats, maintaining shine and durability automatically.
How do I keep my flooring in prime condition over the years?
Implementing a tailored maintenance schedule—such as regular cleaning with microfiber mops, prompt attention to spills, and scheduled refinishing—can dramatically extend your floors’ lifespan. Remember, the initial investment in quality tools and proper procedures pays off over time, making repairs less frequent and preserving your space’s beauty. For professional-grade equipment recommendations, consider consulting this resource. Take On the challenge of one advanced tip today: start using a laser level to re-verify flatness biannually—I guarantee it will catch minor issues before they turn serious, saving you from costly repairs later. Ready to get your tools in order? Visit our contact page for personalized advice.
Lessons I Wish I Learned When Starting Out
- Sometimes, obsessing over tiny imperfections early on saves me hours of fixing bigger issues later. I used to dismiss minor dips and dips in the subfloor, but experience has shown me that even slight flaws can lead to uneven tiles and cracked hardwood over time.
- Patience during curing and drying phases isn’t just about following instructions; it’s about ensuring longevity. Rushing this step quickly leads to failures that could have been avoided with just a little extra wait.
- Investing in quality tools, like a reliable laser level or a premium multi-tool, transforms the project from guesswork into precision craftsmanship. Cutting corners here costs far more than the tool itself.
- Understanding material-specific behaviors—like moisture absorption rates in hardwood or the quick-set nature of tile adhesives—prevents costly mistakes and predictable disasters.
- Lighting and detailed measurement checks throughout the process guide me to catch small issues before they become big problems, making my finish look professional and durable.
A Treasure Chest of Tools and Guides
- Laser levels like Bosch GLL 3-80: They provide unmatched accuracy across large spans, helping me verify flatness and alignment effortlessly. I trust them because they reduce human error and increase confidence in every step.
- Self-leveling compounds from top brands: Proper mixing and application are crucial, and these products have consistent quality that I rely on to create smooth, flat surfaces ready for the final flooring.
- The ultimate guide to floor leveling: An invaluable resource packed with tips that help me avoid common pitfalls and achieve professional results.
- Moisture meters like Tramex or Wagner: I always test subfloor moisture levels before starting; these tools give me peace of mind knowing I won’t face surprises later, especially in humid areas.
Keep Moving Forward with Confidence
The journey to flawless flooring isn’t just about following steps; it’s about cultivating a mindset of patience, precision, and continuous learning. Every project I complete reinforces that investing in the right tools, understanding material nuances, and paying attention to detail results in floors that truly stand the test of time. Think of your flooring as an ongoing relationship—requires care, maintenance, and the willingness to learn from each experience. Ready to take your skills to the next level? Visit our contact page for personalized tips and support. What stubborn flooring challenge have you overcome recently? Share your experience below and inspire others to elevate their craft.
Comments are closed.