
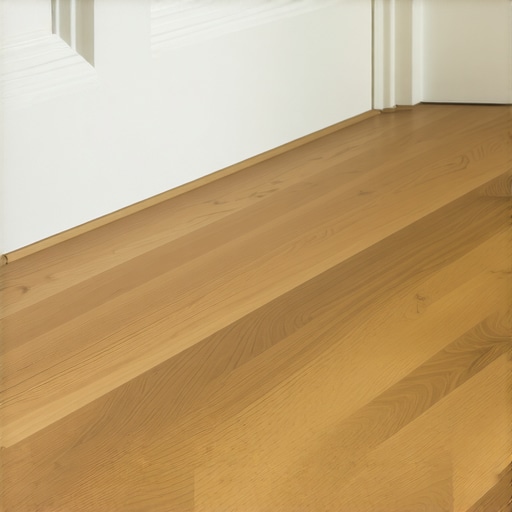
It was a frustrating weekend in my kitchen renovation – hours spent trying to achieve that crisp, professional-looking hardwood border. Every time I thought I had it right, the paint bled, or the edges looked uneven, making me question if I was cut out for DIY flooring projects. Then, I had my lightbulb moment. What if I could use painter’s tape not just as a painter’s friend but as a secret weapon for clean, sharp hardwood borders?
Mastering the Painter’s Tape Hack for Perfect Borders
If you’ve ever felt the sting of uneven paint lines or jagged hardwood edges, you’re not alone. Achieving that flawless transition between hardwoods and baseboards can be notoriously tricky, especially without professional tools or experience. But here’s the good news: with a simple tweak to your painting process, you can drastically improve your results.
Is the Painter’s Tape Hack Really Worth the Hype?
Early on, I made a common mistake – rushing through applying painter’s tape without prepping the surface properly. That quick oversight led to bleeding and uneven lines, a mistake I’d love to warn you about before you start your own project. Trust me; a little extra prep work makes all the difference. To ensure your border lines come out sharp and clean, I recommend following some tried-and-true techniques. For more in-depth tips on tile installations that save time and money, check out our detailed guide.
Do you find yourself battling with uneven borders and paint bleed? If yes, keep reading. I’ll walk you through the step-by-step process I perfected over countless attempts, including a few tricks that professionals swear by. Together, we’ll tackle this common flooring challenge and help your hardwood borders look impeccable. Ready to turn your DIY mishaps into a masterclass? Let’s dive into the details.
Applying Painter’s Tape Effectively
Start by cleaning the edges thoroughly to remove dust or grease, which can cause tape to stick unevenly. When applying tape, press it down firmly with a putty knife or your finger, ensuring full contact with the surface. Use painter’s tape specifically designed for delicate surfaces to prevent paint bleed. I learned this the hard way during my first try when careless taping led to messy lines, but careful pressing turned this around.
Prepping the Surface and Cutting-in
Before painting, lightly sand the edge where the hardwood meets the baseboard to create a smooth surface. When using a brush or roller to paint, work from the taped edge inward, avoiding excess paint that seeps under. A quick tip is to slightly overlap the tape with your paintbrush for extra precision. During my project, this step made my borders sharp, resembling professional work—boosting my confidence exponentially.
Painting and Removing the Tape
Apply your chosen finish carefully, using steady, even strokes. Don’t rush. Once the paint is just slightly dried (check your paint manufacturer’s instructions), carefully peel back the tape at a 45-degree angle to minimize lifting. I once waited too long, and peeling caused jagged edges, but patience paid off in giving me crisp borders. For high-traffic areas, sealing the edges with a clear topcoat once the paint dries helps maintain sharpness longer.
Addressing Common Mistakes
Beware of overloading your brush, which can cause paint to bleed under the tape. If this happens, use a small detail brush dipped in the base color to carefully touch up the edges. Keep a damp cloth nearby; if you notice paint seepage, gently wipe it before it dries. I accidentally used a tape with low adhesion during a humid day, resulting in smudged borders—always choose tape suited for your environment.
Consistent Results Tips
For consistent borders across multiple rooms, set up a guide line with a level and painter’s tape to mark the boundary. This acts like a railroad track, guiding your brush and maintaining straight lines. During my second room, using this trick transformed uneven borders into smooth, professional-looking edges, saving me the cost of hiring someone. For more pro tips on tile installations that save time and money, visit this guide.
Final Inspection and Touch-ups
After removing the tape, inspect the borders closely. Use a small brush or point to refine any imperfections. If you notice tiny gaps or slipped paint, a steady hand with a small detail brush will make a difference. Properly executed, your borders will look crisp and clean, comparable to professional craftsmanship, elevating your entire flooring project. Remember, patience during drying and careful tape removal are key to flawless results.
When it comes to flooring installation, many homeowners and even some professionals fall victim to misconceptions that can compromise the final result. Let’s dig deeper into some nuanced pitfalls that are often overlooked and how to avoid them with expert techniques and insights. Contrary to popular belief, simply laying down the flooring material without meticulous preparation can lead to long-term issues like buckling, uneven surfaces, or compromised durability. For example, many assume that a quick subfloor check is sufficient, but detailed surface flatness assessments are crucial for ensuring flawless tile or hardwood installation. Skipping these steps can result in costly repairs down the line. Additionally, a common myth is that all hardwoods react the same way to humidity and temperature changes; in reality, understanding the specific properties of your chosen wood type is essential. For instance, engineered hardwoods with specific wear layers perform better in humid climates but may still require proper acclimation procedures. Speaking of acclimation, some believe that an 24-hour period is enough before installation, but advanced techniques suggest waiting 48-72 hours in the installation environment for optimal results. An overlooked danger is ignoring moisture levels, which can lead to cupping or mold growth. Consulting a moisture meter and adhering to precise moisture content thresholds is vital—see our detailed guide on floor leveling for how to achieve perfectly flat surfaces. Addressing installation errors early, like uneven subfloors or improper T-molding, can save thousands. Never underestimate the power of proper surface prep; it’s the foundation of a lasting flooring project. A strategic, detail-oriented approach combined with advanced knowledge reduces common mistakes that can plague DIY or even professional jobs. Have you ever fallen into this trap? Let me know in the comments.
Keep It Working: Essential Tools for Flooring Success
Maintaining your floors over time depends heavily on using the right tools and adopting effective techniques. One of my go-to tools is the cordless oscillating multi-tool. I swear by it for precision in clean-up, such as smoothing out minor hardwood refinishes or trimming loose grout. Its versatility allows me to tackle small repairs without fuss, simplifying long-term maintenance.
Another indispensable tool is a quality digital moisture meter. Consistent monitoring of moisture levels in subfloors and hardwood is vital, especially in humid environments. Regular checks prevent issues like cupping or warping, keeping your flooring durable and looking pristine. I calibrated mine to ensure readings stay accurate over years, preventing costly surprises.
For effective cleaning and care, I recommend a microfibre mop paired with pH-neutral cleaning solutions. This combo keeps your hardwood or tile surfaces free from dirt and avoids chemical damage. I avoid harsh chemicals that can degrade finishes over time, extending the lifespan of your investment.
A professional-grade floor leveling system is essential when preparing surfaces for installation or repair. I prefer systems that incorporate self-leveling compounds with anti-air-entrapment features, such as the self-leveler with bubble-release technology. They ensure a perfectly flat surface, which is the foundation for long-lasting results.
How do I maintain flooring over time?
Regular inspections and preventive care are key. I schedule quarterly checks for signs of wear or damage, especially in high-traffic areas. Using specialized tools like a hardwood floor care kit helps me address scratches and dullness early, avoiding more extensive refinishing. Additionally, maintaining proper humidity levels with a dehumidifier or humidifier prevents expansion and contraction issues that can cause gaps or buckling. Investing in good-quality cleaning products and avoiding excessive moisture prolongs the beauty and integrity of your floors.
Anticipating Future Trends in Flooring Maintenance
Advancements in smart home technology will likely integrate embedded sensors within flooring to provide real-time health reports—monitoring moisture, temperature, and even wear patterns. As materials evolve, tools that facilitate minimally invasive repairs, like ozone or laser-based rejuvenation, will become mainstream, reducing the need for complete replacements. Staying ahead with these innovations ensures your floors remain as stunning and durable as the day they were installed.
Ready to level up your maintenance routine? Try calibrating your moisture meter regularly and keep a log of readings. Precise moisture control is a game-changer for longevity, preventing issues like buckling or mold. For more expert guidance on long-term flooring care, visit our detailed hardwood maintenance tips. Remember, the right tools and proactive care turn routine maintenance into a preventive shield, ensuring your floors stay pristine for decades.
Looking back, the biggest lesson I learned about flooring installation is that patience outweighs speed. Rushing through the prep or peel phase often leads to mistakes I’d spend hours fixing later. The second insight is that investing in quality tools, like a durable painter’s tape and a good moisture meter, can dramatically shift your results from decent to professional-looking. Lastly, understanding the environment’s specifics—like humidity fluctuations—can save you from costly repairs. These revelations have turned my DIY projects into sources of pride rather than frustration.
My Toolbox for A Flooring Success Story
I’ve come to rely on a few trusted tools that always deliver reliable results. A high-quality self-leveling compound with bubble-release technology ensures my surfaces are perfectly flat, preventing tile lippage. A precision digital moisture meter helps me keep moisture levels in check, avoiding cupping or warping. For ongoing maintenance, I swear by a quality microfiber mop and pH-neutral cleaner that preserve the finish without chemicals that can degrade the flooring over time. Embracing these tools has simplified my process and extended the life of my floors.
Take the Next Step—Your Flooring Dreams Are Within Reach
Embarking on a flooring project might seem daunting at first, but with the right mindset and tools, you can achieve stunning results that rival professionals. Remember, each small improvement—be it meticulous surface prep, patience during paint drying, or careful tape removal—adds up to a big difference in the final outcome. Your space deserves that touch of personal craftsmanship, and now is the perfect time to bring your vision to life. Don’t hesitate—start planning your next project today, and enjoy the satisfaction that comes with transforming your home one step at a time.