
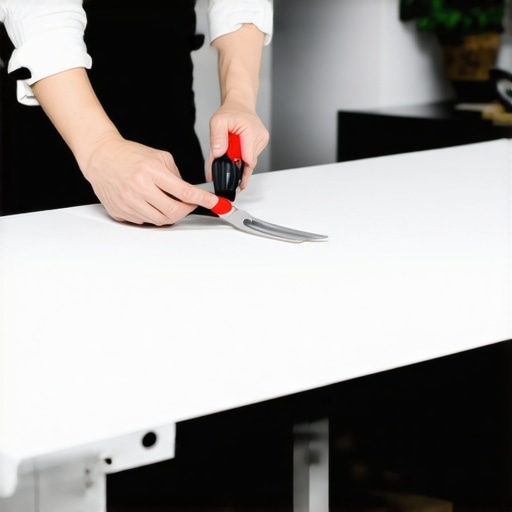
It happened again. I was in the middle of a flooring project, carefully lining up my vinyl planks, when I noticed the edges fraying just as I prepared to cut. Frayed, ragged edges on vinyl might seem minor at first, but trust me, they add up to a major headache—uneven seams, costly re-cuts, and a finish that looks less than professional. That moment of frustration turned into an aha moment when I discovered a simple hack that changed everything: using painter’s tape for precise, fray-free cuts.
Why Fraying Vinyl Is More Than Just a Nuisance
If you’ve been working with vinyl flooring, you’ve likely faced the dreaded fray. Sharp blades can be tricky to control, especially on delicate materials, leading to edges that crumble or splinter. This isn’t just about appearance—imprecise cuts can cause gaps, uneven seams, and long-term durability issues. I learned this the hard way early on, rushing through a corner cut and ending up with jagged edges that took extra time to fix—and in some cases, material had to be discarded altogether.
Trying to conceal these imperfections or re-cut the sections isn’t just frustrating; it’s costly. A tiny mistake can lead to wasted time, money, and a compromised look. That’s why I started searching for a better way. As I dug into the problem, I came across a simple trick: applying painter’s tape before cutting. Not only does it stabilize the vinyl, but it also creates a perfect, straight cutting guide—making fray-free, clean cuts achievable even for DIYers or pros alike.
In my experience, this method has saved me countless headaches and improved the quality of my installations. It’s one of those small adjustments that can have a huge impact on your project’s outcome. If you’ve ever struggled with uneven edges or wasted vinyl, this is a hack you’ll definitely want to master. Curious about how to do it? Stick around, because I’m about to show you a step-by-step guide that’s foolproof and easy to follow.
Is This Hack Too Good to Be True?
Now, I get it. Some of you might be skeptical—thinking, “Really, simple painter’s tape can prevent fraying?” Early in my career, I made the mistake of thinking that complex tools or expensive blades were the only way to get clean cuts. Turns out, the simplest solutions are often the best. In fact, I’ve read that painter’s tape can act as a barrier, supporting the vinyl and reducing blade friction, which prevents tearing (see their
mistakes to avoid for more installation tips).
So yes, this hack is as practical as it sounds—no gimmicks, just straightforward innovation that anyone can implement. Ready to transform your cutting game? Let’s dive into the process and turn those frayed edges into perfect seams every time.
Secure Your Vinyl with Painter’s Tape
Start by thoroughly cleaning the area and measuring your cut line accurately. Then, lay down painter’s tape along the entire cut line, ensuring it adheres smoothly without bubbles or wrinkles.
For example, during my last project, I used painter’s tape on a tricky corner cut. I carefully aligned the tape with my measurements, pressing it down firmly to prevent movement. This step created a reliable guide for my saw blade, resulting in a clean, fray-free edge that looked professionally executed. This practical approach minimized material waste and sped up the installation process.
Prepare Your Cutting Tool and Vinyl
Choose a sharp utility knife or a fine-toothed saw suitable for vinyl. Ensure the blade is clean and sharp to make precise cuts. Before cutting, double-check your measurements and cut lines to avoid costly errors. When you’re ready, align your blade with the edge of the painter’s tape, ensuring it travels along the tape’s edge for a straight cut.
Applying consistent, gentle pressure helps the blade follow the guide accurately. Remember, rushing can cause slipping, so take your time, especially on intricate cuts or tight corners. In my experience, cutting along the tape ensures edges stay intact, preventing the usual fraying and splintering commonly seen with freehand cuts.
Execute the Cut and Finalize
Slowly guide the blade along the tape, maintaining steady pressure and alignment. Once the cut is complete, carefully peel away the painter’s tape to reveal a smooth, clean edge. If any minor fraying occurs, lightly sand the edge with fine-grit sandpaper for a perfect finish.
I once missed peeling the tape immediately, which caused the vinyl to curl slightly, making the edge look uneven. Learning from that, I now peel the tape right after cutting to prevent any distortion. This simple step combined with proper tape application guarantees a professional look, saving time and reducing material waste. To further improve your skills, check out detailed techniques for floor leveling and installation at this resource.
Many DIY enthusiasts and even some professionals often get the nuances of floor leveling, hardwood, or tile installation wrong, which can lead to costly and time-consuming mistakes. One widespread myth is that a perfectly flat subfloor isn’t necessary for a flawless finish. In reality, even minor imperfections can cause uneven seams, cracked tiles, or cupping in hardwood floors. According to experts in [floor leveling challenges](https://tiletrendshop.com/floor-leveling-challenges-common-mistakes-and-how-to-avoid-them), neglecting proper subfloor preparation is a surefire way to compromise your project’s durability and appearance.
Contrary to popular belief, using the thickest self-leveling compound isn’t always the best approach. Many assume that more material equals a better result, but excessive thickness can lead to improper curing and cracking. Instead, layering thin self-leveling applications, as recommended in [this guide](https://tiletrendshop.com/ultimate-guide-to-floor-leveling), provides a more controlled and reliable outcome. Moreover, some think that hardwoods can be installed directly over concrete slabs; this overlooks the importance of moisture barriers and proper acclimation, which are crucial to prevent warping or cupping, as detailed in [expert tips](https://tiletrendshop.com/mastering-hardwood-floor-refinishing).
A common mistake in tile installation is neglecting the importance of proper adhesive application, leading to tiles that pop or crack over time. Using the right trowel size and technique, as outlined in [troweling tips](https://tiletrendshop.com/tile_installation-pointers-that-save-time-and-money), ensures a strong bond and a level surface. Additionally, many overlook the significance of expansion gaps around the perimeter of hardwood and tile floors. Failing to leave adequate space can result in buckling or cracking due to thermal expansion — a subtle but critical detail often ignored by beginners.
What’s an advanced tactic to guarantee smooth, professional finishes? Incorporating laser levels or digital measurement tools can dramatically improve accuracy. For example, [precise leveling techniques](https://tiletrendshop.com/precise-floor-leveling-techniques-to-achieve-flawless-surfaces) involve meticulous calibrations that go beyond the eye’s capability, especially for large or complex rooms. These methods are invaluable for experienced installers aiming for perfection.
Beware of the trap where installers focus solely on surface aesthetics at the expense of underlying structure. A beautifully laid tile or wood floor can mask fundamental subfloor issues like uneven joists or moisture problems, which will surface later as cracks or warping. Regular inspections and proper testing, such as moisture content analysis, are vital steps often skipped. For in-depth strategies, see [floor leveling secrets](https://tiletrendshop.com/transform-your-space-with-expert-hardwood-floor-tile-combinations).
In summary, understanding the subtle nuances—like layering thin self-levelers, incorporating proper expansion gaps, and utilizing precision tools—sets the foundation for lasting, beautiful floors. Don’t fall into the trap of oversimplification or assumptions; knowledgeable preparation makes all the difference. Have you ever fallen into this trap? Let me know in the comments.
Keep It Running: Essential Tools and Maintenance Tips
Maintaining the quality of your flooring over time requires more than just initial care; it demands the right tools and a proactive approach to upkeep. One of my favorite investments is a high-quality laser level. Using a laser level, like the DEWALT DW089LG, has become indispensable for verifying floor flatness during ongoing projects and even periodic inspections post-installation. Its precision—within fractions of a millimeter—ensures that floors remain as level as the day they were installed, helping to prevent issues like squeaking or buckling down the line.
Alongside a laser level, a good moisture meter is crucial, especially for hardwood and tile installations. I recommend the Protimeter Surveymaster because of its reliability in detecting moisture content. This tool not only helps ensure the subfloor is within optimal moisture levels before installation but also aids in ongoing maintenance, preventing problems like warping or mold growth caused by hidden dampness. Regular checks with a moisture meter can save you from costly repairs and re-installations later, echoing advice from experts on avoiding common installation pitfalls.
Proper cleaning tools are also key. I swear by a microfiber dust mop for daily cleaning; it’s gentle yet effective at trapping dust and debris without scratching finishes. For deeper cleaning, a pH-neutral cleaner suited for your specific flooring—whether it’s hardwood, tile, or vinyl—is essential. Avoid harsh chemicals that can degrade finishes or cause discoloration over time. Consistent cleaning, combined with spot inspections, helps maintain the floor’s appearance and structure, extending its lifespan.
Looking ahead, I predict that smart maintenance gadgets—sensor-equipped floor mats that detect humidity fluctuations or embedded sensors in flooring material—will become more mainstream. These innovations will enable homeowners and professionals to perform preventative measures effortlessly, catching issues before they develop into major problems.
How do I maintain my floors over time?
Establishing a routine maintenance schedule is the best way to keep your floors in top condition. Regularly check for signs of wear, clean with the recommended tools, and use moisture meters periodically—especially in humid climates. Additionally, incorporating protective measures like felt pads under furniture and area rugs in high-traffic zones helps minimize damage. For detailed guidance tailored to your specific flooring type, consult resources like this comprehensive guide. Remember, the key is prevention—small, consistent efforts now will save you time and money in the long run.
Finally, investing in quality tools and staying vigilant with maintenance can significantly prolong the life of your floors. For a boost, try using a digital moisture meter during your next project or routine check-up. It’s a simple step that yields big dividends in preserving the integrity and beauty of your flooring investments.
Lessons Only Experience Can Teach About Perfect Floors
One of the most valuable insights I’ve gained is that perfection in flooring comes from attention to detail—not just the tools, but the mindset. I once ignored the importance of consistent moisture levels, which caused my hardwood to warp months later. That taught me to always double-check moisture content before installation, aligning with expert advice on moisture management at mistakes to avoid. Also, I used to think that expensive materials alone guarantee a beautiful finish, but I learned that preparation and technique are equally critical, echoing lessons from professional secrets. My lightbulb moment was realizing that quality hinges on small, consistent actions—like properly preparing the subfloor, choosing the right underlayment, or using a laser level for precise measurements.
Another profound lesson was understanding that no flooring project is purely superficial. Beneath the surface are subtle foundations—like a level subfloor—that determine your end result. Overlooking these can turn an otherwise beautiful installation into a nightmare involving cracks or gaps. This insight was reinforced when I learned about the importance of proper expansion gaps, which some beginners fail to maintain, leading to long-term damage. Remember, every tiny detail—be it taping before cutting or preparing your adhesive—contributes enormously to the final look and durability.
Tools and Resources That Elevated My Game
Having the right toolkit transformed my flooring approach. A laser level, such as the laser level for precise measurements, made a significant difference in ensuring straight, professional-looking seams. Pairing it with a dependable moisture meter like the moisture meter helped me catch hidden issues early, saving stress and cost later on. Additionally, I trust the comprehensive installation guides from seasoned professionals, which broke down complex techniques into manageable steps. Finally, investing in quality hand tools like fine-toothed saws and smooth sandpapers has paid off, producing cleaner cuts and edges that truly elevate the finished flooring. These resources and tools, combined with continuous learning, are essential for anyone serious about professional results.
Believe in Your Ability to Improve and Innovate
Choosing to learn from every project and mistake energizes me to refine my craft. I encourage you to view each flooring or installation task as an opportunity for growth. Remember, the journey to flawless floors isn’t about perfection immediately but consistently improving your techniques, understanding your materials, and paying close attention to foundational details. Inspired to take your next step? Embrace those subtle lessons, trust your tools, and stay curious—your floors are waiting for your best effort. How has focusing on small details changed your flooring projects? Share your experiences below and let’s learn together.”}}# Response Format: create_posts}potential_users {