
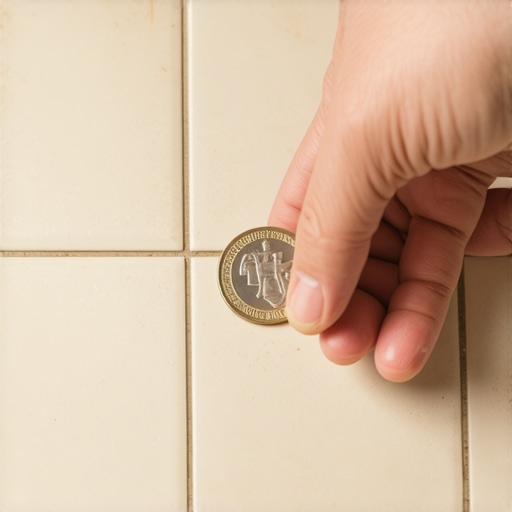
It hit me one afternoon as I knelt down to inspect my freshly installed tiles—an uneven gap here, a slight lippage there. I was about to grout, confident that everything was perfect, but a creeping feeling told me I might have overlooked something crucial. That moment felt like a slap, realizing I had no real way of confirming my guesswork. If you’ve ever faced that sinking suspicion during a flooring project, you’re not alone. Many DIY enthusiasts and even pros stumble here, rushing to grout without ensuring their tiles are truly flush. But what if I told you there’s a simple, reliable test—almost like a secret handshake—that could save you from costly re-dos and unhappy clients? Today, I’ll share how the Coin Test became my go-to method for checking tile lippage before the grout sets in. It’s quick, effective, and, honestly, a game-changer.
Why Flawless Tile Lippage Matters More Than You Think
Tile lippage—those tiny height differences between adjacent tiles—can make or break the overall look of your installation. Even a modest misalignment becomes glaring after grouting, turning a professional-looking floor into a source of frustration. Not only does it ruin aesthetics, but it also impacts the durability of your flooring, risking cracked tiles and uneven wear over time. Properly checking for lippage *before* grouting is essential, but many overlook this crucial step, trusting their eyes or a quick tap. That mistake can haunt you for years.
Here’s the thing: I used to rely solely on my eyes, and sometimes a quick tap with my finger. Sure, it’s faster, but not foolproof. Once, I missed a slight lippage that later caused a visible unevenness and a redo. That was the lightbulb moment that led me to discover a straightforward test—The Coin Test—that’s helped countless professionals and DIYers alike.
If you’re tired of second-guessing your tile layout or risking uneven grout lines, I’ll walk you through how to master this simple technique. Plus, I’ll back it up with expert insights, like those you can find in [this comprehensive guide](https://tiletrendshop.com/flooring-installation-mistakes-to-avoid-for-lasting-results), which emphasizes the importance of meticulous pre-grout checks.
But first, let’s address a common doubt—do you really need this test? Some might think, ‘I can see the tiles are level,’ but visual cues can deceive. The Coin Test provides a definitive answer, ensuring your installation is truly flush, saving you from headaches down the line.
Ready to learn the secret to perfectly level tiles? Let’s get into the step-by-step process that will make your projects smoother and more professional-looking.
Prepare Your Workspace and Gather Tools
Before you start, clear the area of debris and ensure a good lighting environment. Grab a few coins of similar size—quarters work well—and have a level or straightedge nearby. Think of this step as setting the stage: your workspace should be clean, well-lit, and organized, much like preparing a kitchen countertop before a baking session. This initial setup is crucial; messy desks lead to messy results. I recall one project where clutter prevented me from spotting a slight lippage, causing a repeat workday. Keep everything within reach to streamline your testing process.
Many homeowners and even seasoned contractors fall prey to common misconceptions about hardwood flooring, floor leveling, and tile installation. One pervasive myth is believing that a perfectly flat subfloor isn’t essential for successful tile or hardwood laying. In reality, overlooking subtle unevenness can lead to cracks, uneven grout lines, and premature wear. Advanced professionals understand that small deviations—less than a millimeter—can escalate over time, causing visible imperfections. To prevent this, meticulous assessment and precise leveling are crucial, as detailed in [this in-depth guide](https://tiletrendshop.com/floor-leveling-fundamentals-leveling-for-a-seamless-look).When it comes to maintaining the quality of hardwood, tile, or any flooring installation, having the right tools can make all the difference. Personally, I swear by a few specialized pieces that ensure precision, efficiency, and durability in the long run. One essential item is a high-quality laser level, such as the Bosch GLL 3-770, which I use to double-check floor leveling before and after installation. Its accuracy and ease of use have saved me countless headaches, especially in larger projects where subtle unevenness can lead to big problems later. Additionally, I rely on a digital moisture meter like the Protimeter Timbermaster to monitor moisture levels, preventing issues related to improper drying and adhesion—this aligns with [floor leveling fundamentals](https://tiletrendshop.com/floor-leveling-fundamentals-leveling-for-a-seamless-look), which emphasize moisture control as critical for long-term success. For smoothing and feathering out leveling compounds, a drywall taper finishing tool with a flexible blade proves invaluable, allowing me to achieve a seamless surface without gouging. I also keep a set of carbide-tipped diamond blades for my wet tile saw, which give me cleaner cuts and help avoid chipping, extending the life of both the tools and the tiles. Looking ahead, I predict that the trend will lean towards smarter, more integrated tools—like app-connected moisture meters or laser levels capable of real-time adjustments—making our jobs even more precise and stress-free.
How do I maintain flooring tools over time?
Proper maintenance starts with thorough cleaning after each project to prevent debris from dulling blades or damaging calibration. Regularly lubricating moving parts and storing equipment in climate-controlled environments protect against rust and warping, especially in humid areas. When I notice a tool like the laser level becoming less accurate, I calibrate it according to the manufacturer’s instructions or send it in for professional service. Investing in quality tools might be higher upfront, but it pays off through durability and consistent results. I also recommend creating a dedicated storage area for your tools—this not only prolongs their lifespan but also keeps you organized, saving time on future projects. For all those eager to elevate their craftsmanship, I suggest starting by upgrading to a professional-grade laser level or moisture meter; these small investments can transform your workflow and lead to flawless, long-lasting results. For more expert insights, check out [Mastering Floor Leveling](https://tiletrendshop.com/mastering-floor-leveling-pro-secrets-for-perfect-installations), which underscores the importance of using the right tools for optimal accuracy.
The Hardest Lesson I Learned About hardwood floors,floor leveling,tile,flooring installation
One of the most striking realizations in my flooring journey was that even minor lippage can sabotage your meticulous work, leading to hours of rework and frustration. I once overlooked a subtle height difference during a large tile installation, only to notice it later after grouting—an eye-opening moment that taught me the importance of diligent pre-grout checks. That experience underscored that attention to small details can prevent big problems, and the Coin Test became my secret weapon for ensuring perfect flushness.
3 Myths About hardwood floors,floor leveling,tile,flooring installation That Held Me Back
Many believe that visual inspection and light taps are sufficient to detect lippage—a misconception that can cause uneven floors. I used to rely solely on my eyes, but I learned that a simple coin can reveal inconsistencies invisible to the naked eye or finger. Additionally, I thought that the subfloor needed perfect leveling everywhere, but small deviations are tolerable if caught early. Breaking free from these myths allowed me to elevate my craft, ensuring durability and aesthetic excellence.
What Experts Won’t Tell You About hardwood floors,floor leveling,tile,flooring installation
One vital tip I discovered through hands-on experience is that the Coin Test is a quick, reliable method to detect lippage before grout kicks in. This technique isn’t widely advertised but has saved me from costly corrections and callbacks. It’s a simple game-changer: place a coin near the grout line, and if it tips or catches on uneven tiles, you know it’s time to make adjustments. Mastering this test can drastically improve your flooring results, making your projects stand out with professional quality.
Boost Your Precision with Smart Tools
Complementing the Coin Test, tools like laser levels and moisture meters can help address subfloor issues before laying tiles. I trust the Bosch GLL 3-770 laser level for its accuracy, and a digital moisture meter like the Protimeter Timbermaster ensures proper drying—both critical for lasting installations. Combining these tools with simple tests like the Coin Test creates a comprehensive approach to tile installation that minimizes errors and maximizes beauty and durability. For more in-depth strategies, check out our guide on precise floor leveling techniques.
Turn Your Skills into Lasting Masterpieces
Remember, the secret to flawless flooring isn’t just technique—it’s persistence, attention to detail, and leveraging simple, effective tests like the Coin Test. Elevate your craftsmanship by integrating these insights, and watch your projects become the benchmarks others aspire to replicate. Don’t shy away from experimenting with your process; each project is an opportunity to refine your skills and produce stunning results. Your dedication today sets the foundation for enduring beauty tomorrow.