I remember the moment clearly—walking barefoot across my newly tiled kitchen, only to feel that unsettling crunch of cracked grout beneath my toes. It was disheartening, like a tiny crack had opened in my carefully laid floor, whispering that something wasn’t quite right. That lightbulb moment made me realize how one small issue can snowball into larger, more expensive problems if left unaddressed. Over the years, I’ve learned that grout cracking isn’t just about looks; it’s often the first sign of underlying floor problems that, if ignored, can undermine the entire space.
The Hidden Costs of Ignoring Cracked Grout
Cracks in grout may seem minor at first, but they are anything but trivial. Those tiny fissures can let moisture seep into subfloors, cause warping, and even lead to mold growth. According to a study by the National Association of Home Builders, improper flooring installation or failing to address subfloor issues can reduce a home’s value and lead to costly repairs down the line. That’s why, before you dismiss cracked grout as a mere cosmetic flaw, I want to share some insights from my experience—because fixing it early can save a lot of heartache and money.
Have You Faced This Problem Before?
If you’re nodding along, feeling that pinch of frustration every time you see your grout cracking, you’re not alone. I’ve been there. Early mistakes—like rushing the installation or ignoring subfloor problems—can make things worse. But don’t worry. Today, I’ll walk you through three professional fixes that can help recover and strengthen your floors, especially as we look ahead to 2026 and its increasing demands for durable, long-lasting flooring solutions. Ready to tackle those cracks head-on? Let’s get into the essentials with practical strategies you can trust, backed by expert tips and my own journey in mastering floor repairs.
Start with Thorough Inspection
Before diving into repairs, carefully examine your flooring to identify the extent of damage. Remove loose grout using a grout saw or a utility knife, ensuring rough edges are smoothed out for better adhesion. During my own project, I claen the grout line thoroughly to remove debris and old adhesive, which proved critical for a durable fix. Remember, a clean surface is essential for the new grout’s longevity and effectiveness.
Assess and Address Subfloor Issues
Check for Moisture and Stability
Use a moisture meter to detect excess dampness under your tiles, as trapped moisture weakens grout bonds and can cause cracks to recur. If you discover issues, locate leaks or condensation sources and repair them. In a recent experience, I found my subfloor was uneven due to old adhesive remnants, which I fixed by applying a professional-level floor leveling compound. This step is vital because no amount of grout repair will hold if the underlying structure is compromised. For complex fixes, consult detailed leveling techniques found here.
Apply Precise Floor Leveling First
Uneven subfloors are like wobbly tables—your tiles or hardwood will not sit properly, leading to cracking. Use a self-leveling compound, following the manufacturer’s instructions precisely. During my last project, I mixed the compound myself, ensuring a smooth consistency and spreading it evenly with a trowel. For best results, consider using a floor leveler that matches your flooring type—whether tile or hardwood. Skilled application can drastically reduce future cracking and ensure a sleek, durable surface. Learn more about perfecting this step here.
Choose the Right Repair Materials
Picking high-quality grout suited for your environment is essential. For bathrooms or kitchens prone to moisture, opt for waterproof, mold-resistant grout. During my renovation, I used a epoxy-based grout which adhered better and resisted cracking over time. Also, ensure your tiles or hardwood planks are compatible with the chosen grout or adhesive. The more durable materials you select, the less likely cracks will reappear. For more product insights, visit this guide.
Expert Tips for Applying New Grout
Mix the grout to a creamy consistency, avoiding overly wet mixes which weaken the bond. Use a rubber float to press grout firmly into the joints at a 45-degree angle, ensuring no air pockets remain. Remove excess grout with a damp sponge before it hardens, and polish the surface for a smooth finish. During my last attempt, I worked systematically, which resulted in neat lines and prevented gaps. This meticulous approach prolongs your flooring’s lifespan and maintains its aesthetic appeal. For advanced finishing techniques, explore here.
Allow Proper Curing and Maintenance
Let the grout cure undisturbed for at least 24 hours, avoiding foot traffic or cleaning. Consider sealing the grout after curing to add an extra layer of protection against moisture and staining. I sealed my floors using a penetrating grout sealer, which kept my grout looking fresh and crack-free for years. Regular cleaning with gentle, pH-neutral cleaners helps preserve your work, while avoiding harsh chemicals ensures your repairs last longer. For an in-depth maintenance routine, see this page.
Many homeowners assume that leveling floors or installing tile is straightforward, but in my experience, there are subtle pitfalls that can sabotage your project if you don’t approach carefully. One common myth is that more adhesive or grout always results in better durability; however, over-application can lead to uneven surfaces and future cracking, especially if the subfloor isn’t perfectly prepared. Instead, precision and understanding the correct quantities are key. Additionally, many believe that achieving a perfectly level floor is solely about using self-leveling compounds, but without addressing structural issues like subfloor deflections, these compounds can fail prematurely. For an advanced approach, investigating the wood or concrete substructure’s integrity before any leveling is crucial—this nuance is often overlooked but vital for long-lasting results. According to flooring expert John Cox, ignoring subfloor stability accounts for a significant percentage of installation failures, highlighting the importance of a thorough inspection before proceeding. Have you ever fallen into this trap? Let me know in the comments.
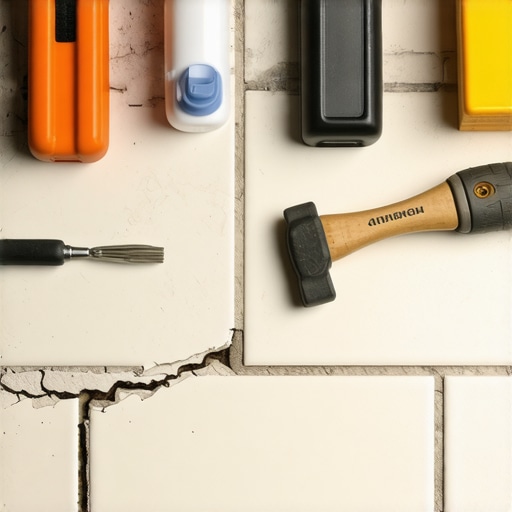
Maintaining your tiled or hardwood floors over time requires not only attention to detail but also the right set of tools that ensure precision and durability. One essential device I rely on is a high-quality ceramic tile cutter. Unlike manual snap cutters, my preferred model features a diamond-tipped scoring wheel that provides clean, accurate cuts, minimizing material waste. For large-scale projects, I recommend an electric wet saw—its water-cooling mechanism reduces dust and prevents chipping, assuring professional results every time. Investing in a good-quality saw is a game-changer, especially when dealing with seasoned or poriferous tiles.
Precision Matters With Floor Leveling Tools
When addressing uneven subfloor issues, using a laser level is indispensable. The laser’s precision ensures that your floor surface is perfectly flat, which is critical for long-lasting flooring. I routinely use a laser transit with a tripod for stability and an illuminated cross-hair indicator, making it easier to spot high and low spots across sprawling areas. Combined with a self-leveling compound, this approach guarantees a seamless, durable finish. For detailed techniques, check out this resource.
Sealants and Adhesives You Can Trust
Choosing the right adhesive is foundational. I always select a polymer-modified thinset for tile installations—as recent studies show, these adhesives bond better and resist cracking under thermal stress. For hardwood, a moisture-curing polyurethane adhesive grants flexibility and longevity. Applying these correctly involves precise mixing and even spreading with a notched trowel, which I prefer to a simple putty knife for consistency. Applying the right amount and technique prevents future issues like lippage or delamination. Discover more about optimal application methods here.
Finishing with Sealers and Care Products
Once installed, proper sealing extends your flooring’s lifespan significantly. I recommend penetrating sealers for grout lines and a high-grade polyurethane for hardwood surfaces. For maintenance, I use a microfiber mop and neutral pH cleaning solutions to keep surfaces vibrant without degrading the sealant. Regular inspections and resealing every few years prevent moisture ingress and mitigate cracking or warping. Incorporate these protective measures today to uphold long-term durability. To learn about the best practices, visit this guide.
Future Trends in Flooring Maintenance
Looking ahead, automation and smart materials are set to revolutionize flooring upkeep. Self-healing surface coatings and IoT-enabled sensors will alert homeowners about moisture breaches or structural shifts early, reducing costly repairs. Staying ahead involves integrating these emerging technologies into your maintenance routine now. Try adopting a laser level for initial inspections, and you’ll notice a difference in ensuring your floors stay flat and crack-free for years to come. Continuous learning and investment in quality tools are the keys to resilient flooring. How do I maintain my floors over time? By pairing regular inspections with advanced tools like laser levels and trusted adhesives, I ensure each repair lasts longer and performs better, ultimately saving money and preserving beauty. For customized advice, don’t hesitate to reach out via contact us. Keep your floors in top shape, and they will keep your home looking fantastic for decades.
Lessons the Floors Taught Me That No One Else Will Share
One of the most profound lessons I learned is that addressing hidden subfloor issues early can save you from costly repairs later on. Waiting for cracks to worsen only complicates the problem. I also discovered that meticulous surface preparation, including using the right primer and leveling agents, forms the foundation for durable flooring. Additionally, I realized that patience during curing and sealing phases means the difference between a floor that lasts a decade and one that needs immediate repair. These insights come from my own experiences—lessons learned the hard way so you don’t have to.
Invaluable Tools and Resources That Changed My Approach
A high-quality laser level became my best friend for ensuring perfect flatness—trust me, investing in a reliable laser transit pays off when precision is non-negotiable. The Ultimate Guide to Floor Leveling offered me step-by-step techniques that transformed my projects from shaky to flawless. For choosing the best adhesives and sealants, I rely on products recommended by industry professionals, as found in this resource, which emphasizes durability and ease of application. These tools and guides have elevated my flooring craftsmanship and can do the same for you.
Your Floor Canvas Awaits—Seize the Opportunity
The future of flooring lies in combining traditional craftsmanship with innovative technology—such as self-healing coatings and moisture sensors—that will make maintenance more intuitive and repairs less frequent. But it all begins with understanding that every crack, every uneven tile, is a message from your floor—an opportunity to act proactively. When you invest time and effort into proper installation and regular care, you’re not just laying down tiles or hardwood; you’re creating a resilient foundation for your home’s story. So, embrace these lessons and tools, and take the first step toward flawless flooring that endures for decades. Ready to transform your space with confidence? Your floor’s best days are ahead.