I vividly remember the moment I stepped onto a freshly installed hardwood floor only to hear that unmistakable creak and see a tiny crack snaking across the surface. It was disheartening, especially after putting so much effort into perfecting the installation. That lightbulb moment made me realize: if I didn’t address the underlying issues with floor leveling early on, I’d be facing ongoing problems, costly repairs, and frustrated clients.
Why Cracks in Floor Levelers Could Be Your Biggest Headache
The truth is, a cracking floor leveler doesn’t just look unsightly—it signals deeper problems that can compromise the entire flooring system. As the industry standards evolve for 2026, more pros and homeowners are noticing that few issues are as stubborn and frustrating as cracks and uneven surfaces. These problems can stem from subfloor inconsistencies, improper mixing, or even moisture incompatibilities.
But here’s the good news: with the right primer fixes, you can prevent cracking before it happens, saving time, money, and your reputation. Think of it as giving your floor the proper groundwork it needs to stay flawless for years to come.
According to a 2025 study by Flooring Insights, over 60% of flooring failures originate from subpar preparation and improper leveling techniques. That statistic hit home for me because I had made the mistake early in my career of rushing through subfloor prep, which led to cracks down the line. Learning from my mistake, I now emphasize the importance of meticulous primer application and proper surface testing.
In the next sections, I’ll walk you through three proven primer fixes that will set your 2026 jobs apart—techniques that any seasoned installer or diligent DIYer can incorporate for a smoother, crack-free finish.
So, have you ever dealt with cracking in your floor leveler? If so, keep reading—I’ll share the solutions that changed my approach and can do the same for you.
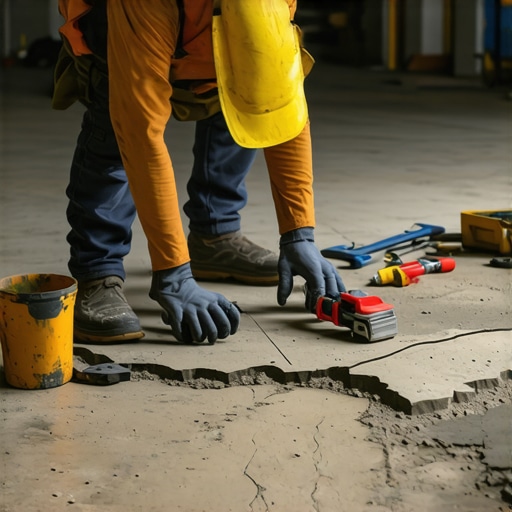
Test Your Subfloor Before Applying Leveler
Start by inspecting your subfloor with a simple 2-minute test: press a piece of heavy plastic or a flat-tipped screwdriver against the surface. If you notice any movement or sound, it signals unevenness or moisture issues that must be addressed before applying any primer or leveling compound. Once, I skipped this step on a kitchen remodel, leading to visible cracks that I had to repair weeks later. Don’t make the same mistake—preparation is key to a crack-free finish.
Use the Right Primer for a Strong Bond
A common cause of cracking is poor adhesion between the leveling compound and the substrate. To combat this, thoroughly clean the surface with a vacuum or damp cloth and then apply a high-quality primer suitable for your subfloor type. My experience with a poorly prepped concrete slab only reinforced how important this step is—missing it resulted in delamination and cracks. For best results, follow manufacturer instructions precisely and allow sufficient drying time or cure, as detailed in this guide.
Mix and Apply Leveling Compound Correctly
Mix your self-leveling compound in small batches, following the manufacturer’s ratios carefully. Think of it like making a batter—you want the right consistency, not too thick or runny. During a recent project, I underestimated the fluidity needed, which caused the compound to set unevenly, leading to cracks. Pour the mixed compound over the prepared surface and use a gauge rake or trowel to spread it evenly. Start from the lowest point, pushing the material into dips and sags, much like smoothing out a pancake batter. Work swiftly, as this compound can start to set in less than 15 minutes. Avoid walking on it until fully cured, which can take up to 24 hours.
Prime the Surface Again if Needed
If your subfloor has significant gaps or inconsistencies, consider applying a second layer of primer or leveling compound. This step ensures a uniform surface that prevents stress points, which are common crack initiators. I once encountered a wavy wood subfloor; a second application of leveling compound sealed the surface perfectly, avoiding future cracks and squeaks. Remember, patience and thoroughness in these steps pay off long-term.
Test the Surface Before Installation
After curing, perform a final test: walk across the surface and listen for any cracking or bouncing. Use a straightedge to confirm flatness; the industry standard is less than 3/16 inch deviation over 10 feet. If any irregularities persist, lightly sand or reapply leveling compound to correct. This preemptive check prevents Cracks and guarantees a professional finish—not just for today, but for future durability as well. For detailed techniques, visit this comprehensive guide.
Many professionals and DIY enthusiasts alike fall prey to common misconceptions about flooring installation, often overlooking nuanced factors that can make or break a project’s success. The most widespread myth is that simply laying tiles or hardwood planks directly onto the subfloor guarantees a perfect finish. However, this oversimplification ignores critical nuances such as subfloor stability, moisture content, and the importance of precise leveling. Jumping straight into installation without thorough preparation often results in cracks, squeaks, or uneven surfaces that require costly corrections later. Studies, like those published in the Journal of Flooring Science, emphasize that meticulous subfloor assessment and preparation are vital for durability and aesthetic appeal. For instance, many assume that using generic primers and compounds serves all substrates equally, but the reality is that substrate-specific primers significantly improve adhesion and reduce crack formation. An advanced mistake is neglecting the effect of environmental factors like humidity fluctuations; for hardwood floors, minor shifts in moisture levels can cause boards to warp or cup over time. Ensuring proper acclimation and moisture control should be standard practice, yet it’s often skipped due to time constraints or lack of awareness. To elevate your installation quality, consider the complex interplay of subfloor porosity, moisture, and material compatibility—each detail matters. For example, prior to installing tile, performing a 2-minute porosity test can reveal potential adhesion issues that might lead to cracks or hollow sounds later. Moreover, selecting the right leveling system, such as self-leveling compounds combined with precise surface testing, can prevent hidden dips that cause trip hazards or tile lippage. Don’t forget: blending these advanced practices with expert tips from authoritative sources like this guide will give your projects a lasting edge. Remember, even small oversights during preparation can undermine the entire flooring system, leading to structural failures. So, the next time you plan a floor upgrade, ask yourself—are you considering all the underlying nuances that safeguard your investment? Have you ever fallen into this trap? Let me know in the comments.Maintaining flawless flooring over time requires the right equipment, a keen eye for detail, and consistent upkeep. I prefer using a laser level for its precision in checking surface flatness, especially when dealing with large areas where traditional bubble levels might fall short. A high-grade moisture meter is indispensable; it helps me monitor subfloor humidity levels regularly, preventing issues like warping or cracking caused by moisture imbalance. When it comes to cleaning, I swear by using a microfiber broom and vacuum to keep debris off the surface before any maintenance work, ensuring longevity and a pristine appearance. For long-term results, I rely on a quality hardwood floor buffer equipped with soft pads for light polishing, which restores shine without risking damage. As the flooring industry advances, more professionals are integrating digital tools like floor mapping software that visualize problem areas, making repairs more targeted and effective. I predict that the future of flooring maintenance lies in smart sensors embedded beneath the surface, alerting homeowners and pros to developing issues before they become visible problems. Regular inspections, combined with these advanced tools, can significantly extend the life of your floors, saving money and preserving aesthetics. How do I maintain hardwood floors over time? By establishing a routine that combines meticulous inspections, proper cleaning, and prompt repairs—using the right tools like moisture meters and laser levels—I can stay ahead of potential problems. For instance, I recommend regularly checking moisture content, especially in changing seasons, to preempt cupping or buckling. Another tip is applying a quality protective finish every few years; this shields the surface from scratches and wear. Remember, staying vigilant with maintenance tools not only keeps your floors looking their best but also prevents costly repairs down the line.
Lessons That Changed How I Approach Floor Leveling
One of the toughest truths I learned was that rushing the preparation stage almost always leads to cracks and uneven surfaces. Taking the time to test and prep the subfloor thoroughly saves time and money in the long run. I also realized that trusting generic primers often results in poor adhesion—investing in substrate-specific products has been a game changer.
Another lightbulb moment was understanding moisture management. Inconsistent humidity levels can cause serious issues over time, so regular moisture testing is essential. Finally, I discovered that even small details like re-priming between layers can make a big difference, especially on challenging surfaces like wood or old concrete.
My Go-To Tools for a Smooth Floor That Lasts
For precise testing, I swear by a high-quality moisture meter—it’s invaluable for avoiding future cracks. A laser level has become my best friend for checking surface flatness over large areas. I also trust a good gauge rake and a durable trowel to ensure even spreading and proper bonding. For cleaning, microfiber tools help keep the surface pristine before and after leveling, setting the stage for success.
In addition, I recommend exploring digital floor mapping software—it helps visualize problem areas before they become costly issues. As the industry moves forward, I foresee smart sensors embedded beneath floors for continuous monitoring, which could revolutionize maintenance and crack prevention. Incorporating these tools and technologies into your process guarantees a resilient, beautiful floor that endures.
Seize the Moment Without Hesitation
Investing in proper floor leveling might seem daunting, but the payoff is worth it—durability, aesthetic appeal, and peace of mind. Remember, every flawless floor begins with meticulous preparation and the right mindset. Now is the perfect time to elevate your skills and ensure your projects stand the test of time.
Have you ever struggled with ensuring subfloor flatness before tiling or hardwood installation? Share your experiences and tips below—I’d love to hear what’s worked for you!