
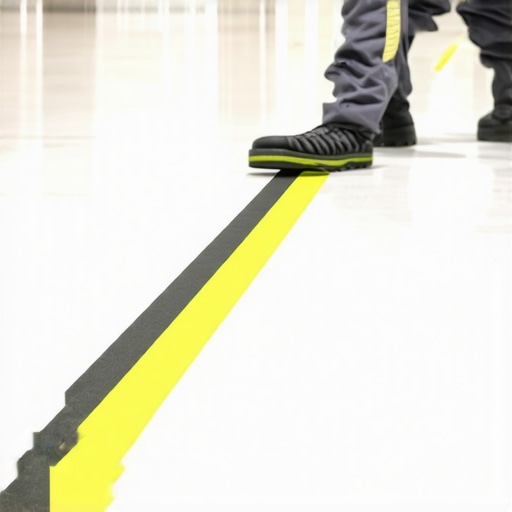
It was a chilly morning when I nearly took a nosedive on my commercial tile floor. The surface was pristine yesterday, but today, a unexpected puddle turned it into a slip hazard. That moment made me realize how easily something as simple as water can turn a beautiful floor into a dangerous trap. Have you ever faced a similar situation, where a wet floor caught you off guard? If so, you’re not alone.
Why Slippery Floors When Wet Are a Common Yet Avoidable Trouble
Every business owner knows the frustration of patrons slipping and falling—it’s not just about safety; it’s about reputation and legal responsibility. Water, spills, or even cleaning routines can make floors treacherously slick, especially in commercial settings where floors are high-traffic and sometimes less maintained than homes. The good news? There are effective ways to minimize this risk, and it all starts with understanding what causes floors to become slippery.
Let’s face it: an unprotected, smooth surface becomes dangerous when wet. Water reduces friction, turning a routine walk into a potential fall. While adding mats and warning signs helps temporarily, a more permanent solution involves enhancing the floor’s grip or applying slip-resistant coatings.
Early in my journey, I made the mistake of assuming that regular cleaning was enough. I ignored the importance of proper sealing and slip-proofing treatments. This oversight made me realize that a comprehensive approach is necessary—one that combines surface design, materials, and maintenance practices.
Curious about the most effective techniques? Stay tuned as I share simple, proven strategies I’ve tested myself, which can help keep your floors safe and secure, even when they get wet.
Ensure Proper Surface Preparation
Before applying any anti-slip treatment, start with a clean, dry surface. Remove dirt, oils, and previous coatings that could hinder adhesion. Use a degreaser if necessary, and allow ample drying time. This step is crucial—skipping it can cause coatings to peel or fail, leading to wasted effort and ongoing safety hazards. I once neglected thorough cleaning on a commercial project, resulting in slippery patches after applying a coating. The cleanup and reapplication were costly, reinforcing the importance of this initial step.
Choose the Right Slip-Resistant Coatings and Additives
For concrete floors, epoxy-based anti-slip coatings are highly effective. Mix them with aggregate or grit additives—like silica or aluminum oxide—to enhance grip. When working on tiles, consider anti-slip sealers or applying a textured overlay. Hardwood floors benefit from non-slip finishes or rubberized coatings. The key is selecting products suitable for your flooring material and traffic levels. I tested different grit sizes; finer grit provides a less abrasive finish, ideal for residential areas, while coarser grit suits commercial spaces demanding maximum traction.
Apply Coatings Correctly for Maximum Safety
Follow manufacturer instructions meticulously. Use a roller or sprayer for even application, ensuring no pooled areas or thin spots. For textured finishes, multiple coats may be necessary. When I refinished my studio’s concrete floor, I applied multiple thin layers, allowing proper curing time between coats. This process created a uniform, slip-resistant surface that held up under daily traffic. Remember, proper curing is vital—rushing can compromise adhesion and durability. For detailed application techniques, visit this comprehensive guide.
Integrate Non-Slip Mats and Surface Treatments
Complement coatings with durable mats in high-traffic or water-prone zones. Use removable rubber mats near entrances or wet areas to absorb splashes and prevent water spread. For hardwood floors, consider area rugs with non-slip backing—never underestimate the importance of temporary measures to prevent slips. I personally installed anti-slip mats in my busy kitchen, which significantly reduced wet-floor accidents. Regularly inspect and clean mats to maintain their grip and longevity.
Maintain and Regularly Test Flooring Safety
Ongoing maintenance keeps slip resistance at peak levels. Routinely clean surfaces with non-slip detergents, and check coatings for wear or damage. When water or spills occur, promptly dry the area to prevent accidents. In my experience, scheduling quarterly inspections and touch-ups prolongs the effectiveness of slip-resistant treatments. Additionally, consider periodic testing of floor grip—simply sprinkle a few drops of water to see if it beads or spreads. Active monitoring is essential for safety, especially in commercial environments. For a detailed overview of maintenance routines, see this maintenance guide.
Many DIY enthusiasts and even some professionals fall victim to misconceptions that can compromise the quality and longevity of flooring projects. One prevalent myth is that a perfectly flat subfloor isn’t crucial, but in reality, even minor deviations can lead to significant issues like tile cracking or uneven hardwood planks. Rushing through floor leveling without proper surface preparation is another common mistake—skipping this step can cause coatings to peel or fail prematurely. To truly master the craft, it’s essential to recognize these nuances and avoid overgeneralized advice that may not suit your specific situation. For instance, using a one-size-fits-all approach to tile mortar or adhesive selection often results in lippage or failed bonds. Instead, refer to detailed guides such as mastering floor leveling to ensure your surface is perfectly prepared. Additionally, understanding the subtle differences between hardwood species, finishes, and installation techniques can prevent costly mistakes down the line. For example, some hardwoods are more prone to cupping if humidity levels fluctuate—something many overlook during installation. Recognizing these hidden factors will empower you to choose the right materials and methods. Have you ever fallen into this trap? Let me know in the comments about your experiences with overlooked details or misconceptions that caught you off guard. Let’s dig deeper and elevate your flooring expertise to a professional level.
Tools I Recommend for Floor Maintenance and Installation
Maintaining flawless floors and ensuring expert installation requires precision tools tailored for each phase of the process. From surface prep to final finishing, the right equipment not only saves time but ensures lasting results. Personally, I swear by a high-quality laser level, which I use daily to verify evenness across large surfaces—this tool helps me spot subtle deviations that could compromise tile or hardwood installation.
When it comes to leveling substrates, a self-leveling compound is essential. I prefer a pump-compatible, fast-curing formula that minimizes downtime and guarantees a perfectly flat base. Pairing this with a spiked roller during pouring helps remove air bubbles, ensuring a smooth, stable surface for tile or hardwood lays. For detailed surface prep, I recommend a concrete grinder with a diamond cup wheel—it efficiently removes old coatings and imperfections, providing a clean slate for new layers. Remember, surface preparation is often overlooked but critically impacts long-term durability—a misstep here can cause tiles to crack or floors to delaminate down the line.
To accurately mix and apply underlayments and adhesives, I utilize a mixing paddle attached to an impact drill. This method ensures uniform consistency, avoiding the issues associated with manual mixing. Additionally, I select a trowel with a blade thickness suited for the tile or wood thickness I am working with. For example, a 1/4-inch notch trowel offers optimal adhesive coverage for large-format tiles, reducing lippage and uneven bonding. Regular inspection of tools like their edges and grips keeps my workflow smooth and prevents accidental damage or uneven application.
For enhancements in adhesion verification and long-term maintenance, I use a moisture meter to test subfloor dryness before installation. This step prevents future issues like cupping or mold growth, aligning with the principles discussed in mastering-floor-leveling-secrets. Regular cleaning tools also matter—high-quality microfiber mops and solvent-free cleaners help maintain polished surfaces without leaving residues that could compromise coatings.
Prediction is that automation and smarter measuring devices will become standard in flooring projects, enhancing precision and efficiency. Integrating digital moisture meters with app-based reporting can alert you to potential problems before they escalate, an invaluable step toward truly long-lasting floors. To streamline your workflow, I suggest trying a combination of a professional-grade laser level and a digital moisture tester—these tools fundamentally change how I approach both installation and maintenance.
How do I maintain my flooring equipment over time?
Proper maintenance of your tools extends their lifespan and ensures consistent results. Regularly clean blades, bits, and nozzles to prevent buildup that could affect performance. Lubricate moving parts periodically, especially for mechanical tools like grinders or mixers, following manufacturer recommendations. Store tools in a dry, protected environment to prevent rust and corrosion. For high-precision instruments like laser levels and moisture meters, calibrate them annually or as specified. Proper care prevents unexpected breakdowns and keeps your workflow efficient, saving you both time and money over the long haul. Investing in quality tools, such as a durable impact drill with a quick-change chuck and a reliable moisture meter, pays long-term dividends—consistent results build trust with clients and diminish costly rework. Try integrating these practices into your routine, and experience the difference in your project quality and equipment longevity.
Lessons That Changed My Approach to Floor Safety and Success
- Never underestimate the power of thorough surface preparation. Skipping detailed cleaning and proper priming can result in costly mistakes that compromise safety and durability.
- Choosing the right tools and understanding their proper use is crucial. Investing in quality equipment not only smooths the workflow but also drastically improves the final result.
- Embrace continuous learning from mistakes—every slip-up or miscalculation offers insight into better practices and prevents future issues.
- The importance of attention to detail cannot be overstated, especially when coordinating between leveling, tiling, and flooring finishes. Small nuances make a big difference in appearance and longevity.
- Developing a routine maintenance plan for tools and floors ensures long-term performance, saving time and money while maintaining safety standards.
My Go-To Resources for Flooring Excellence
- Mastering Floor Leveling Secrets: This detailed guide has become my Bible for understanding subtle surface nuances and the correct application techniques that lead to perfect installation results. It has saved me from many common pitfalls.
- Tile Installation Pointers: Practical and concise, this resource offers tips that balance efficiency with quality. I trust it because it simplifies complex steps into understandable actions, which I’ve implemented successfully in projects.
- Flooring Fundamentals: When I need to revisit core principles, this source keeps me grounded. Its comprehensive approach ensures I don’t overlook vital steps like moisture testing or substrate preparation—crucial for successful hardwood and tile integration.
- Expert Home Renovation Tips: This collection of innovative ideas pushes me to elevate my craftsmanship, ensuring my flooring projects stand out in both style and durability. It’s a source I consult regularly to stay inspired and informed.
Your Turn to Elevate Your Flooring Skills
Achieving seamless, safe, and lasting floors is within your reach when you combine proper techniques, the right tools, and continuous learning. Remember, the difference between a good job and a great one often lies in the details—investing where it counts will pay dividends in satisfaction and longevity. Don’t be afraid to experiment, ask questions, and refine your process—it’s all part of mastering the craft. Are you ready to take your flooring projects to the next level? Share your experiences or challenges below, and let’s grow together in this journey toward flooring excellence.