
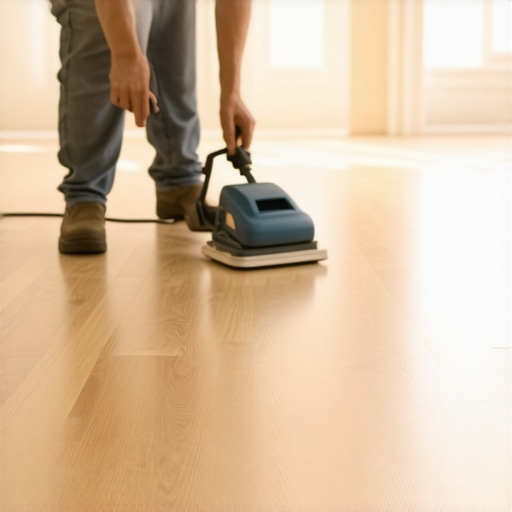
Ever stood in your living room, stared at those scuffed, dull hardwood floors, and felt that pang of frustration? I know that feeling all too well. I once tried to tackle refinishing my own floors, thinking it would be a quick weekend project. Turns out, I underestimated the complexity—and barely made a dent. The worst part? I didn’t have any professional gear, and I truly thought I needed a pro’s tools to get a decent finish. Spoiler alert: I was wrong.
Don’t Let Lack of Equipment Keep You From Gorgeous Floors
When I first decided to sand and refinish my hardwood, I felt overwhelmed. All those intimidating machines and fancy abrasives in the store made me think I’d have to hire someone—or at least rent expensive gear. But after some experimentation and resourcefulness, I discovered that you can achieve fantastic results with just a few common tools and some good old-fashioned elbow grease. Today, I’ll share how you too can breathe new life into your floors without breaking the bank or risking your sanity.
Are DIY Sanding and Refinishing Really Worth the Effort?
Initially, I was skeptical. I’d heard stories of dusty messes and uneven finishes. My early mistake was trying to rush the job without proper prep, which led to more sanding than necessary and a finish that looked… well, amateurish. But I learned from that experience, and with the right techniques, even complex floors can be restored by an enthusiastic homeowner. According to flooring experts, with patience and proper planning, you can avoid many pitfalls that typically scare DIYers away. For example, avoiding common mistakes like uneven sanding or improper sealing can make all the difference and produce a professional-looking result.
If you’ve ever felt discouraged by the thought of sanding your hardwood floors—you’re not alone. Many homeowners fear that without professional gear, their floors will turn out worse than before. But I promise, with some guidance, you can do this yourself. In the next sections, I’ll walk you through my step-by-step process, share insider tips, and show you the simple tools that will make all the difference. Are you ready to transform your tired floors into stunning, glossy surfaces that last? Let’s begin by understanding what tools are truly needed—and what can be skipped.
Prep Your Space Like a Pro
Start by clearing the room completely—furniture, rugs, everything—so you have open access. Use painter’s tape to mask off baseboards and door jambs to protect edges. Next, inspect the floor for any protruding nails or staples; countersink them to prevent sanding gouges. Don’t forget to vacuum thoroughly; dust particles can ruin your finish and cause unevenness. I learned this the hard way when I skipped this step and ended up with specks in my sealant, costing me extra time and materials. Proper preparation ensures a smoother process and top-tier results.
Choosing the Right Sanding Technique
Begin with a coarse grit (such as 36 or 40) to remove the old finish and smooth out scratches. I used a drum sander for large open areas, resembling a giant, vibrating cheese grater—powerful, but easy to control once you get the hang of it. For edges and corners, switch to a handheld orbital sander or sanding block. Work in the direction of the wood grain to prevent scratches that are visible after finishing. I once tried to go against the grain, which left visible marks—an avoidable mistake that delayed my project. Moving systematically from coarse to finer grits—say, 40, 60, 80, then 120—gradually refines the surface, much like polishing a gemstone.
Mastering Floor Leveling for a Even Base
An uneven subfloor is like a bumpy road—uncomfortable and hazardous for finishes. To achieve a perfectly flat surface, lay down self-leveling compound, which flows into low spots and fills gaps. Think of it as pouring pancake batter—spread it evenly, avoiding pools or thin spots. I once poured too much, and it pooled in one corner, which took hours to fix. Use a gauge rake to spread the compound smoothly and follow the instructions on drying times meticulously. For more precise info, check out this guide to flawless floor leveling techniques. After setting, use a straightedge to verify flatness before proceeding.
Applying a Fresh Finish Carefully
Choose your finish—polyurethane, oil-based, or water-based—based on the room’s use and desired sheen. Use a high-quality brush or roller designed for floors; avoid cheap rollers that shed fibers. Apply thin, even coats—think of spreading peanut butter—so that it dries uniformly and doesn’t drip. I once streaked on a thick coat, which resulted in bubbling during curing, a mistake that cost me a whole weekend of sanding and reapplication. Sand lightly with fine grit (220) between coats for a mirror-like surface, and always follow manufacturer drying times. Patience here pays off in gleaming, durable floors.
Final Tips to Achieve Professional Results
Maintain a steady pace during each step, avoiding rushing through crucial phases. Keep the room well-ventilated to speed up drying and reduce fumes. Regularly inspect your progress—if you notice uneven spots or dust particles, address them promptly to prevent imperfections. Remember, attention to detail during each phase makes all the difference. For additional guidance on specific techniques, visit this expert resource. With methodical work and patience, even a DIYer can transform tired hardwood into a show-stopping feature in their home.Even seasoned professionals have their blind spots when it comes to tile, floor leveling, or hardwood installation. One common misconception I’ve encountered is the idea that using larger trowel notches automatically guarantees better adhesion. In reality, the correct trowel size depends on the specific materials and conditions, as emphasized by industry experts. Choosing the wrong size can cause voids beneath tiles or weak bonds, leading to costly repairs down the line. Another nuance often overlooked is the importance of compressive strength in self-leveling compounds. Many DIYers assume that any standard product will do, but in high-traffic or load-bearing areas, the wrong formulation can crack or degrade prematurely. Consulting technical datasheets, like those provided in this comprehensive guide, can save you from such pitfalls. A particularly tricky trap involves neglecting moisture management prior to installation. Some believe that sealing or priming is sufficient, but without accurately measuring subfloor moisture content with a reliable meter, you risk bonding failures and mold growth. Tools like moisture meters are game-changers—investing in quality gauges can ensure your preparation is sound. Have you ever fallen into this trap? Let me know in the comments. Lastly, I want to highlight a mistake I see too often: assuming that new flooring products are universally compatible with existing materials. For example, mixing engineered wood with older, uneven subfloors without proper underlayments may lead to buckling or squeaks. Expert advice suggests thoroughly assessing your subfloor condition and choosing the right underlayment to accommodate expansion and contraction—more details are available in this resource. Cracks in the surface, uneven readings, or unexpected noises aren’t just annoyances—they’re signals that you may be misunderstanding your materials’ nuances. By digging deeper into these details, you’ll ensure a durable, professional finish that lasts. Remember, successful flooring isn’t just about tools and materials—it’s about understanding their intricacies and making informed choices.
Tools That Stand the Test of Time
Investing in quality tools is crucial for maintaining your flooring projects long-term. I highly recommend a dust extractor compatible with your sander; it minimizes airborne debris, making cleanup less of a chore and preventing dust from settling into your finish. For leveling, a laser level with adjustable tripod, like the Bosch GLL 55, ensures precise flatness over large areas, saving you from costly unevenness later. When sealing or refinishing, a high-grade microfiber roller set, such as the Wooster alpha series, provides even application and reduces streaks, especially on large surface areas. These tools, while initially more expensive, pay for themselves by delivering professional results and reducing the need for rework.
Longevity Through Routine Checks
To keep hardwood floors and installed tiles looking their best, schedule routine inspections—at least biannually—to identify areas of wear, scratches, or loosening tiles. Use a rubber mallet and a straightedge to tap and verify the evenness of tiles and wood planks; irregularities can signal underlying issues. Applying a quality polish, like the Bona Hardwood Floor Polish, can restore shine and offer a protective barrier against future damage. For high-traffic zones, consider sealing grout lines annually with a penetrating sealer to prevent staining and efflorescence. Regular maintenance coupled with the right tools extends the lifespan of your flooring investment significantly.
Preparing for Long-Term Success
Future trends suggest that smart flooring will increasingly incorporate embedded sensors to monitor humidity and structural integrity, predicting issues before they arise. Currently, tools like moisture meters and infrared thermometers are invaluable for proactive care—checking subfloor moisture levels and identifying hidden problems early. Remember, one of the most overlooked aspects is maintaining proper humidity levels in your home; fluctuations can lead to hardwood gapping or buckling. A dehumidifier or humidifier, calibrated with a hygrometer, can stabilize conditions, especially in regions with significant climate shifts. Implementing these practices now will position you to preserve your flooring’s beauty and function for decades to come.
How do I maintain hardwood floors over time?
Consistent care involves using the right cleaning techniques—damp mops instead of wet ones, avoiding harsh chemicals—and avoiding excessive moisture. Additionally, consider regular application of a recommended polish to maintain the protective finish. For detailed guidance on hardwood floor care secrets to longevity and shine, visit this resource. Trying out an advanced tip like applying a fresh coat of polyurethane with a foam roller every few years can refresh the surface and provide a durable barrier against scratches and stains. Remember, routine maintenance isn’t just about appearance—it’s about ensuring your floors remain structurally sound and visually appealing over time.
Staying vigilant with your tools and maintenance routines is key to long-lasting, beautiful flooring. For more expert advice on flooring installation or repairs, don’t hesitate to reach out. Keep your floors pristine and enjoy the beauty they bring to your home for years to come!
Lessons That Changed My Approach to Floor Refinishing
- Don’t underestimate the importance of thorough prep—skipping steps like vacuuming and masking can jeopardize your entire project. I learned this the hard way when dust ruined a perfect finish.
- Patience with each phase—especially sanding and finishing—yields professional-looking results. Rushing leaves uneven surfaces and unsightly imperfections that are tough to fix later.
- Investing in good tools, even if it means spending a bit more upfront, saves time and frustration down the line. A quality sander and finishing brushes made all the difference in my project.
- Understanding your materials deeply, like subfloor moisture levels and the right types of sealants, can prevent costly mistakes. Using a moisture meter before starting is a game-changer.
- Learning from industry experts and trusted resources can accelerate your learning curve significantly. For instance, refining techniques through guides like this comprehensive floor leveling guide helped me avoid common pitfalls.
My Go-To Resources and Tools for Floor Refinishing
- Bosch GLL 55 Laser Level: Precise flatness over large areas, crucial for leveling and layout. I rely on it for accuracy.
- High-Quality Microfiber Rollers: For smooth, streak-free finishes. Standard rollers just don’t compare in gloss and durability.
- Moisture Meter: Essential for assessing subfloor conditions. Prevents bonding failures and mold issues down the line.
- Deborah’s Hardwood Refinishing Book: A personal favorite; packed with practical tips and real-world examples that boost confidence.
- This inspiring tile design resource helped me visualize the final look and plan the aesthetics effectively.
Your Floors Deserve a Fresh Start — Take Action Today
The journey to stunning hardwood floors is rewarding, especially when you apply lessons learned with patience and care. Remember, every scratch, every layer of finish, and every shimmery surface is a testament to your dedication. Don’t let fear of mistakes hold you back; with the right knowledge and tools, you’re capable of transforming your space into something truly spectacular. Now’s the time to roll up your sleeves and start your own refinishing adventure. Your floors will thank you for it—and so will your home’s appearance and value.
Have you ever hesitated before tackling a flooring project? What’s the biggest lesson you’ve learned along the way? Share your experience below and let’s cheer each other on in creating beautiful, durable floors that last!
}token_reasoning: