
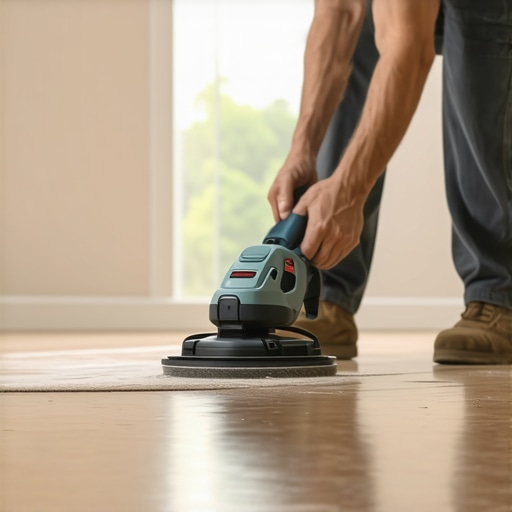
Walking into a room with a beautifully laid parquet floor, only to be greeted by unsightly swirl marks after sanding. I remember the frustration vividly—those inevitable swirl marks seemed to taunt me every time I tried to restore my vintage hardwood. It’s a common dilemma, and honestly, it almost made me give up on the project altogether. But then, I discovered that with a few simple tricks and a mindful approach, you can sand your parquet floor smoothly, without those dreaded swirl marks.
In this post, I’m going to share my personal experience and proven methods to achieve a flawless finish. Whether you’re refurbishing an old floor or doing a quick touch-up, understanding how to sand properly is crucial. You’ll learn the key mistakes to avoid and the best practices to keep your floor looking pristine.
Why the Right Sanding Technique Matters for Your Parquet Floor
When I first started sanding my parquet, I thought more pressure and endless passes would help get rid of the old finish faster. Turns out, I was wrong. Excessive pressure and inconsistent movements only created swirl marks and uneven surfaces. According to flooring experts, improper sanding techniques can permanently damage the wood and make refinishing a nightmare (see our comprehensive guide on hardwood floor refinishing). The right approach, however, can save you time, money, and frustration.
Have you ever faced the frustration of uneven sanding or swirl marks ruining your wood’s surface? You’re not alone. Many DIYers and even pros stumble upon similar issues, especially when rushing or neglecting detail. The good news is, with proper technique, you can avoid most of these pitfalls.
One common mistake I made early on was using a random orbital sander without adjusting the grit properly. I started with too coarse a grit, which left deeper scratches that later turned into swirl marks when smoothed over. Patience and gradual grit progression are your best friends here.
In the next sections, I’ll break down the step-by-step process to sand your parquet floor flawlessly. We’ll cover choosing the right tools, techniques to prevent swirl marks, and finishing tips to make your floor shine. Ready to transform your space? Let’s dive in and get those floors looking better than ever.
Choose the Right Grit Progression for Flawless Results
Start with a medium grit, such as 80 or 100, to remove old finish and surface imperfections, then gradually step up to finer grits like 150 and 220. I recall once working on a vintage oak floor; rushing from coarse to fine grit without intermediate steps left scratches that turned into swirl marks. Taking your time with each grit ensures a smooth surface that reduces the risk of swirl marks later.
Setup Your Equipment for Precision
Use a high-quality orbital sander paired with a good-quality vacuum system to prevent dust clogs and uneven sanding. I learned this the hard way when I used a low-end sander—dust buildup caused inconsistent pressure, leading to swirl patterns. Proper equipment setup is crucial to control and consistency during sanding.
Master Proper Sander Movement
Maintain constant, overlapping passes in a crisscross pattern—imagine you’re mowing a lawn; go in one direction, then cross over at right angles. This prevents uneven pressure and minimizes swirl formation. During my first attempt, I kept following the same path, which created swirl marks. Adopting the crisscross technique improved results dramatically.
Keep the Sander Moving and Use Light Pressure
Let the sander do its job—pressing too hard results in gouges and swirl marks. My personal tip: hold the sander loosely and lift it slightly when changing directions, like guiding a gentle brush. This prevents gouges and ensures an even finish. Remember, patience and gentle handling are your best tools here.
Work in Manageable Sections
Divide your floor into smaller zones, completing each thoroughly before moving on. I made the mistake of rushing through a large area, which caused uneven sanding and swirl marks that took extra time to fix. Tackling small sections allows for better control and consistent results across your entire floor.
Final Pass with Fine Grit to Seal the Surface
After initial sanding, switch to an ultra-fine grit like 220 or 240 for the final pass. This step smooths out surface scratches and prepares the wood for finishing. I remember spending extra time on this step, but the glossy, swirl-free finish it produced made it worth the effort—more in line with hardwood floor refinishing best practices.
Inspect and Correct Imperfections Promptly
After each stage, inspect the surface closely. If you spot swirl marks or scratches, lightly sand those areas with a very fine grit to blend them in. During my first project, I ignored small scratches—by the time I applied the finish, they were visible. Catching flaws early and addressing them ensures a professional-looking result.
When it comes to level floors, many assume that simply pouring self-leveling compounds and expecting perfect surfaces is foolproof. However, even seasoned DIYers often overlook the nuanced factors that influence a flawless finish. One pervasive myth is that using too much self-leveler will eliminate unevenness instantly. In reality, excess product can cause puddling, leading to weak spots and future cracks, especially over expansive areas. Proper application techniques, such as spreading with a spiked roller to eliminate air bubbles, are crucial for durable results, as highlighted in our guide on precise floor leveling techniques.
Investing in the Right Tools for Durable Floors
Maintaining beautiful flooring over time requires the right equipment and a strategic approach. I personally rely on high-quality orbital sanders with variable speed control, such as the Festool RTS 400, because they provide precise maneuverability and reduce the risk of swirl marks when sanding hardwood floors. Paired with HEPA-rated vacuum systems like the Fein Turbo IVC, these tools help keep dust to a minimum, ensuring a cleaner work area and a smoother finish. Additionally, I recommend using microfiber cleaning pads for routine maintenance, as they trap dirt effectively without scratching surfaces.
Why I Switched to Dust Extraction Systems
Dust management is crucial in flooring restoration. I found that traditional dust bags or simple vacuums couldn’t handle fine particles generated during sanding or tile cutting. Upgrading to a dedicated dust extraction system like the Festool CT MIDI significantly improved air quality and minimized cleanup time—saving me hours on every project. Proper dust extraction not only prolongs the life of your equipment but also ensures a healthier environment for your family or clients.
Tools That Extend Your Flooring’s Lifespan
Maintaining long-term results involves more than just the right sander; quality grout and surface sealants are essential. I prefer epoxy grout for its durability, especially in high-traffic areas, and I only trust water-based polyurethane finishes for their environmental benefits and resistance to scratches. Regular application of hardwood floor care products, like oil-based cleaners for hardwood surfaces, helps preserve shine and prevent wear. Using the right tools for cleaning, such as soft-bristled mops and, occasionally, buffing machines equipped with soft pads, keeps floors looking pristine without damage.
How do I keep my floors looking new?
Consistent maintenance with the correct tools is key. Schedule periodic deep cleans with steam mops (suitable for sealed surfaces) and reapply protective finishes before signs of wear appear. Investing in a laser-guided level tool ensures your subfloors remain even over years, preventing uneven wear and tear that could undermine your flooring investments. For tile installations, I always use a spiked roller during leveling to eliminate air pockets, as detailed in our guide on precise floor leveling techniques.
Scaling Your Flooring Projects with Confidence
As you refine your process, consider tools that facilitate larger-scale work, like modular sanding platforms and automatic grout mixing stations. These innovations make labor-intensive tasks more manageable and consistent, leading to professional results even on extensive floors. Looking ahead, advancements in robotic sanding and AI-powered leveling systems promise to revolutionize DIY and professional flooring markets—trend predictions point toward smarter, faster, and more precise equipment becoming standard in the coming years. Stay ahead by keeping an eye on emerging innovations in flooring technology.
How do I maintain my tools over time?
Regular cleaning, lubrication, and calibration are vital for preserving tool performance. For example, keeping your orbital sander’s pads clean preserves its ability to produce a smooth finish, while periodically replacing worn-out brushes in your power tools prevents motor damage. Additionally, storing tools in climate-controlled environments reduces wear and corrosion. For in-depth strategies on maintaining your equipment, explore resources like our detailed guide on hardwood floor refinishing, ensuring your tools—and results—stand the test of time.
Lessons the Hard Way That Still Shine Bright
One of the most valuable insights I gained was that patience truly pays off—rushing through the grit stages or skipping the final fine sanding inevitably leads to swirl marks. I learned that a meticulous, step-by-step approach is the unsung hero behind perfect floors. Additionally, I realized that improper equipment setup, like neglecting dust extraction, can silently sabotage even the best techniques, emphasizing the importance of investing in quality tools. Finally, I discovered that consistently inspecting your surface at each stage prevents small imperfections from turning into costly mistakes, turning a DIY project into a surprisingly rewarding journey.
My Go-To Tools and Resources for Seamless Results
For a project that stands the test of time, I swear by high-quality orbital sanders like the Festool RTS 400, coupled with HEPA dust extractors such as the Fein Turbo IVC. These tools reduce dust and provide the control needed for gentle, even sanding—essentials for avoiding swirl marks. I also regularly consult guides like hardwood floor refinishing to refine my technique. When it comes to surface protection, epoxy grouts and water-based sealants are my trusted allies, ensuring durability and easy maintenance over the years. Investing in these tools and resources has transformed my approach, making each project more efficient and satisfying.
Ignite Your Passion for Perfect Floors
Remember, every great floor starts with a single, careful step. With the right mindset, tools, and patience, you can achieve results that will impress and inspire. Your flooring journey is just beginning—embrace the learning curve and celebrate each milestone. The ultimate reward is stepping into a space that looks professionally finished and feels truly yours. Now’s the time to roll up your sleeves, apply what you’ve learned, and create a stunning foundation for your home’s story. Your perfect floor awaits—why not start today?