
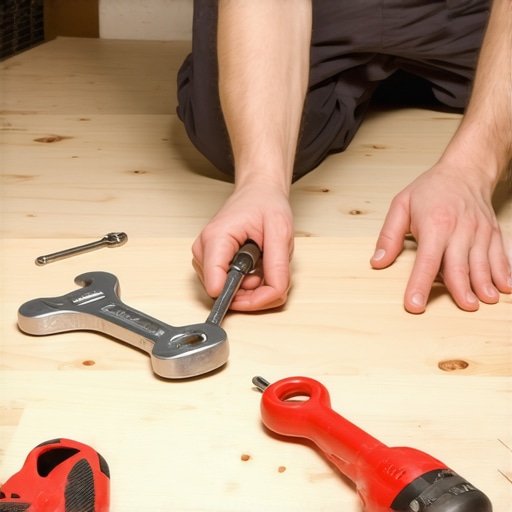
It happened unexpectedly one morning. I was standing in my living room, about to start laying new tiles, when I heard that telltale squeak—right beneath my feet. You know the one—the high-pitched alarm that seems to echo through the entire room whenever someone walks by. I almost froze, realizing I might have overlooked an essential step that could ruin my entire flooring project. That moment of frustration turned into a lightbulb moment: I needed to fix that squeaky subfloor first.
Why a Squeaky Subfloor Can Ruin Your Flooring Project
A squeaky subfloor isn’t just an annoyance—it’s a warning sign of underlying issues that, if ignored, can lead to costly repairs down the line. When the subfloor flexes or shifts, it creates pressure points that will cause your new flooring to crack, warp, or come loose prematurely. In fact, according to industry experts, ignoring such problems can significantly reduce the lifespan of your flooring, making your investment less worthwhile. Properly addressing squeaks involves more than just a quick fix; it’s about ensuring a solid foundation for years of beautiful, trouble-free floors.
Have you ever laid new flooring only to find it creaking or shifting afterward?
This common mistake early in my DIY journey taught me a vital lesson. I once skipped the step of thoroughly examining and fixing my subfloor, thinking that it was in good shape. The result? Months later, my floors started squeaking every time I stepped on them—a constant, irritating reminder that I hadn’t set a proper base. That experience made me realize how critical it is to invest time in fixing a squeaky subfloor before proceeding. Don’t make the same mistake; understanding how to tackle this problem can save you a lot of headaches and money later on.
If you’re ready to ensure your new floors stay silent and sturdy, keep reading. I’ll guide you through proven techniques to identify and fix those squeaks effectively. For a comprehensive understanding of how to prepare your subfloor, you might find it helpful to review this detailed guide on floor leveling.
Identify the Source of the Squeak and Prepare
Start by locating exactly where the squeaks occur. Walk across the floor while listening carefully, noting high-traffic spots. Use a flashlight to inspect accessible areas for gaps between subfloor and joists. Once pinpointed, clear the area of furniture and debris to work uninhibited. Wear safety glasses and gloves to protect yourself during the process.
Remove Baseboards if Necessary
Gently detach baseboards near the squeaky areas with a pry bar, taking care not to damage the drywall. This gives you unobstructed access to the subfloor edges. Label pieces for reinstallation. Doing this early prevents surprises and saves time during reassembly.
Access the Subfloor for Inspection
If your floor is above a basement or crawl space, crawl underneath and examine the space beneath your problem areas. Look for loose nails, cracked framing, or gaps where the subfloor meets joists. Use a stud finder with depth capability if needed. This assessment guides your repair approach and prevents unnecessary work.
Tighten and Secure Loose Joists and Subfloor
For loose or squeaking joists, apply construction adhesive between the joist and subfloor for a tighter bond. Drive screws, not nails, through the subfloor into the joists at 6-12 inch intervals to secure them firmly. Use a drill with a driver bit and a countersink bit to prevent damage. Think of this like tightening loose teeth — firm, strategic bolts prevent future movement.
When screwing, apply consistent pressure and keep the drill perpendicular to avoid damaging the subfloor. Consider using structural screws designed for subfloor fastening, which hold better and minimize splitting. As I discovered in my last repair, properly secured joists and subfloor reduce squeaks dramatically, especially after applying expanding foam in gaps.
Use Squeak-Ender or Shims for Persistent Issues
If squeaks persist after tightening, install a Squeak-Ender device or small shims at the junctions. These devices create friction that prevents movement. To install, lift the subfloor slightly, insert the device or shim between the joist and subfloor, and secure with screws. This method is akin to squeezing a loose door hinge—eliminating movement at critical points.
Lubricate and Seal Gaps
Apply a graphite or talcum powder lubricant into any remaining tiny gaps or cracks, then walk over the area to prevent future squeaking. This reduces friction and acts as a temporary barrier. For long-term results, consider sealing gaps with flexible caulk or foam sealant, especially if you notice ongoing movement or shifting.
Reassemble and Retest
Once secured and lubricated, reattach baseboards with finishing nails and touch up paint if necessary. Walk over the repaired sections, listening carefully. If squeaks are gone, you succeeded. If not, revisit the area for missed points or additional loose spots. Remember, patience and precision are key—fast, sloppy work can lead to recurring squeaks.
When it comes to tile and hardwood flooring, many homeowners fall prey to common misconceptions that can jeopardize the longevity and appearance of their investment. Contrary to popular belief, achieving a flawlessly level surface isn’t about rushing through the prep work; it’s about understanding the subtleties of floor flatness and adjusting techniques accordingly. For instance, some think that an even subfloor alone guarantees perfect tile placement, but neglecting issues like slight dips or high spots can lead to cracking or lippage over time. Advanced installers leverage precise tools and perform detailed surface assessments—methods explained in this comprehensive guide—to ensure a durable finish.
One common myth is that screwing down loose floorboards is enough for a squeak-free floor, yet I’ve seen floors still creak because the subfloor remains uneven at a micro-level. This “oops” trap often surprises DIYers who skip targeted leveling, risking future damage. Using shims or structural adhesives precisely at the high spots can dramatically improve sound and stability.
For advanced practitioners, mastering the nuances of substrate moisture control can be a game-changer. Excessive moisture can compromise thinset adhesion, especially with porcelain tiles or engineered hardwoods, leading to costly failures. A study by the Tile Council of North America emphasizes that proper moisture testing before installation significantly reduces grout and tile failure rates. Integrating moisture barriers and proper acclimation tailored to your climate conditions is vital.
Have you ever fallen into this trap? Let me know in the comments. Remember, paying attention to these advanced details can save you time, money, and headaches—so don’t overlook them in your next project. For more insights on avoiding pitfalls, check out our installation pitfalls guide, or explore how to match new flooring seamlessly with existing hardwoods in this article.
Cultivating Your Toolbox for Floor Success
To keep your flooring project looking impeccable over the years, investing in the right tools isn’t just wise—it’s essential. I personally swear by a high-quality cordless oscillating multi-tool, like the Fein MultiMaster, because its precision allows me to make delicate cuts or remove grout without damaging surrounding tiles. This versatility proves invaluable when performing maintenance or adjustments down the line.
Additionally, a digital moisture meter such as the Tramex Moisture Encounter Plus is my go-to device for a quick, non-destructive check of subfloor and hardwood moisture levels. Accurate readings prevent issues like warping or delamination that often stem from moisture fluctuations, especially in climates with high humidity.
Software that Elevates Your Workflow
In today’s tech-driven world, software tools can streamline project management and ensure a flawless finish. I recommend using applications like Levelset to handle permits and logistics, especially if your project scales beyond DIY. For design visualization, tools like SketchUp help me plan floor patterns and transitions, saving time and reducing errors during installation.
Routine Checks to Preserve Your Investment
One habit that pays off is performing seasonal inspections of your floors. Look for signs of wear or subtle shifts, and address them promptly. For hardwood floors, applying a protective layer of floor polish or finish every few years keeps the surface resilient against scratches and moisture ingress. For tiles, sealing grout lines annually with a high-quality sealant like Miracle Sealants 511 Impregnator prolongs their aesthetic and structural integrity.
Long-Term Results Demand Consistency
Installing hardwood or tile flooring isn’t a one-and-done task; it’s an ongoing process. Incorporate regular maintenance checks and cleanings—using pH-neutral cleaners for hardwood, and a damp mop for tile—to sustain the glow. In addition, I suggest referencing this guide to understand how meticulous surface care can prevent bigger issues later.
Scaling Up for Future Projects
If you’re thinking ahead, consider tools that facilitate easy scaling. Modular vacuum systems like the Numatic Henry Hoovers can handle large areas efficiently, maintaining a clean workspace that minimizes debris settling into grout lines or under flooring edges. For large-scale projects, investing in a computer-controlled leveler like the Kraft Tool LevelMaster adaptive screed can ensure even surfaces over expansive areas, laying the groundwork for flawless finishing.
What About Maintaining Floors Over Time?
Once your flooring is in place, sustaining its beauty and durability involves understanding its unique needs. Regularly checking for signs of moisture intrusion, wear, and loose tiles or planks allows you to intervene early. As a proactive measure, I strongly recommend acquiring a comprehensive maintenance kit that includes a specific hardwood floor cleaner, grout rejuvenator, and a moisture meter for ongoing peace of mind. Remember, building a routine around preventive maintenance ultimately protects your investment and simplifies future repairs.
Looking to elevate your skills even further? Try implementing a quarterly inspection schedule using the tools mentioned, and watch how minor issues stay minor. For detailed strategies on ensuring longevity, don’t miss this step-by-step guide.
The Hardest Lesson I Learned About tile, floor leveling, flooring installation, hardwood floors
One of the most humbling experiences in my DIY projects was realizing that neglecting a thorough subfloor assessment could lead to long-term issues like creaking, shifting, or even premature failure. I learned the importance of patience and precision, understanding that rushing the prep work often results in costly setbacks. This lesson pushed me to master detailed inspections and proper fastening techniques, transforming my approach from trial and error to confident craftsmanship.
3 Myths About tile, floor leveling, flooring installation, hardwood floors That Held Me Back
Early on, I believed that a perfectly even subfloor was enough, only to discover subtle dips and high spots sabotaged my tile’s integrity. I also thought screwing down loose boards was a quick fix, but without addressing underlying flex, squeaks persisted. Lastly, I assumed moisture control was optional — neglecting this step led to warping and delaminating down the line. Dispelling these myths, I now rely on precise surface assessments, shims, and moisture testing, ensuring my floors stay flawless for years.
What Experts Won’t Tell You About tile, floor leveling, flooring installation, hardwood floors
Many professionals keep quiet about the meticulous prep work involved—like using laser levels or digital moisture meters—that can dramatically improve installation quality. They understand that achieving long-lasting, beautiful floors is as much about detailed groundwork as it is about aesthetic choices. Embracing these insider tips, such as careful substrate preparation and step-by-step surface assessments, has revolutionized my results and saved me from future headaches.
My Essential Toolkit for tile, floor leveling, flooring installation, hardwood floors
Over the years, I’ve curated a set of tools I trust for flawless results. A high-quality cordless oscillating multi-tool allows me to make precise cuts and grout removal without damaging surrounding areas, streamlining repairs. A reliable moisture meter, like the Tramex Moisture Encounter Plus, ensures the subfloor and hardwood are at optimal moisture levels—crucial for avoiding warping. For leveling large areas, a professional-grade leveler like the Kraft Tool LevelMaster delivers consistent thickness and flatness. These tools, combined with a passion for detail, elevate every project I undertake.
Books That Changed How I View tile, floor leveling, flooring installation, hardwood floors
Reading comprehensive guides like “The Ultimate Guide to Floor Leveling” unlocked my understanding of surface preparation. Diving into technical manuals and industry standards helped me grasp the nuances of substrate moisture, structural support, and perfect tiling techniques. These resources remain my go-to references, inspiring me to continually refine my skills and stay ahead in the craft of durable, stunning floors.
Your Turn to Try
Embarking on a flooring upgrade is both an art and a science— requiring patience, attention to detail, and the right mindset. Remember, every squeak or uneven surface is an opportunity to learn and improve. By gradually building your toolkit of knowledge and skills, you not only elevate your space but also enjoy the satisfaction of craftsmanship that lasts. Don’t shy away from embracing those complex steps; they’re the foundation of floor perfection. How will you start applying these insights in your next project? Share your plans below and let’s grow together in this journey of flooring mastery.