
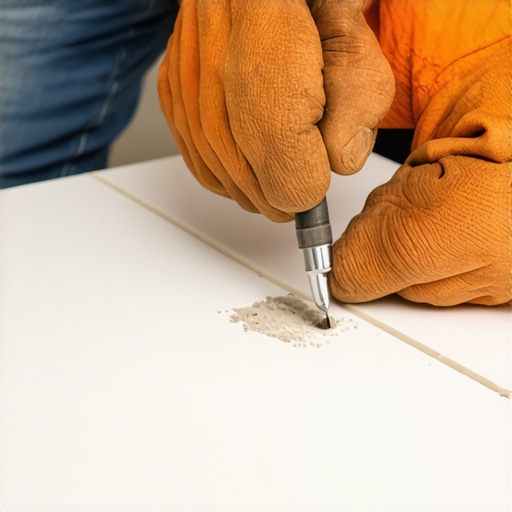
One morning, I leaned down to grab my coffee mug, and suddenly, I felt that sickening crunch under my foot. There it was—a small but undeniable chip in my beautiful porcelain tile. At first, I thought, “Well, that’s just my luck,” and considered tearing out the entire section of floor. But then I had a lightbulb moment: could I really repair that tiny flaw without going through the hassle and expense of replacing the whole tile? Turns out, yes—and quite successfully too!
Why a Tiny Chip Doesn’t Have to Turn into a Major Problem
Like many homeowners, I used to believe that any damage to porcelain tiles meant instant replacement. But honestly, that’s not only costly but often unnecessary. A small chip can actually be fixed with some patience and the right techniques. Repairing chips preserves the seamless look of your floor, saves money, and prevents the hassle of tearing out perfectly good tiles. Plus, there’s a bit of satisfaction in being able to do it myself—no fancy skills required, just some know-how and a gentle touch.
Is a DIY Fix Actually Worth the Hype?
I admit, early in my DIY journey, I made the mistake of rushing into repairs without proper prep. That led to uneven finishes and a wasted weekend. But after some research and trial-and-error, I learned the importance of specific materials and patience. Did you know that using the right epoxy or filler can make your repair nearly invisible? You can maintain the beauty and integrity of your floor without the steep costs of wholesale replacement. For more insights into DIY flooring repairs, check out this guide.
If you’ve ever faced a similar dilemma—seeing a tiny chip grow into a crack or ruin the visual flow—you’re not alone. Many homeowners hesitate to take action, fearing they’ll do more harm than good. But with the proper approach, tiny chips become just a minor blemish rather than a major eyesore.
In the sections ahead, I’ll walk you through step-by-step how to fix that small chip, restore your tile’s pristine look, and avoid common pitfalls that can turn a simple repair into a larger problem.
Preparing Your Workspace and Tools
Before diving into the repair, clear the area around the chipped tile to prevent dust or debris from contaminating your work. Gather essential tools: epoxy or specialized tile filler, a small palette knife or spatula, fine-grit sandpaper, a toothbrush, rags, and possibly a color-matching pigment. In one instance, I cleared my living room corner and set up a portable work light to ensure detailed visibility during the repair process.
Cleaning and Fixing the Chip
Clean the Damage Area
Start by removing loose debris from the chip with a toothbrush or soft brush. Wipe the area with a damp cloth to eliminate dust and grease, then let it dry completely. I once used a damp cloth with a bit of rubbing alcohol for stubborn grime, which significantly improved the adhesion of the filler afterward.
Mixing the Filler
Prepare your epoxy or tile filler according to manufacturer instructions. For a more seamless blend, add a tiny amount of color-matching pigment, which I did by mixing a drop into the epoxy, matching my tile’s hue. This extra step minimized the appearance of the repair and saved me from additional coloring later.
Applying the Filler
Use a small spatula or palette knife to fill the chip gently, pressing the mixture into the crack or gap. Overfill slightly to account for shrinkage during curing. I once overfilled and used a damp finger to press the filler evenly, smoothing out excess and reducing the need for sanding later.
Finishing Touches for a Seamless Look
Sanding and Smoothing
Once the filler has fully cured (per the product’s instructions, usually 24 hours), gently sand the area with fine-grit sandpaper until flush with the tile surface. During my first attempt, I avoided over-sanding, which kept the finish smooth without damaging the surrounding glaze.
Cleaning and Final Inspection
Wipe the repaired area with a damp cloth to remove dust. Inspect closely to ensure the fill blends well; if necessary, apply a thin layer of matching epoxy or gloss to restore the tile’s shine. I recommend testing this on a hidden edge first to perfect your method before final touch-up.
Additional Tips to Ensure Success
Work in a well-ventilated space, and wear gloves to prevent skin contact with epoxy. Patience is key—rushing the process can result in uneven surfaces or visible repairs. For a more detailed guide on tile repairs, consider reviewing floor leveling tips to ensure your substrate remains in optimal condition before repairs.
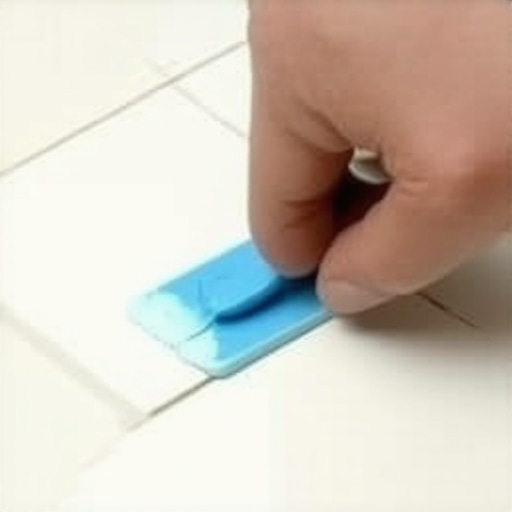 When it comes to hardwood floors, flooring installation, and tiling, many homeowners fall prey to misconceptions that can lead to costly mistakes. A prevalent myth is that hardwood floors are too delicate for high-traffic areas, but with proper finishing and maintenance, engineered hardwood can last decades in busy spaces. Similarly, the belief that all tile adhesives are interchangeable overlooks the nuances of substrate compatibility, which can compromise durability if not properly addressed. Advanced installers understand that proper floor leveling is crucial for preventing future cracks and uneven wear, yet many skip this step or use generic products, risking long-term failure. For a comprehensive guide on achieving a perfect finish, check out expert refinishing tips.
One oops factor often overlooked is the temptation to rush the curing process. Whether applying a topcoat or setting adhesive, patience is vital. Rushing can trap moisture or cause incomplete bonding, leading to tiles popping or finish peeling. A common mistake is neglecting environmental conditions; high humidity or excessive dryness can hinder proper curing. Experts recommend monitoring moisture levels with specialized meters, as shown in this resource, to ensure optimal results.
How can you master the nuances of floor leveling to avoid hidden cracks?
Addressing uneven subfloors isn’t just about using self-leveling compounds blindly. Many professionals emphasize the importance of assessing subfloor moisture, material type, and existing imperfections before choosing the right product and application method. For example, using the wrong primer can cause the leveler to peel or crack, negating the entire effort. This is elaborated upon in this detailed guide. Remember, the devil is in the details—skipping these steps can turn a minor imperfection into an observable flaw that ruins your entire project.
Finally, don’t assume that inexpensive materials are a saving; in many cases, cheap leveling compounds or adhesives contain fillers and additives that impair bonding or curing. Investing in high-quality products pays off, especially when working on high-end materials like marble or hardwood. Well-placed shims, proper subfloor preparation, and selecting the right sealing techniques are the hidden nuances that truly elevate your flooring’s longevity. To learn more about avoiding costly mistakes, review common installation errors.
In sum, mastering flooring installation isn’t just about following steps—it’s about understanding the complex interplay of materials, environment, and technique. Do you want your floors to stand the test of time? Then pay attention to these lesser-known pitfalls and nuances. Have you ever fallen into this trap? Let me know in the comments.
Keep Your Floors Functioning Like New
Ensuring your hardwood and tile floors stay in top shape over the years requires more than just initial installation. Regular maintenance, the right tools, and a few expert tips can dramatically extend their lifespan and beauty. In this section, I’ll share my trusted equipment and actionable strategies to keep your floors working efficiently for the long term.
Invest in Quality Cleaning Equipment
I always recommend using a high-quality vacuum with a soft brush attachment for routine cleaning. A vacuum like the Dirt Devil Endura Reach effectively removes debris from grout lines and hardwood crevices without scratching surfaces. For wet cleaning, a microfiber mop combined with a pH-balanced cleaner, such as this hardwood floor cleaner, ensures dirt removal without damaging the finish. Consistent, gentle cleaning prevents grime buildup that can deteriorate your floors over time.
Use Precise Floor Leveling Tools
When resurfacing or repairing floors, precise leveling tools are essential. I personally rely on a laser level like the DeWalt DW089LG to detect uneven spots. Its accuracy helps me identify high or low areas, allowing me to apply self-leveling compound precisely where needed. Proper leveling prevents future cracks and ensures tiles and hardwoods sit flush, which is vital for long-term durability. To achieve flawless surfaces, review these expert-level leveling techniques.
Monitoring Environmental Conditions Maintains Integrity
Controlling humidity and temperature is crucial for hardwood flooring. I recommend a digital hygrometer like the ThermoPro TP50 to monitor indoor conditions. Maintaining relative humidity between 30% and 50% prevents wood from expanding or contracting excessively. Additionally, a quality dehumidifier or humidifier, depending on your climate, helps stabilize moisture levels, safeguarding your investment. For detailed insights, check out this long-term maintenance guide.
Predicting Future Trends in Floor Maintenance
Looking ahead, I see an increased emphasis on smart home devices integrating environmental sensors. These innovations will automatically alert homeowners to humidity or temperature fluctuations, enabling proactive care. Moreover, advancements in durable finishes mean floors will need even less frequent refinishing, as seen with urethane-infused sealants gaining popularity. Staying updated on emerging technology and tools will empower homeowners to maintain their floors effortlessly and efficiently.
How do I maintain my floors over time?
Developing a regular care routine with the right equipment, such as effective cleaning tools and precise leveling instruments, ensures your floors stay resilient. Incorporating environmental monitoring helps prevent damage caused by moisture fluctuations. For more comprehensive strategies, explore this article on flooring longevity. Remember, investing in quality tools and consistent maintenance now saves you from costly repairs later. Try implementing a weekly cleaning routine with microfiber mops and check your humidity levels periodically—you’ll notice a significant difference in your floors’ longevity and appearance.
The Shocking Truth About DIY Floor Fixes I Didn’t See Coming
One eye-opening lesson I learned was that patience outweighs haste—rushing leads to imperfect repairs. Another revelation was that investing in quality materials early on saves time and money in the long run. And perhaps most surprisingly, I discovered that understanding the intricacies of floor leveling can dramatically prevent future cracks, a detail many overlook. These insights made my flooring projects more successful and rewarding, highlighting that persistence and knowledge truly pay off.
Tools, Books, and Resources That Elevated My Expertise
My go-to kit includes a high-quality laser level like the DeWalt DW089LG for precision. For deepening my understanding, this refinishing guide became invaluable. When tackling leveling projects, I rely on expert techniques that ensure flawless results. Lastly, consulting trusted materials at this resource helps avoid costly mistakes, shaping my approach with confidence.
Keeping Floors Beautiful and Strong—My Personal Affirmation
Your dedication to mastering flooring not only elevates your home’s beauty but also instills pride in your craftsmanship. Remember, each project is a step toward creating a space that lasts and impresses. Don’t hesitate—start that repair, consider these tools and tips, and watch your floors transform from ordinary to extraordinary. Your journey into durable, flawless flooring begins now, and I believe in your ability to succeed. What’s the next flooring challenge you’re eager to conquer? Share below—I’d love to hear your plans.
,