
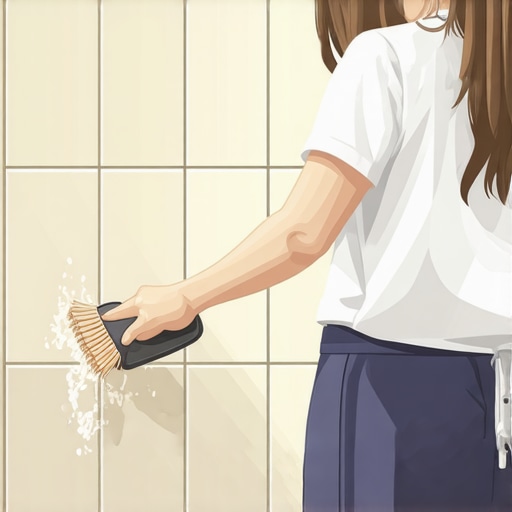
It all started with a simple weekend project that went awry. I vividly remember kneeling on my kitchen floor, scrubbing away enthusiastically, only to realize my efforts had somehow dulled the shiny sealant on the grout. That frustrating moment hit me hard—there had to be a better way. Over time, I discovered that cleaning grout isn’t just about getting rid of dirt; it’s about preserving the protective seal that keeps your tiles looking pristine and lasts for years. Today, I want to share how I learned to clean grout effectively without stripping away that precious sealer, and how you can do the same.
Why Proper Grout Cleaning Matters More Than You Think
If you’ve ever wrestled with stubborn stains or noticed discoloration in your grout lines, you’re not alone. Grout acts as the foundation that holds everything together, quite literally. But frequent cleaning can be tricky. Use harsh chemicals or abrasive tools, and you risk damaging or removing the sealer that guards against stains and moisture infiltration. The result? You might think you’re cleaning, but you’re actually inviting long-term damage. A surprising statistic from the Tile Council of North America highlights that improperly maintained grout can lead to costly repairs down the line, emphasizing the importance of gentle, proper cleaning techniques.
Is It Really Possible to Clean Grout Without Stripping the Sealer?
When I first started exploring solutions, I made a critical mistake: I used bleach and heavy-duty cleaners. These might seem effective initially, but I quickly learned they can erode the sealer and leave your grout more vulnerable over time. If you’re worried about wasting time and money on cleaning methods that do more harm than good, you’re not alone. But fear not—I’ve found methods that strike a balance between cleanliness and protection. Want to learn which one worked best for me? Keep reading, and I’ll show you step-by-step how to get your grout sparkling without risking that vital sealant.
Select Gentle Cleaning Solutions for Optimal Results
Start by choosing a pH-balanced, non-abrasive cleaner specifically designed for grout. I remember wiping down my bathroom tiles with a DIY mix of baking soda and water; it was mild yet effective, ensuring the sealant remained intact. Avoid harsh chemicals like bleach or ammonia, which can weaken or remove the sealer over time. Reading product labels and opting for sealant-friendly formulas will save you money and preserve your grout’s longevity.
Use Soft Tools to Avoid Damage
Next, gather a soft-bristled brush or a microfiber scrub pad. These tools gently lift dirt without scratching or eroding the sealer. I once used a nylon scrub brush on my kitchen backsplash, applying light pressure; the dirt lifted easily, and the seal remained pristine. Refrain from metal brushes or abrasive pads, as they are similar to using a steel wool pad on a painted wall—they can cause permanent damage and compromise the protective layer.
Apply Cleaner with Care and Precision
Spray or dab the chosen cleaner onto the grout lines, ensuring even coverage. Let it sit for 5-10 minutes to loosen soil. During my project, I used a spray bottle to target stubborn spots, making sure not to oversaturate the surrounding tiles. Excessive moisture can seep into the grout and weaken the seal, so control the application. Avoid pouring large amounts directly onto the grout to minimize water infiltration beneath the tiles.
Scrub Gently for Deep Cleaning
After the cleaner has set, gently scrub the grout with your soft tool. Think of this as massaging the dirt out rather than scraping it away forcefully. I recall tackling a particularly stained shower grout, using light circular motions. This approach lifted stains without abrasive action, and my seal remained intact. Aggressive scrubbing can remove the sealer and create tiny scratches, diminishing the grout’s appearance and protection.
Wipe and Dry to Seal in Freshness
Use a clean, damp cloth to wipe away loosened dirt and excess cleaner. Follow with a dry microfiber towel to eliminate residual moisture. In my experience, thoroughly drying the grout prevents water from seeping in and weakening the seal over time. A quick, thorough wipe preserves the shine and prevents mold or mildew growth, which often thrives in damp, uncleaned grout lines.
Additional Tips for Maintaining Your Grout
Regular cleaning using these gentle methods prolongs the life of your sealant. Consider reapplying a high-quality sealant every 1-2 years, especially in high-moisture areas. Proper maintenance ensures your tiles stay not only clean but also protected against stains and moisture damage. For complex installation issues or persistent problems, consulting experts through resources such as our contact page can provide tailored solutions. Remember, patience and gentle care are your best allies in preserving your tiles’ beauty and durability.When it comes to flooring, many homeowners and even professionals cling to common beliefs that aren’t supported by modern best practices. Let’s dig deeper into some of these misconceptions and reveal the nuances that can save you time, money, and headaches. One widespread myth is that the most expensive materials and tools automatically guarantee the best results. In reality, proper installation technique and understanding substrate preparation matter more than brand names or premium products; for an in-depth guide, check out these essential flooring installation tips. Another misconception is that floor leveling is a minor step—something you can skip or rush. But uneven subfloors are a leading cause of cracked tiles, squeaky hardwoods, and premature wear. Neglecting proper leveling can doom your project from the start; for detailed strategies, visit these step-by-step leveling techniques. Many assume that tile installation is purely about selecting thinset and grout, but the real secret lies in surface prep. Dirty, oily, or uneven substrates sabotage adhesion and cause long-term failures. Investing in proper cleaning and priming, as shown here, makes all the difference.
An advanced question arises: How does substrate flexibility influence joint movement and crack prevention in large-format tiles? This issue isn’t often appreciated but is crucial for large spans. As per recent studies from the Tile Council of North America, substrate movement significantly impacts tile cracking under thermal and load stresses, especially in commercial or open-concept residential spaces. Ensuring your subfloor is adequately reinforced or using flexible membrane systems can dramatically extend the life of your installation.
Beware of the trap of over-adhesion—trying to make tiles or planks fit perfectly by forcing adjustments can damage the materials or result in crooked lines. Learn to plan your layout carefully before starting, as discussed in these professional tips. Remember, patience and attention to detail are your best allies. Do you have a flooring project that didn’t go as planned? Share your story in the comments and let’s help each other avoid these pitfalls.
Keeping your flooring in top shape requires the right tools and a proactive approach
Investing in high-quality equipment is crucial to ensure your hardwood, tile, or other flooring types stay durable and beautiful over time. Personally, I rely on a combination of professional-grade moisture meters, such as the Tramex Moisture Encounter, to monitor moisture levels in subfloors before installation or repair. This ensures you avoid common issues like warping or adhesion failure, especially in moisture-prone environments. Additionally, a powerful, versatile oscillating multi-tool, like the Fein Multimaster, is indispensable for precision cuts and detailed refinishing jobs, saving time and preventing accidental damage. Regular maintenance also involves using products specifically formulated for your flooring type; for hardwoods, I recommend treatments like the hardwood floor care kit from here, which preserve shine and prevent wear.
Embracing routine inspections and minor repairs last longer between major overhauls. For example, checking grout lines periodically with a small screwdriver or scraper helps spot early cracks or deterioration, allowing for timely sealing or regrouting. Remember that preventative measures often outweigh costly repairs, especially when combined with proper cleaning routines discussed earlier.
How do I maintain elegant flooring over time?
The future of flooring maintenance is moving towards smart systems that monitor environmental conditions continuously. Innovations like integrated humidity sensors and automated sealing systems could become commonplace by 2030, providing homeowners with real-time alerts and automated repair suggestions. This trend emphasizes the importance of investing in durable materials and smart maintenance tools now.
If you aim to keep your floors looking pristine, consider adopting advanced techniques like the precise floor leveling methods for any underlying issues that may cause uneven surfaces. Properly leveled floors not only look better but also reduce stress on joints and finish layers, extending their lifespan significantly.
Begin by implementing a regular maintenance schedule that includes using specialized tools and trusted cleaning solutions. For instance, incorporating a high-quality microfibre mop combined with a pH-neutral cleaner can effortlessly remove dirt without damaging sealants or finishes. Don’t forget to revisit your maintenance routine periodically, especially after major seasons changes that could affect floor stability.
As flooring technology evolves, staying updated with the latest maintenance tools and techniques becomes more important than ever. Take the initiative today by trying out a moisture meter or scheduling a professional inspection to detect unseen issues early. This small step can save you from costly repairs and keep your investment shining for decades to come.
Lessons from My Flooring Journey That Changed Everything
One of the most eye-opening lessons I learned is that patience beats force every time. Trying to rush a grout cleaning or sealer application often leads to mistakes that are costly and time-consuming to fix. Learning to read the subtle signs—like moisture levels or the texture of your grout—can save you from unnecessary headaches. Additionally, understanding that not all sealants or cleaning products are created equal transformed my approach, making me more strategic and cautious in my maintenance routines. It’s these small, personal epiphanies that elevate your flooring care from routine chore to an art form.
Another vital insight was realizing that the tools you choose are just as important as the solutions you use. Investing in soft brushes and microfiber cloths, for example, pays dividends in preserving your grout’s integrity and prolonging the life of your sealant. I also discovered that every surface responds differently—what works in my kitchen might not be suitable for a delicate bathroom tile. Experimenting cautiously and observing results helped me develop a tailored routine that ensures longevity without compromise.
Lastly, the importance of regular, proactive maintenance cannot be overstated. Small checks and cleanings prevent big problems down the line. I now schedule quarterly inspections, just like I do with my car, ensuring everything remains in top condition. This preventative mindset means fewer surprises and a consistently stunning finish that boosts my home’s overall appeal.
My Go-To Resources for Flooring Success
Over the years, I’ve come to rely on a handful of trusted resources that keep me informed and equipped. First and foremost, this guide on common flooring mistakes has been instrumental in helping me avoid pitfalls during installation and maintenance. It offers practical tips that are easy to implement and backed by industry expertise. For product-specific advice, the Hardwood Floor Care Secrets page provides insights into preserving shine and preventing damage over time. And when I need professional help or specialized tools, consulting with experts offers peace of mind, knowing that my investment is protected. These resources together form an arsenal that empowers me to make informed decisions, ensuring my flooring stays beautiful and functional for decades.
Transform Your Floor, Transform Your Life
Investing in the health and beauty of your flooring isn’t just about aesthetics—it’s about creating a space where you feel comfortable, proud, and at peace. Every sweep, every gentle scrub, and every carefully chosen sealant contributes to a home that reflects your care and attention. So, don’t wait for that stubborn stain or pesky squeak to become a crisis; start applying these expert tips today and watch your floors transform into a signature feature of your home. Remember, the journey to perfect flooring is ongoing, and every small step brings you closer to flooring mastery.