I remember the moment I realized my first hardwood floor project wasn’t going as planned. That squeaking sound every time I stepped on a section, the uneven patches that seemed to emerge out of nowhere—that lightbulb moment hit hard. It was clear I had overlooked some crucial steps, and soon enough, I was dealing with costly repairs and frustration. If you’ve ever experienced that sinking feeling, you know exactly what I mean. But here’s the good news: with the right knowledge, you can avoid the pitfalls and ensure your hardwood floors stay stunning for years to come.
Why Proper Hardwood Floor Installation Matters More Than Ever in 2025
In today’s home improvement world, more homeowners are investing in quality hardwood floors. Not only do they add timeless elegance, but they also significantly boost property value. According to industry research, a well-installed hardwood floor can last over 100 years, making it a smart long-term investment. However, the key to their longevity lies in the installation process itself. If done incorrectly, even the most expensive hardwood can develop issues like warping, uneven surfaces, or squeaks, making all that investment futile.
Many DIY enthusiasts and even some professionals underestimate how critical proper leveling and moisture control are in hardwood installation. This oversight often leads to costly repairs down the line. Personally, I once skipped [precise floor leveling techniques](https://tiletrendshop.com/precise-floor-leveling-techniques-to-achieve-flawless-surfaces), thinking minor imperfections wouldn’t matter. But, within a few months, those tiny flaws turned into noticeable gaps and creaks. Don’t make the same mistake.
In 2025, the focus is sharper than ever on achieving durable, beautiful floors that stand the test of time. That’s why I’m diving into proven strategies that will help your floor installation be both flawless and long-lasting. Ready to turn your space into a true showstopper? Let’s explore how to do it right from the start.
Is Skipping Professional Tech Enough to Save Money and Time?
One of the biggest skeptics I hear is, “Can’t I just do this myself and save a few bucks?” Trust me; I’ve been there. Early on, I thought I could cut corners, but the mistakes I made only set me back. The truth is, professional techniques—like precise floor leveling and moisture barrier application—are essential for lasting results. For example, I once neglected to check humidity levels, which led to buckling after just a couple of months. It’s a mistake I’ll never repeat, especially after learning that proper moisture management, as outlined in [expert installation strategies](https://tiletrendshop.com/expert-floor-leveling-hardwood-floors-installation-tips-for-2025), can dramatically extend the life of your floors.
So, before you jump into your project, consider investing a little time in learning the core principles. It will save you money, time, and a whole lot of headaches in the long run.
Achieving a Flawless Base with Precision Floor Leveling
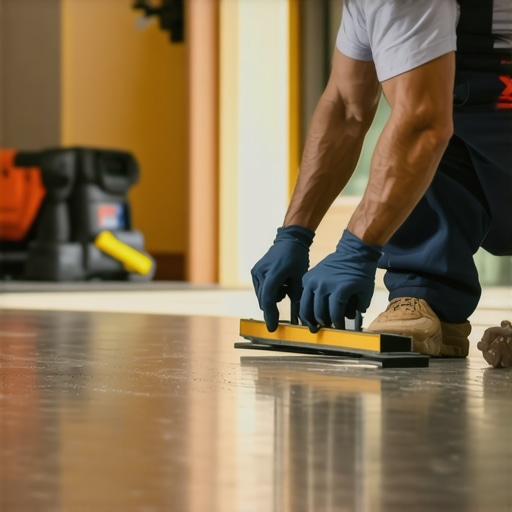
Ensuring your subfloor is perfectly level is the first and most crucial step in any flooring project. Think of it as laying a foundation for a house—you can’t build a stable structure on uneven ground. I once attempted to ‘eyeball’ the levelness while installing a hardwood floor, which resulted in noticeable gaps and squeaks over time. To avoid this, I now use a laser level or self-leveling compounds to identify high and low spots accurately. Applying these techniques transforms an unpredictable surface into a reliable base, similar to smoothing out wrinkles in fabric before sewing. For detailed strategies, I recommend reviewing precise floor leveling techniques that save time and money over the long run.
Addressing Common Unevenness Challenges
While assessing your floor, watch out for hidden issues like subfloor rot or protruding nails. Using a straightedge or long level, identify high and low points; treat high spots with a grinder or sander, and fill low areas with suitable leveling compounds. This process is much like preparing a canvas before painting—every imperfection will be magnified if left uncorrected, leading to problems down the road. Once the surface is uniformly flat, proceed with confidence knowing your flooring will not flex or squeak underfoot. Remember, proper leveling not only improves appearance but also extends the life of your floor, especially in high-traffic areas.Many homeowners believe that selecting beautiful materials like hardwood or tile guarantees a successful installation, but the real challenge lies in the details many overlook. For instance, a common myth is that leveling the subfloor isn’t critical—nothing could be farther from the truth. In my experience, skipping thorough floor leveling is one of the leading causes of long-term issues such as squeaks, uneven surfaces, and cracking. Achieving a perfectly level base is not just about aesthetics; it’s about durability and longevity. I’ve seen professional-grade flooring fail prematurely because of minor mistakes in the foundational steps. To avoid such pitfalls, I recommend reviewing precise floor leveling techniques that are proven to save time and money in the long run.
How Advanced Techniques Can Save Your Day
One misconception I often encounter is that simple tools are enough for an effective floor leveling process. But the truth is, employing advanced methods—like laser-guided leveling and self-leveling compounds—can dramatically improve accuracy. These tools help identify subtle unevenness that might elude the naked eye, preventing ‘oops’ moments down the line. For example, ignoring humidity levels during installation can lead to warping or buckling within just a few months. Industry expert insights confirm that proper moisture management is essential; I recommend exploring expert strategies for floor leveling in 2025 to stay ahead. Such nuances often make the difference between a durable finish and a costly redo. Don’t assume that you can just ‘eyeball’ the surface—precision matters more than ever. This approach not only applies to leveling but also to ensuring the subfloor’s structural integrity, especially if you’re working with older homes where decay or protrusions are common. Remember, overlooked issues such as subfloor rot or protruding nails can sabotage your project. Using a straightedge or long level helps identify hidden problems early, saving you from surprises later. Keep in mind that investing time in proper prep work is as vital as choosing the right materials. For a comprehensive understanding, check out the ultimate guide to floor leveling. Have you ever fallen into this trap? Let me know in the comments.Once your flooring is installed flawlessly, keeping it looking new and functioning perfectly over the years requires the right tools and a dedicated maintenance routine. Personal experience has taught me that investing in quality equipment not only prolongs your floor’s life but also makes any necessary repairs or touch-ups much more manageable.
Must-Have Tools for Maintaining Your Floors
One of the most versatile tools I rely on is a microfiber dust mop, like the *O-Cedar® Microfiber Flip Mop*. It captures fine dust and debris without scratching the surface, which is crucial for hardwood and tile floors. I use it daily to prevent dirt from settling into the grain or grout lines, which can cause long-term damage.
For deeper cleaning, I turn to a pH-neutral cleaner specifically designed for your flooring type. For hardwood, I prefer *Bona Hardwood Floor Cleaner* because it’s gentle yet effective, helping to preserve the finish. For tiles, I recommend a steam cleaner like the *McCulloch MC1275 Heavy-Duty Steam Cleaner*, which uses high heat to eliminate stubborn grime without harsh chemicals. Steam cleaning also helps sanitize the surface, maintaining a healthier home environment.
A detail-oriented tool I cannot do without is a flexible grout brush, especially for tile floors. It reaches into grout lines, loosening dirt and preventing discoloration. Regular use prevents buildup that can crack or stain the grout over time.
Practicing Routine Maintenance for Longevity
Consistent cleaning is the foundation of durable floors. I schedule bi-weekly deep cleans using my steam cleaner to remove any hidden residual dirt and to refresh the surface. Additionally, applying a protective sealant to grout lines every few years can prevent staining and deterioration—an often-overlooked step that can save a lot of trouble.
Protecting your floors from scratches involves more than just cleaning tools. I always recommend felt pads on furniture legs and area rugs in high-traffic zones. These simple steps distribute weight more evenly and prevent scratches, preserving the floor’s aesthetic appeal.
How do I maintain hardwood and tile floors over time?
Regularly inspect your flooring for signs of wear or damage. Address scratches on hardwood with light sanding followed by reapplication of finish—something I’ve mastered using a palm sander and the right varnish. For tiles, examining grout lines for cracks and re-sealing as needed ensures water doesn’t seep in and cause damage.
Keep humidity levels stable—ideally between 35-55%. Fluctuations cause expansion and contraction, which can lead to gaps or buckling. I use a hygrometer and a humidifier/dehumidifier combo, especially in seasonal transitions. For detailed strategies on maintaining tight control over the environment, check out hardwood floor care secrets.
Mastering proper cleaning tools and routine checks can dramatically extend the lifespan of your floors. Don’t underestimate the power of regular maintenance; it’s your best defense against costly repairs down the line.
If you want to step up your game, try a monthly application of a high-quality floor polish or wax suitable for your material. This adds a protective layer that deflects scratches and stains. Consistency is key, and over time, you’ll see your investment pay off with floors that stay stunning for decades. Remember, proactive upkeep with the right tools ensures your floors continue to impress and endure, making every penny spent worthwhile.
The journey to perfect flooring isn’t just about selecting beautiful materials; it’s a deep commitment to the foundational steps that ensure longevity and beauty. My experience taught me that overlooking small details like precision leveling or moisture control can turn a dream project into a costly nightmare. Now, I realize that every seasoned expert has faced those lightbulb moments—those lessons learned from mistakes that could have been avoided with the right knowledge.
What Surprised Me About Flooring Success They Don’t Tell You
- Deep Leveling Matters More Than You Think: I used to believe eyeballing the surface was enough—until tiny imperfections caused squeaks and gaps within months. Testing with laser levels changed my approach forever.
- Moisture Control is a Game Changer: Signs of buckling taught me that humidity checks and moisture barriers aren’t optional—they’re critical for durability.
- Tools Make the Difference: Investing in advanced leveling tools and quality sealants made my install smoother and results last longer. Trusting the right resources accelerates mastery.
- Preparation Prevents Problems: Deciding to skip subfloor repairs was a costly mistake. Proper inspection and fixing underlying issues saved me from future headaches.
- Learning is a Continuous Process: Even now, I review industry strategies and keep up with expert insights such as floor leveling techniques for 2025. Staying updated makes all the difference.
Tools and Resources That Elevated My Craft
- Laser Level and Self-Leveling Compounds: Precision tools that transformed uneven surfaces into pristine foundations.
- Moisture Meters: Knowing your environment prevents future issues—an unmissable step for hardwood and tile projects.
- Quality Sealants and Floor Protectors: Protects your investment and enhances the lifespan of your floors.
- Industry Guides and Tutorials: Resources like expert-level leveling techniques and community forums keep your skills sharp and your results reliable.
Your Next Step Toward Flooring Excellence
Now, it’s your turn to elevate your flooring projects. Embrace meticulous preparation, invest in the right tools, and seek continual learning. Whether you’re remodeling a single room or upgrading your entire home, these principles empower you to achieve stunning, durable results that stand the test of time. Remember, confidence in your craft grows with each successful project—so take that first step today and trust in your ability to create a space you’ll love for years to come.
What has been your biggest challenge in flooring installation, and how did you overcome it? Share your story below—I’m eager to hear about your journey!
,
This post really hit home for me, especially the emphasis on thorough preparation like precision floor leveling. I’ve experienced first-hand how skipping this step can lead to squeaks and uneven surfaces just a few months later. Using laser levels and self-leveling compounds has truly transformed my DIY projects, saving me both time and money in the long run. I also agree that consistent maintenance, like regular cleaning and inspecting humidity levels, plays a huge role in preserving the beauty of hardwood floors. One challenge I faced was with moisture fluctuations in my old house, which caused some gaps to open over time. After researching, I found that installing a good vapor barrier and using a hygrometer to monitor humidity levels regularly made a significant difference. Has anyone here tried using environmental controls to optimize floor longevity? Would love to hear your tips or experiences on managing moisture issues effectively.