I remember the frustration vividly—standing in the middle of a newly tiled floor, realising that despite my best efforts, the surface was uneven, causing tiles to crack under the slightest pressure. That was my lightbulb moment. I discovered that the secret to flawless tile and floor installation lies in mastering expert-level leveling strategies, especially with the advancements expected in 2025.
Why does this matter now more than ever? Because DIYers and professionals alike are facing higher expectations for durability and aesthetic perfection. The market is flooded with new tools and techniques promising perfect results, but without proper knowledge, many end up with costly mistakes. The good news? You don’t have to be a seasoned contractor to get it right. Today, I’ll guide you through the most effective expert tile and floor leveling strategies for 2025, ensuring your next project is a stunning success.
Why Proper Floor Leveling is the Foundation of Beautiful Surfaces
Before diving into the technicalities, it’s crucial to understand why floor leveling is so vital. An uneven surface isn’t just an aesthetic issue; it can compromise the integrity of your entire installation. Tiles or hardwood floors laid on an uneven subfloor are prone to cracking, shifting, or even detaching over time. According to industry experts, improper leveling is one of the leading causes of flooring failures, costing homeowners and contractors thousands annually.
Early in my career, I made a common mistake — rushing through the leveling process and skipping the meticulous preparation that ensures a flat surface. That oversight led to several callbacks and rework, which could have been avoided with a better understanding of expert strategies. The key takeaway? No matter how beautiful your tiles or hardwood looks, if the foundation isn’t solid, everything else will suffer.
To help you avoid my mistakes and elevate your installation skills, I’ve researched the latest techniques that will dominate 2025. From advanced tools to refined methods, these strategies will help you achieve professional results with less stress and fewer errors. Ready to learn how to level floors like a true expert? Let’s proceed to the first step in mastering this essential skill.
Is Floor Leveling Really Worth the Extra Effort?
Many skeptics wonder if investing time and effort into detailed leveling is justified. I used to think so too—until I saw the difference it made. Proper leveling not only enhances the appearance but also significantly extends the lifespan of your flooring. The industry agrees; a report from the National Tile Contractors Association emphasizes that meticulous surface preparation reduces long-term maintenance costs and prevents premature failure (source).
My early mistake was underestimating the importance of choosing the right leveling compounds and tools, which led to uneven surfaces. Now, with the knowledge I’ve gained, I know that investing in quality materials and precise techniques pays off in the durability and beauty of your floors. So, if you’ve ever wondered whether skipping detailed leveling is a shortcut worth taking, I’ll tell you right now: it’s not.
In the upcoming sections, I’ll walk you through step-by-step strategies that will make your next project flawless. From selecting the best leveling compounds to mastering the latest tools, you’ll discover everything needed to ensure a perfectly even surface for tiles or hardwood floors. Are you ready to transform your installation process? Let’s get started.
,
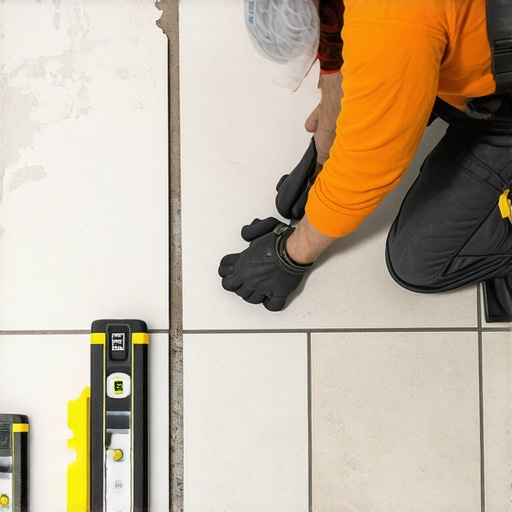
Choose the Right Tools for Precision
Start by selecting high-quality leveling compounds and tools, such as self-leveling underlayments, which are designed for quick, even spreads. I recall a project where I used a premium self-leveling compound that flowed smoothly, creating a perfectly flat surface—saving hours of manual troweling and rework. Using a gauge rake or a notched trowel helps spread the compound evenly, much like a painter spreading paint in a single stroke. For larger areas, consider a laser level to ensure the entire surface is uniformly flat, preventing surprises during tile installation.
Prepare the Subfloor Thoroughly
Clean and Repair
Before applying any leveling compound, sweep and vacuum the surface meticulously. Remove any debris, dust, or loose material that could compromise adhesion. In my experience, neglecting this step leads to uneven settling of the compound, resulting in dips or high spots. For cracks or holes, fill them with a suitable patching compound and allow it to cure fully. This step is like preparing a canvas before painting—nothing should interfere with the smoothness of your surface.
Check for Stability
Ensure the subfloor is stable and firmly anchored. If it flexes underfoot, reinforce it with additional supports or screws. A flexible base will undermine your leveling efforts, causing tiles to crack or shift over time. Think of it as building a foundation for a house—without a solid base, everything else collapses.
Apply the Leveling Compound Correctly
Mix the compound according to manufacturer instructions, aiming for a pourable but not runny consistency. Use a drill with a mixing paddle for uniformity, avoiding lumps that can create uneven spots. Pour the compound in sections, starting from the lowest point and working outward. Use a gauge rake to spread the material evenly, much like a carpenter setting shims to achieve a flush surface. For large areas, work in manageable sections to prevent the compound from setting before you finish.
Utilize Advanced Techniques for 2025
Embrace innovations like laser-guided leveling systems that provide real-time feedback, ensuring ultra-precise flatness. I once integrated a laser level with a moisture meter, which allowed me to monitor both levelness and moisture content simultaneously—a game-changer for complex projects. For intricate areas, use a trowel or squeegee to feather the edges of the compound, blending it seamlessly into the existing surface. This method minimizes transitions and ensures a uniform finish.
Final Checks and Curing
After applying the compound, wait for the recommended curing time—usually 24 hours—before proceeding. During this period, avoid walking on the surface to prevent shifting. Once cured, use a long spirit level or laser level to verify flatness. Small deviations can be sanded down with a fine-grit sander or patched with additional compound if necessary. This step is like fine-tuning a musical instrument—precision at this stage guarantees a perfect finish for your tiles or hardwood floors.
Implementing these expert strategies ensures your flooring project will stand the test of time and look stunning. For more detailed steps on tile installation, check out this comprehensive guide. Whether you’re a DIY enthusiast or a seasoned pro, these techniques will elevate your craftsmanship and results in 2025 and beyond.
Many DIY enthusiasts and even seasoned professionals often get caught up in misconceptions about floor leveling, which can lead to costly mistakes. Let’s dig deeper into what most people overlook or misunderstand. One prevalent myth is that a quick, superficial leveling job is sufficient for long-lasting floors. In reality, surface-level fixes might hide underlying issues like subfloor flex or moisture problems, which can cause future cracks or failure. An expert approach involves comprehensive assessment and addressing root causes, not just surface imperfections. Contrary to popular belief, not all leveling compounds are created equal. Some cheap options may seem attractive initially but tend to crack or shrink over time, compromising the entire installation. Investing in high-quality, industry-approved self-leveling compounds ensures better adhesion, durability, and a smoother finish.
What advanced techniques can professionals use to ensure precision?
One sophisticated method involves laser-guided leveling systems, which provide real-time feedback on flatness, allowing for ultra-precise surface preparation. These tools are game-changers in 2025, especially for large or complex areas.
Another common trap is neglecting proper subfloor preparation. Many underestimate the importance of thoroughly cleaning, repairing, and stabilizing the subfloor before applying leveling compounds. Failing to do so can lead to uneven settling or shifting, even with the best materials.
Furthermore, many overlook the importance of curing time. Rushing the process and walking on the surface prematurely can introduce imperfections, defeating the purpose of meticulous leveling. Patience and adherence to manufacturer instructions are crucial. For more detailed insights, check out this guide on advanced leveling techniques.
Maintaining your flooring and using the right tools is crucial to ensure lasting beauty and durability. Over time, even the best installations can show signs of wear or minor issues, which is why a proactive maintenance routine and the right equipment are essential. In my experience, investing in high-quality tools not only streamlines the process but also extends the lifespan of your floors.
One tool I personally swear by is the laser level. Unlike traditional bubble levels, laser levels provide a precise, 360-degree reference point, making it far easier to detect unevenness or shifts over large areas. This is especially useful for periodic checks in hardwood flooring or tile installations, where slight deviations can cause long-term problems. For example, I recently used a laser-guided leveling system from this resource to monitor a complex tiling project, ensuring flawless flatness throughout.
Another essential is a high-quality vacuum designed for fine dust removal. Dust and debris can settle beneath floors or in grout lines, leading to uneven wear or even moisture retention. I prefer a HEPA-filter vacuum that can be used regularly to keep the surface clean and free of contaminants, which is vital for hardwood refinishing or tile maintenance. This simple step can prevent many issues down the line, prolonging the aesthetic and structural integrity of your floors.
When it comes to maintenance products, I recommend a combination of cleaning solutions tailored to your flooring type and protective sealants. For hardwood floors, a pH-neutral cleaner combined with a microfiber mop keeps surfaces shiny without damaging the finish. For tiles, a grout cleaner and sealant help prevent staining and cracking. Regularly applying these protective measures makes a significant difference in maintaining that ‘just-installed’ look for years.
Looking ahead, I predict that smart technology will play an increasing role in flooring maintenance. Devices equipped with sensors can monitor moisture levels, detect shifts, and even alert homeowners or contractors to potential problems before they become serious. Embracing these innovations now will prepare you for a more efficient, durable future.
How do I maintain my floors over time?
Consistent, gentle cleaning combined with periodic inspections using tools like laser levels and moisture meters is key. Also, scheduling professional checkups for hardwood refinishing or tile re-sealing every few years can preserve your investment. Remember, a well-maintained floor not only looks great but also retains its value and longevity much longer than neglected surfaces.
To get started with your maintenance routine, consider trying out a laser-guided leveling system for periodic checks. This small investment can save you from costly repairs or reinstallation later. For more expert tips on flooring upkeep, visit this guide.
The Hidden Lessons I Discovered About Floor Leveling That Changed Everything
One of the most surprising insights I gained was that even minor imperfections in your subfloor can lead to major issues down the line. I once skipped thorough cleaning and repair, thinking it was a waste of time, only to face cracked tiles and uneven surfaces later. That lightbulb moment taught me that meticulous preparation is the secret to lasting results.
Another lesson was about the quality of leveling compounds. I experimented with cheaper options early in my career, but they shrank or cracked over time, ruining my work. Investing in high-quality, industry-approved compounds made all the difference in achieving a smooth, durable finish that stands the test of time.
Finally, I learned that patience during curing is non-negotiable. Rushing to walk on freshly leveled surfaces resulted in imperfections. Waiting the full recommended time and verifying flatness with precision tools ensures your project’s success, making your effort truly worthwhile.
My Must-Have Arsenal for Flawless Floor Leveling in 2025
For anyone serious about expert-level results, here are the tools I rely on:
- Laser-guided leveling systems: These provide real-time feedback and unparalleled accuracy, especially for large or complex areas. I trust models from this source for their reliability.
- High-quality self-leveling compounds: Brands recommended by professionals ensure durability and ease of application. My personal choice is always industry-approved formulas.
- Precision mixing drills: A powerful, variable-speed drill with a mixing paddle guarantees a lump-free compound, which is critical for a smooth finish.
- Long spirit levels and moisture meters: Regular checks with these tools during and after curing help maintain perfect flatness and avoid hidden issues.
Your Next Step Towards Flawless Floors Starts Today
Remember, mastering expert-level floor leveling strategies isn’t just about tools or techniques; it’s a commitment to quality, patience, and continuous learning. Each project is an opportunity to refine your skills and achieve stunning, durable results that transform spaces and elevate your craftsmanship. So, why wait? Start implementing these strategies today and see the difference it makes in your work and home.
What has been your biggest challenge when leveling floors? Share your experiences below—let’s learn and grow together!