I remember the moment clearly. I was halfway through installing a new hardwood floor, only to realize I had missed a crucial step. The surface was uneven, and I knew that if I didn’t fix it, the entire project would be compromised. That lightbulb moment made me realize how vital expert-level floor leveling truly is for long-lasting, beautiful results. Since then, I’ve dedicated myself to understanding the best strategies to ensure my floors stand the test of time, and today, I want to share that knowledge with you.
Why Floor Leveling Matters More Than Ever in 2025
In 2025, the demand for durable, flawless flooring has skyrocketed. With homes being more stylish and sustainable, the foundation must be perfect. An uneven surface can cause issues like cracking, squeaking, or even safety hazards. According to industry experts, improper leveling is one of the most common flooring mistakes that significantly reduces lifespan (source). When I first started, I underestimated the importance of precise leveling, and it cost me time, money, and frustration. That early mistake taught me a valuable lesson: proper preparation and technique are everything.
Have you ever faced a wobbly floor or cracked tiles that just wouldn’t sit right?
If so, you’re not alone. Many DIYers and even seasoned pros overlook the intricacies of floor leveling, assuming it’s just about filling gaps or using a standard leveling compound. But in reality, the key to lasting results lies in understanding the nuances of surface preparation, the right tools, and the correct techniques. You wouldn’t build a skyscraper on a shaky foundation, right? The same applies to your floors. Stay with me, because I’m about to walk you through the proven strategies that will elevate your flooring game and save you headaches down the road.
Prepare Your Surface with Precision
Start by clearing the area completely. Remove furniture and debris, then sweep or vacuum thoroughly. Inspect the subfloor for any cracks, holes, or loose sections. Use a high-quality primer to ensure optimal adhesion of leveling compounds. I once ignored the primer step, leading to uneven settling of the compound, which caused future cracks. Always remember, surface prep is the foundation of a flawless finish.
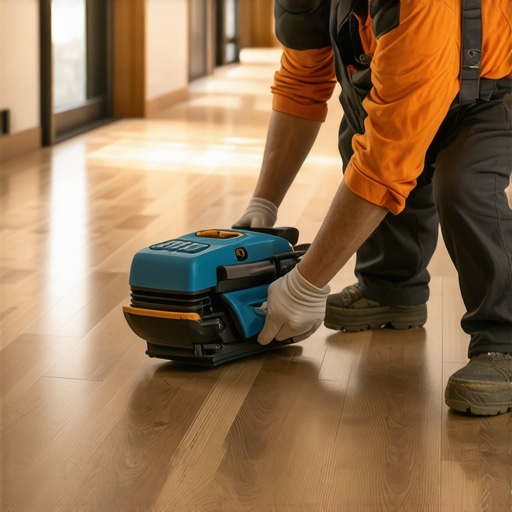
Choose the Right Tools and Materials
Invest in a durable, high-quality self-leveling compound suited for your subfloor type. Use a long-handled trowel and a gauge rake for spreading. For large areas, a power mixer can save time and ensure consistency. I learned this the hard way during a large kitchen renovation—manual mixing created inconsistent texture, resulting in uneven floors. Proper tools make the difference between a professional look and a DIY disaster.
Apply Leveling Compound Correctly
Mix the compound according to manufacturer instructions, aiming for a pourable but not too runny consistency. Pour the compound starting from the lowest point, allowing gravity to do its work. Use a gauge rake to spread the compound evenly across the surface, ensuring it fills all low spots. I once rushed this step, resulting in a thick layer in some areas and thin in others. Take your time—patience ensures a smooth, level surface.
Work in Small Sections for Control
Divide your project into manageable zones. This prevents the compound from setting before you can spread it out. During a recent project, I worked in 4-foot sections, which made the process more controlled and less stressful. Carefully check the level with a laser level or long straightedge, and add more compound if necessary. Remember, the goal is a perfectly flat surface, not just close enough.
Allow Proper Curing Time
Patience is key. Let the compound cure fully—usually 24 to 48 hours—before proceeding. Rushing this step can cause cracks or uneven settling. I once installed tiles prematurely, and a slight shift caused a visible crack. Follow the manufacturer’s guidelines strictly for drying times, and avoid walking on the surface during curing.
Verify the Levelness
Use a long level or a laser level to confirm your work. Look for any high or low spots and address them with additional compound or sanding. Checking after curing saves you from surprises under your finished flooring. I found a small dip that I fixed with a quick skim coat, saving me from future issues.
Finish with Proper Surface Preparation
Once level, clean the surface thoroughly. If installing tiles, consider a primer like in this guide. For hardwood, ensure the surface is dust-free and slightly roughened for better adhesion. Proper preparation ensures your flooring will last decades without issues.

Many people believe that simply pouring a leveling compound and smoothing it out will guarantee a perfectly flat floor. While this might seem sufficient for a quick fix, it often leads to problems down the line. A common misconception is that all leveling compounds are interchangeable or that thicker layers are better. In reality, choosing the wrong product or applying it improperly can cause cracks, uneven surfaces, or even failure of the entire flooring installation.
Another mistake I see frequently is neglecting the importance of surface preparation. Skipping steps like cleaning, priming, or inspecting the subfloor can drastically reduce adhesion and lead to future issues. For example, I once ignored a thorough cleaning, which resulted in air bubbles and uneven settling of the compound. Remember, surface prep is the foundation of flawless results, as detailed in this comprehensive guide.
What do most homeowners overlook about advanced leveling techniques?
Many assume that basic techniques are enough, but advanced projects demand a nuanced approach. For instance, understanding the thermal expansion properties of different materials can prevent future cracks. Using a high-quality primer tailored to your subfloor type enhances adhesion, especially when working with materials like concrete or plywood. Additionally, employing tools like laser levels or long straightedges ensures your surface is truly flat, not just visually acceptable. For detailed, expert strategies, I recommend reviewing these precise techniques.
Beware of the trap of rushing curing times. Patience is essential; rushing can cause cracks or uneven settling. Proper curing ensures the longevity of your work, and ignoring this step can cost you dearly. Plus, verifying the level after curing with proper tools can save you from surprises under your finished flooring. Small dips or high spots can be easily remedied if caught early, illustrating the importance of thorough inspection and touch-ups.
In conclusion, understanding the hidden nuances—like choosing the right compound, preparing the surface meticulously, and exercising patience—can make all the difference in achieving professional-quality results. Don’t fall into the trap of oversimplification or rushing your project. For more expert tips, explore these advanced strategies. Have you ever fallen into this trap? Let me know in the comments!
Keeping your floors looking pristine and functioning well over the years requires more than just initial installation skills. It involves investing in the right tools, adopting effective maintenance routines, and understanding how to troubleshoot issues early. Over time, I’ve found that specific equipment and methods can make all the difference in ensuring durability and aesthetic appeal, especially as trends in flooring technology evolve towards smarter, more sustainable solutions.
How do I keep my floors in top shape for years to come?
First, regular cleaning with the right tools is crucial. I recommend using a microfiber mop paired with a pH-balanced cleaner suitable for your flooring type. For hardwood floors, a soft broom or vacuum with a hardwood-friendly attachment prevents scratches. For tile or stone, a damp mop with a gentle cleaner works wonders. I personally prefer a steam cleaner for deep cleaning sessions—modern models like the Shark S6003D can sanitize without harsh chemicals, extending your floor’s lifespan while maintaining its shine.
For more stubborn stains or damage, investing in a quality repair kit tailored to your flooring material is wise. For hardwoods, a wood filler and a mini sander help manage scratches or dents. Tile repair kits that include epoxy grout and color-matched fillers allow you to fix chips or cracks quickly. I’ve used these tools myself to maintain a seamless look, which saves money and preserves property value.
Tools I recommend for long-term maintenance
One game-changing device I rely on is a laser level. It helps monitor unevenness or shifts in the floor over time, alerting you to issues before they escalate. Regularly checking the levelness ensures your installation remains stable, especially in high-traffic areas. Additionally, a high-quality orbital sander with variable grit options allows you to re-surface areas that have worn unevenly, particularly in hardwood installations. I trained myself to use a Bosch ROS20VSC, which delivers smooth results without gouging or excessive dust.
Another essential is a moisture meter—specifically, a pinless model like the General Tools MMD4E. Moisture levels can fluctuate, causing expansion or contraction, which leads to cracks or buckling. Regular checks prevent these problems from developing. For tile and stone, a grout saw and color-matched epoxy help with periodic re-sealing, preventing water infiltration that could undermine the subfloor.
Future of floor maintenance and scalability
Looking ahead, I believe smart sensors embedded in flooring could revolutionize maintenance routines. Imagine real-time moisture monitoring or stress detection, alerting homeowners or contractors immediately. This trend aligns with the broader move towards intelligent homes and sustainable building practices. Incorporating these technologies now can save you money and hassle in the long run.
To get started, try adopting a routine that combines regular cleaning with periodic inspections using tools like laser levels and moisture meters. This proactive approach ensures your floors stay beautiful and durable, matching the high standards of 2025 and beyond. For further expert insights, I recommend reviewing these advanced strategies — it’s a game-changer for serious DIYers and professionals alike.
Remember, consistent maintenance and the right tools are your best allies in extending your floors’ lifespan and beauty. So, take the time to invest in quality equipment and develop a routine that suits your flooring type. Your future self will thank you for it!
The Hardest Lesson I Learned About Floor Leveling
One of my most valuable lessons came when I underestimated the importance of surface preparation. Skipping thorough cleaning and priming led to cracks and uneven settling, costing me time and money. Now, I know that surface prep is the secret to flawless floors, and I never take it lightly anymore.
3 Myths About Floor Leveling That Held Me Back
I used to believe that all leveling compounds were interchangeable and that thicker layers meant better results. Both are misconceptions. Choosing the right product and applying it in thin, even coats has made my projects much more durable and professional-looking. Don’t fall for these myths; educate yourself on the specifics of your materials.
What Experts Won’t Tell You About Achieving Flat Floors
Many overlook the importance of precise tools like laser levels and moisture meters. I learned that regularly checking for shifts or moisture issues can prevent future problems like cracks or buckling. Investing in quality tools and understanding their use is an insider tip that pays off in the long run.
Curated Resources for Elevating Your Flooring Skills
- My Essential Toolkit for Floor Leveling: A laser level, moisture meter, and high-quality leveling compounds are my go-to tools. I trust these because they provide consistent results and help catch issues early.
- Books That Changed How I View Floor Installation: “The Ultimate Guide to Floor Leveling” offers deep insights and step-by-step strategies that have transformed my approach to flooring projects.
- Where to Go from Here: For advanced tips and technical guidance, I recommend exploring the detailed articles on expert strategies. They’re invaluable for both DIYers and professionals.
Your Turn to Try
Achieving perfect floor leveling in 2025 is within your reach with the right knowledge, tools, and patience. Don’t rush the process—quality results come from careful preparation and expert techniques. Remember, a level floor is the foundation of beautiful, durable flooring that lasts for decades.
What’s the biggest challenge you’ve faced with floor leveling? Share your experiences below—I’d love to hear your story!
This post really highlights how overlooked surface prep can make or break a flooring project. I once jumped straight into laying hardwood without properly inspecting the subfloor, and it ended up causing squeaks and an uneven surface within just a few months. Since then, I’ve learned that thorough cleaning, priming, and carefully choosing the right leveling compound are crucial steps that save so much hassle later. I especially agree with the importance of using precise tools like laser levels and moisture meters—these help catch issues early before installation, saving time and money in the long run. I’m curious—has anyone experimented with advanced techniques like thermal expansion considerations? I’ve read that matching the right materials can significantly lessen cracking problems over time. How do others address this in their projects?