Ever laid down a beautiful tile or hardwood floor, only to see it start to show cracks, unevenness, or wear after just a few years? I’ve been there. I remember the frustration of pouring time and money into a project, only to have it fall apart prematurely. One lightbulb moment for me was realizing that the key to longevity isn’t just in the choice of materials but in the installation strategies I used from the very start.
Why Proper Installation Makes All the Difference
When I first began tackling flooring projects, I thought that picking the right tile or hardwood was enough. I quickly learned that even the most stunning materials can fail if not installed correctly. Poor leveling, inconsistent adhesives, or rushed workmanship can turn a beautiful floor into a nightmare. According to industry experts, most flooring failures are due to installation mistakes rather than material defects. That’s why mastering the best strategies for installation is crucial if you want your floors to last for decades, not just a few years.
If you’ve ever faced problems like uneven surfaces, loose tiles, or squeaky hardwood, you’re not alone. It’s a common frustration. The good news? With the right techniques, you can dramatically improve your results. Today, I’ll guide you through proven strategies that I’ve personally tested and refined—techniques that will help you avoid costly mistakes and achieve durable, beautiful floors that stand the test of time.
Is Cutting Corners Worth the Risk?
I remember rushing through a tile installation early in my journey, thinking I could save time and money. The result? Cracked grout lines and tiles that started lifting within a few months. That mistake taught me a vital lesson: investing in proper preparation and skillful execution pays off. It’s tempting to skip steps or use cheaper materials, but in the long run, it’s a false economy. For reliable tips on avoiding common pitfalls, check out this guide on installation mistakes.
So, if you’re tired of fixing the same problems over and over, stay tuned. I’ll share some essential strategies that can transform your project from a shaky start to a lasting success. Ready to elevate your flooring game? Let’s dive into the core techniques that make all the difference.
Prepare Your Surface with Precision
Start by thoroughly cleaning the subfloor, removing all debris, dust, and grease. An unclean surface can cause uneven bonding and lead to future cracks or loose tiles. For concrete slabs, inspect for cracks or moisture issues and address them before proceeding. I once skipped this step and ended up with tiles that cracked after just a year. Proper surface prep is the foundation for durability.
Next, check the levelness of your subfloor using a long level or straightedge. If you notice dips or humps, these must be corrected. I used a self-leveling compound on a particularly uneven area, which made a huge difference in the final finish. For detailed leveling techniques, see this guide.
Achieve Flawless Leveling
Proper leveling is crucial to avoid future cracks or uneven wear. Use a high-quality floor leveler and follow the manufacturer’s instructions carefully. Mix the compound thoroughly to prevent air bubbles, and pour it slowly across the surface, spreading evenly. I once hurried this step and ended up with a lumpy surface, causing tiles to pop loose. Take your time; a level surface ensures longevity.
After applying the leveler, use a trowel to smooth out the surface, ensuring no ridges remain. Allow sufficient drying time before proceeding. For a perfect finish, consult this comprehensive guide.
Use Quality Adhesives and Grouts
Choosing the right adhesive is vital. For tiles, opt for a thinset mortar suitable for your tile type and substrate. For hardwood, use a high-quality adhesive designed for wood flooring. I once used a cheaper glue for hardwood and noticed squeaks and movement within a year. Investing in good materials pays off in the long run.
Apply the adhesive evenly with a notched trowel, following the recommended trowel size for your tile or hardwood. This ensures proper bonding and prevents hollow spots that can cause cracking or lifting. For detailed application techniques, see this resource.
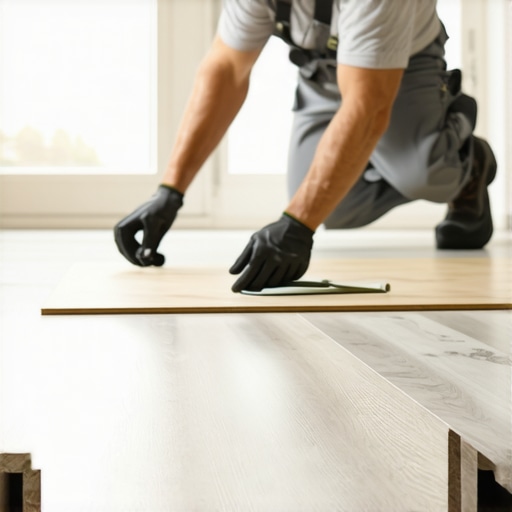
Lay Tiles or Hardwood Carefully
Set tiles or planks with deliberate, consistent pressure. Use spacers for tiles to maintain uniform grout lines, and ensure hardwood planks are tightly butted together. I remember rushing this step and ending up with uneven grout lines, which compromised the look and durability. Take the time to check alignment frequently.
Tap each piece gently with a rubber mallet to seat it properly. For tiles, periodically check the level to prevent lippage. For hardwood, use a tapping block to avoid damage. Precision now saves repairs later.
Finish with Proper Grouting and Sealing
Once tiles are set, wait for the adhesive to cure fully—usually 24 to 48 hours. Mix and apply grout evenly, filling all joints. Remove excess grout with a float and clean the surface with a damp sponge before it hardens. I once didn’t clean grout properly and ended up with stained, uneven joints that required regrouting.
Finally, seal the grout to prevent staining and moisture infiltration. For hardwood, apply a protective finish or sealant to enhance longevity. Proper sealing guards against water damage and wear, making your investment last for years.
Mastering these steps—surface prep, leveling, quality materials, careful laying, and sealing—will drastically improve your chances of achieving durable, long-lasting floors. For more tips, visit this resource.
When it comes to flooring installation, many DIY enthusiasts and even some professionals fall prey to misconceptions that can compromise the durability and appearance of their floors. Let’s dig deeper into these myths and uncover the truths that can save your project from costly mistakes.
Why Most People Oversimplify the Need for Proper Surface Prep
A widespread belief is that surface preparation is a quick step that can be overlooked or rushed. However, the reality is that the success of your entire flooring project hinges on meticulous surface prep. Skipping this crucial step can lead to uneven surfaces, cracking, or tiles lifting prematurely. Industry experts emphasize that thorough cleaning, leveling, and moisture control are non-negotiable. For instance, concrete slabs often harbor moisture or cracks that, if ignored, will cause your flooring to fail early on. Proper surface prep sets the foundation for lasting results and should never be underestimated. For detailed techniques, check out this guide.
Advanced Mistake: Believing All Adhesives Are Created Equal
Many assume that any adhesive, whether it’s thinset or wood glue, will work equally well for their flooring type. This misconception can cause significant problems, from loose tiles to squeaky hardwood. Different materials and substrates demand specific adhesives designed for optimal bonding and moisture resistance. Using a generic or cheaper adhesive might save money upfront but will likely result in costly repairs down the line. Always select high-quality, manufacturer-recommended products tailored to your flooring type. Learn more about choosing the right adhesives at this resource.
Don’t Let This Common Laying Mistake Ruin Your Floors
Another myth is that precise alignment isn’t crucial as long as the tiles or planks are roughly in place. In reality, even minor misalignments can lead to uneven grout lines, lippage, or gaps that compromise the integrity and aesthetic of your floor. Using spacers, checking alignment frequently, and tapping each piece into place are simple steps that make a big difference. Rushing this phase often results in uneven surfaces and potential future repairs. For step-by-step strategies, see this guide.
Have you ever fallen into this trap? Let me know in the comments.
Remember, understanding these nuances and avoiding common pitfalls can dramatically extend the lifespan of your flooring. Small details like proper surface prep, selecting the right adhesives, and careful laying are what separate professional results from amateur mistakes. Don’t let misconceptions undermine your efforts—equip yourself with the right knowledge for a durable, beautiful floor that lasts for years to come.
Keeping your flooring looking pristine and functioning perfectly over time requires more than just initial installation skills. It involves using the right tools and adopting effective maintenance routines. In this post, I’ll share the specific equipment and methods I personally rely on to ensure durability and seamless performance of hardwood and tile floors.
Invest in Quality Tools for Precise Work
One of my go-to tools is a high-accuracy laser level. Unlike traditional bubble levels, a laser level projects precise lines across the surface, making it easier to check for levelness during installation and maintenance. I use it regularly when re-leveling sections or checking for uneven spots. This tool has saved me countless hours of troubleshooting and ensures that my floors stay perfectly flat over the years.
Another must-have is a professional-grade notched trowel. The trowel’s notch size impacts adhesive coverage, affecting how well tiles or planks bond to the subfloor. I prefer a trowel with a specific notch size recommended for my material—usually 1/4-inch for tiles—because it guarantees even adhesive spread and reduces the risk of hollow spots, which can cause cracking or lifting. Using subpar tools here can result in uneven surfaces and costly repairs; hence, choosing the right equipment is essential for longevity.
How to Maintain Floors and Tools Over Time
Maintaining your floors involves regular cleaning with appropriate products. For hardwoods, I recommend using a pH-neutral cleaner to preserve the finish and prevent buildup that can dull the surface. For tiles, a gentle, non-abrasive cleaner helps avoid scratches. Consistent sealing of grout lines and hardwood finishes protects against moisture infiltration and stains, extending the lifespan of your investment.
On the tool maintenance side, cleaning your equipment after each project is crucial. A simple wipe-down of your trowels, levels, and other tools prevents cement, grout, or adhesive residues from hardening and affecting accuracy in future work. Replace worn-out blades or worn-out leveling devices promptly—using outdated tools can compromise precision and lead to uneven results over time.
Predicting Future Trends in Flooring Maintenance and Tools
Looking ahead, I believe advancements in digital tools will further improve DIY and professional projects. Smart levels and digital moisture meters will become more affordable and accurate, allowing for real-time data collection and better decision-making. Additionally, eco-friendly, long-lasting sealants and adhesives will gain popularity, reducing environmental impact while enhancing durability. Staying updated on these innovations will empower you to keep your floors in top shape for decades.
Make Your Floors Last by Staying on Top of Maintenance
To truly keep your floors working well over the long term, schedule regular inspections. Check grout lines, surface finish, and subfloor stability periodically. When you notice issues early—such as loose tiles or worn finishes—you can address them before they become costly repairs. Incorporate these tools and maintenance habits into your routine, and you’ll enjoy beautiful, durable floors for years to come. For detailed guidance on surface upkeep, visit this resource.
The Hardest Lessons I Learned About Flooring Installation
One of my biggest lightbulb moments came from rushing the surface prep step. I once skipped thorough cleaning and leveling, thinking it was a minor detail. The result? Cracked tiles and uneven surfaces that haunted me for years. Now I know that meticulous surface prep isn’t just a step—it’s the foundation of lasting flooring.
Another lesson was the importance of choosing the right adhesive. Using a generic glue for hardwood seemed fine at first, but within a year, squeaks and loose planks appeared. Investing in the proper, high-quality adhesive made a world of difference, prolonging the life of the floor.
Finally, I realized that precision during laying matters more than I thought. Rushing to set tiles or planks led to misalignments that I couldn’t fix later. Frequent checks with a laser level and patience during installation saved me costly repairs down the line.
I completely agree with the emphasis on surface preparation and using quality tools—those are often overlooked but can make or break the entire project. When I took on my first hardwood floor installation, I underestimated how crucial it was to ensure the subfloor was perfectly level. I ended up with squeaks and minor gaps that persisted even after sealing. Now, I always pre-check with a laser level and take my time with leveling compounds. It’s interesting how small investments in tools like a reliable laser level or a notched trowel can save so much time and money down the line. For anyone doing DIY flooring, how do you handle moisture issues in concrete slabs? I found that moisture barriers are essential in my humid climate, but I’d love to hear different approaches.
I fully agree with the importance of surface prep and choosing quality tools. During my last tile project, I learned first-hand how skipping a thorough cleaning or rushing the leveling process can cause problems down the line. I’ve found that even a small investment in a good laser level and proper leveling compounds can really pay off for both DIYers and pros alike. It’s also interesting how much moisture management plays a role, especially in humid climates. In my experience, using a moisture barrier underneath concrete slabs has prevented significant issues with cupping and cracking. Has anyone tried using newer moisture detection tools? I’ve heard digital sensors are becoming more accurate and affordable, which could really help in pre-survey stages before installation. What strategies have others found effective for moisture control in challenging environments? It seems that combining great tools with proper planning truly makes a difference in the longevity of a floor.