I still remember the frustration of laying my first tile floor. It looked perfect for about a week—until it started cracking and shifting. That lightbulb moment made me realize that a good installation isn’t just about laying tiles; it’s about setting the foundation for lasting beauty and durability. If you’ve ever invested time, money, and effort into a flooring project only to see it fail prematurely, you’re not alone. I’ve been there, and I want to share what I’ve learned since then.
Why Proper Installation Matters More Than Ever in 2025
With advancements in tile and flooring materials, many assume that choosing the right product guarantees long-term success. But the truth is, even the most beautiful tiles won’t stand the test of time without proper installation. Especially in 2025, where new challenges like climate variations and innovative materials demand precise techniques, skipping the details can cost you dearly. A recent study by the Tile Council of North America highlights that up to 80% of flooring failures are due to improper installation practices. That’s a staggering number that underscores why mastering installation tips is crucial for your home’s longevity.
Let’s face it—nobody wants to rip out and redo their floors every few years. That’s why I’ve dedicated myself to learning the best practices, from leveling techniques to adhesive choices. If you’re tired of dealing with cracked tiles or uneven surfaces, then this post is for you. I’ll guide you through proven strategies that will help you achieve flawless results and avoid costly mistakes.
Is It Really Worth Stressing Over Small Details?
Absolutely. Early in my projects, I made the mistake of rushing through the prep work, thinking I could fix issues later. Spoiler: you can’t. Proper surface leveling is the backbone of a durable floor. For example, neglecting this step often results in tiles cracking under pressure. That’s why I always recommend consulting resources like expert-level leveling strategies to ensure a solid foundation. Trust me, taking the time to get these details right saves you from headaches down the line.
Now that you understand why installation quality is non-negotiable, let’s dive into the specific steps that will make your flooring last well into 2025 and beyond. Ready to transform your space into a durable, stunning masterpiece? Let’s get started!
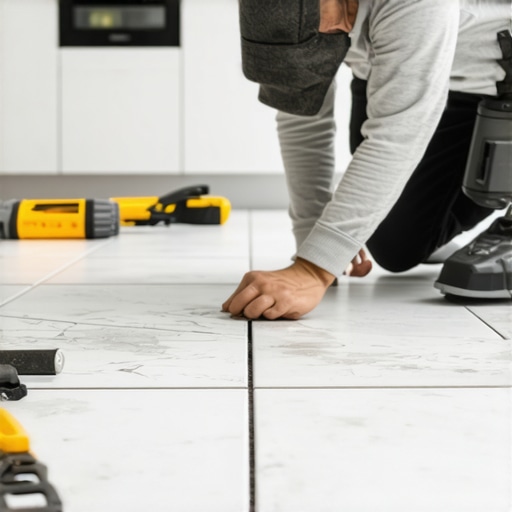
Prepare Your Surface with Precision
Start by thoroughly cleaning your subfloor to remove dust, debris, and grease. Use a vacuum and a damp cloth to ensure a spotless surface. Next, inspect for any uneven areas or cracks. If you find dips or bumps, apply a floor-leveling compound. My first attempt at leveling was messy—applying too much compound in one spot—but I learned that patience and small, controlled applications produce the best results. For detailed techniques, consult this comprehensive guide.
Master the Art of Surface Leveling
Achieving a perfectly level surface is paramount. Use a long straightedge or a level to identify high and low spots. When applying leveling compounds, spread them evenly with a trowel, working in small sections. Remember, thin layers dry faster and provide a smoother finish. I once hurried through this step, which resulted in uneven tiles that cracked under pressure. Patience here ensures a durable, flawless floor. For advanced techniques, visit this resource.
Choose the Right Adhesives and Grouts
Select adhesives suitable for your tile type and environmental conditions. For instance, in humid areas, use waterproof thinset mortar. I once used a standard adhesive in a bathroom, leading to tiles loosening over time. Afterward, I switched to a high-quality, flexible adhesive recommended for 2025 standards. Grout selection matters too—opt for epoxy or other durable, stain-resistant options. Proper mixing and application are key; I found that pressing the grout into joints firmly prevents future cracking. For more guidance, check this article.
Lay Tiles with Care and Consistency
Start in the center of the room and work outward, using spacers for uniform gaps. Use a rubber mallet and a level to tap tiles into place, ensuring they sit flush. I once skipped checking with a level after each row, which caused a ripple effect of uneven tiles. Taking the time to double-check alignment prevents this. Cutting tiles accurately with a wet saw ensures sharp edges and clean lines—don’t rush this step. For detailed laying techniques, see this guide.
Allow Proper Curing and Setting
Let adhesives and grout cure undisturbed. Follow manufacturer instructions—usually 24-48 hours. During this period, avoid foot traffic to prevent shifting. I once walked on freshly laid tiles too soon, causing misalignment. Using spacers and keeping the area clear ensures a perfect finish. Once cured, seal grout lines to prevent stains and water damage—this simple step significantly extends the lifespan of your floor. For sealing tips, visit this resource.
Final Inspection and Maintenance
Inspect your floor for any loose tiles or gaps. Fix issues immediately to avoid long-term damage. Regular cleaning with appropriate products, as recommended in this article, keeps your floor looking new. Remember, proper installation combined with ongoing maintenance ensures your investment lasts well into 2025 and beyond.

Many DIY enthusiasts and even seasoned pros fall prey to misconceptions that can undermine their tile installation projects. Let’s dig deeper into some of these myths and reveal the nuances that can make or break your flooring’s longevity. First off, a widespread belief is that choosing the best tile alone guarantees durability. While high-quality tiles are essential, the real secret lies in proper installation techniques. Skipping surface prep or rushing the layout can cause cracks and uneven surfaces, no matter the tile quality.
Another common myth is that thicker adhesive layers lead to better sticking power. In reality, applying too much thinset can cause uneven bonding and future failures. The key is applying the right amount for your specific tile type and substrate, which is often overlooked. This nuance is critical in 2025, with advanced materials requiring precise adhesive application. For a detailed breakdown, check out this comprehensive guide.
Why does surface preparation often trip people up?
Many underestimate the importance of a perfectly level and clean subfloor. A common mistake is skipping the use of a proper leveling compound, which can lead to uneven tiles and accelerated cracking. Remember, surface inconsistency is one of the top causes of tile failure—something that experts like those at this resource emphasize repeatedly. Even small dips or bumps, if left uncorrected, can cause big problems down the line.
Have you ever fallen into this trap? Let me know in the comments. Mastering these nuances ensures your project not only looks stunning but lasts for years, especially as materials and standards evolve in 2025. So, don’t just buy the best tile—install it with the expertise that guarantees durability. For more insights, explore design ideas and reach out with questions or challenges you face during your project.
Keeping your tile and flooring installations in top shape over the years requires more than just expert installation; it demands the right tools and consistent maintenance. Over time, even durable materials can degrade if not properly cared for, but arming yourself with the proper equipment and knowledge makes all the difference. In this post, I’ll share the specific tools I rely on for ongoing maintenance and how to keep your floors looking pristine for years to come.
Invest in Quality Cleaning Equipment
My go-to tool for maintaining tile floors is a high-quality, oscillating floor scrubber. These machines deliver consistent cleaning power without damaging delicate grout lines or tiles. I personally prefer models with adjustable brushes and strong suction capabilities, such as the Kärcher FC 5 Cordless, which makes quick work of dirt and grime. Regular use of such equipment helps prevent the buildup of dirt that can grind down surfaces and stain grout, especially in high-traffic areas. For deep cleaning, I recommend applying a pH-neutral cleaner formulated specifically for tile and grout, which keeps the surface sealed and prevents stains from setting in.
Tools for Spot Repairs and Sealing
Every few years, I perform minor repairs using a grout saw and color-matched grout filler. These tools allow me to remove cracked or stained grout efficiently and apply fresh filler that blends seamlessly. To maintain that professional finish, I also keep a high-quality grout sealer on hand—my favorite is a penetrating, breathable sealer like Miracle Sealants 511 Impregnator. Applying this every couple of years prevents water and stains from penetrating the grout, which significantly extends its lifespan. Remember, maintaining your grout is just as important as the initial installation; a well-sealed grout line prevents costly repairs later.
Why I Rely on Specific Power Tools
For larger projects or when I want to refresh a worn floor, I turn to a handheld oscillating multi-tool with a diamond-grit blade. This versatile tool helps me remove old adhesive residue or uneven spots with precision. I also use a wet/dry vacuum for cleanup, which keeps dust and debris from settling into grout lines or underneath tiles. Investing in these tools has saved me countless hours and kept my floors looking brand new.
Trend Predictions and Future Maintenance
Looking ahead, I predict that smart cleaning devices with IoT connectivity will become standard in flooring maintenance. Imagine robotic cleaners that automatically detect and scrub stained grout or uneven tiles, alerting you via smartphone. Staying ahead of these innovations will make long-term upkeep easier and more effective. In the meantime, I recommend scheduling regular inspections and cleanings—at least bi-annually—to catch issues early. For detailed strategies, check out this resource.
How do I maintain my floors over time?
Consistent cleaning with the right equipment, timely repairs, and proper sealing are the keys to extending the life of your tile and hardwood floors. Don’t forget that routine inspections can reveal minor issues before they escalate. If you haven’t already, try incorporating a maintenance schedule that includes deep cleaning, grout sealing, and surface inspections. This proactive approach will ensure your floors stay stunning and durable for years to come. Remember, the investment in good tools and regular upkeep pays off in longevity and beauty.
The Hardest Lessons I Learned About Flooring Durability
- Surface prep is everything. I once skipped thorough cleaning and leveling, and paid the price with cracked tiles. Now, I know that a flawless foundation is the key to longevity.
- Details matter more than you think. Small things like the right adhesive amount and proper grout sealing can make or break your project. Rushing these steps leads to costly repairs down the line.
- Quality tools save time and stress. Investing in a good level, grout saw, and sealer has transformed my maintenance routine. It’s worth every penny for floors that last.
- Continuous learning unlocks better results. Staying updated with expert guides and trends, like those found on this resource, has helped me improve with every project.
My Essential Toolkit for Long-lasting Floors
- High-quality leveling compounds: Ensures a smooth surface, reducing future cracks. I trust products from this source.
- Durable adhesives and grouts: Waterproof thinset and epoxy grouts resist moisture and stains. My go-to brands are recommended by experts in this article.
- Sealing and cleaning tools: Penetrating sealers and oscillating scrubbers keep floors pristine. Regular maintenance with these tools extends lifespan significantly.
- Precision cutting tools: Wet saws and multi-tools ensure perfect tile edges, saving time and avoiding rework. I rely on trusted brands like this guide.
Your Turn to Elevate Your Flooring Game
Now that you’re equipped with insider lessons and trusted tools, it’s time to take action. Whether you’re tackling a DIY project or overseeing a professional install, remember that lasting results depend on attention to detail and continuous learning. Don’t settle for less—your floors deserve the best for 2025 and beyond. Ready to transform your space? Share your experience or ask questions below, and let’s build floors that stand the test of time together!
This post really highlights the importance of proper surface leveling and preparation. I remember rushing through my first DIY tile project, skipping a thorough cleaning of the subfloor, only to have cracks appear within months. It was a tough lesson, but it taught me that no matter how high-quality your materials are, the foundation has to be solid. I’ve since invested in good leveling compounds and learned to inspect the subfloor meticulously before laying tiles. One thing I’d add is the value of using a laser level for large areas — it really helps achieve that perfect flat surface. I’m curious, have others found any new tools or techniques in 2025 that make surface prep easier or more precise? I’d love to hear about innovative solutions for DIYers looking to improve their installation quality.
Reading this post really resonated with me because I recently experienced a similar frustration with my initial tile project. Like many DIYers, I underestimated the importance of the subfloor quality and went straight to laying tiles without proper prep. As a result, I regrettably dealt with cracked tiles and uneven surfaces that took extra work to fix. Over the years, I’ve learned that meticulous surface prep, including using a laser level for large areas and high-quality leveling compounds, can make all the difference. I’m especially curious about the latest tools in 2025—has anyone tried any smart leveling devices or enhanced adhesive applicators that simplify the process? I believe that investing in precise tools and taking time for proper preparation pays off in the long run, reducing both stress and costs. What’s your experience with newer tech or methods that have helped improve your installation quality?