
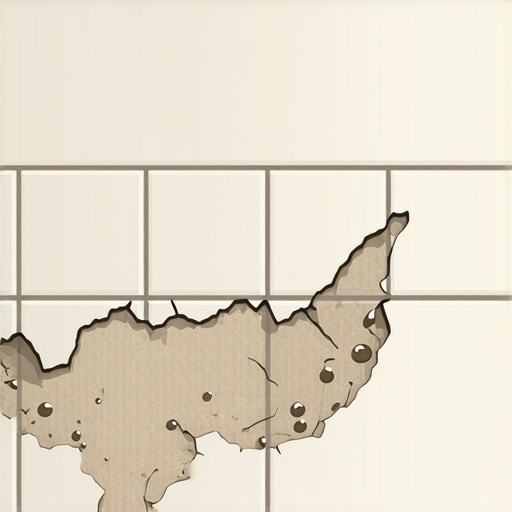
I remember the exact moment I stepped into my kitchen one morning, only to be greeted by a crusty, crumbly mess of tile grout that hadn’t been there the day before. That sinking feeling of realizing that my seemingly perfect tile installation was already falling apart was eye-opening. It’s a frustration many homeowners face—seeing their beautiful tiles degrade so quickly, leaving us questioning what went wrong.
If you’ve noticed your grout cracking or crumbling after just a few months, you’re not alone. This is more common than you might think, and understanding the root causes can save you time, money, and unnecessary stress. Today, we’ll uncover the reasons behind this rapid deterioration and, more importantly, how to prevent it from happening to you.
Why Quick-Tracked Tile Grout Fails Shake Our Confidence
Tile grout is supposed to be durable, providing both aesthetic appeal and a protective barrier against water and dirt. But when it crumbles prematurely, it feels like all your hard work has gone to waste. During my early projects, I made a critical mistake—failing to let the thinset mortar fully cure before grout application—which contributed to some of the cracking issues I faced. That experience taught me an important lesson about the importance of patience and proper technique, something I now share openly to help others avoid similar pitfalls.
According to tile experts, improper installation and inadequate surface prep are leading causes of early grout failure. A study published by the Tile Council of North America emphasizes that substrate moisture levels and surface cleanliness significantly influence grout longevity. Recognizing these factors can turn your DIY mistake into a learning opportunity and set you on the path toward a more resilient, long-lasting tiled surface.
Are you frustrated because your grout crumbles just a few months after installation? If so, you’re probably wondering whether there’s a straightforward fix or if it’s time to start over. The good news is, understanding the causes is half the battle won. In the following sections, I’ll walk you through common mistakes and practical solutions that can help preserve your grout and keep your tiles looking pristine for years to come.
Ensure Proper Surface Preparation Before Applying Grout
Start by thoroughly cleaning your tiles and grout lines to remove dust, grease, and residues. Use a stiff brush and a suitable cleaner to ensure the surface is free of debris and dry. Think of this step as prepping a canvas before painting—if it’s not clean, your work won’t last. When I renovated my bathroom, skipping this step caused initial grout cracks because dirt and moisture remained, leading to bond failure. Proper surface prep creates a solid foundation, preventing future issues. For detailed guidance, check out this resource on installation mistakes.When it comes to flooring installation, many homeowners and even some contractors fall prey to misconceptions that can lead to costly mistakes. Let’s cut through the noise and explore what most people get wrong about floor leveling, tile laying, and hardwood floors, and uncover the nuanced truths that can elevate your project from amateur to expert level.
Why the Popular Belief That Tight Tolerance Means Perfect Floors Isn’t Entirely True
Many believe that adhering to manufacturer-specified tolerances guarantees a flawless finish. However, in practice, a tight tolerance without proper substrate preparation can still result in lippage, cracking, or unevenness. Advanced techniques, such as substrate assessment and multiple leveling passes, often yield better results than simply following generic specifications. According to a study from the National Tile Contractors Association, meticulous substrate assessment has a more significant impact on tile flatness and longevity than tolerance adherence alone.
Avoid the Trap of Over-Leveling Without Addressing Underlying Issues
Overreliance on self-leveling compounds without fixing structural defects is a common trap that leads to future failures, like cracking or shifting. Many DIY enthusiasts pour on leveling products expecting instant perfection, but neglect to identify why unevenness occurred—be it joist movement, moisture fluctuations, or subfloor inconsistencies. Proper floor leveling involves both understanding the root causes and employing precise techniques, such as those detailed in this comprehensive guide. Failing to do so can turn a quick fix into an ongoing headache.
Advanced Mistakes: Underestimating Floor Expansion and Contraction
One of the most overlooked nuances, especially in hardwood flooring, is the importance of allowing for expansion gaps and understanding climate effects. A common mistake is installing floors without sufficient space for movement, which eventually results in buckling or gaps. Modern hardwood flooring professionals stress the importance of acclimatizing materials and planning for seasonal variations, as elaborated in this expertly curated content. Ignoring these factors can compromise your flooring’s lifespan and appearance.
Make Your Installation Last by Recognizing Hidden Risks
Beyond the visible technical errors, there’s a hidden trap that many miss: neglecting proper moisture testing and subfloor evaluation. Moisture can be insidious, causing tiles to delaminate or hardwood to cup over time. Skipping moisture tests or ignoring subfloor irregularities means you’re setting your flooring up for failure. For detailed strategies on preventing moisture-related issues, check out this essential guide. Confirming substrate conditions before starting is a step that expert installers always prioritize.
Quick Tips to Elevate Your Flooring Experience
Remember, successful flooring installation is less about following popular myths and more about understanding and addressing the unique challenges of each project. Investing in proper surface prep, moisture assessment, and accommodating structural nuances is what separates pros from novices. Curious about mastering your project? Discover more advanced strategies at this step-by-step guide. Have you ever fallen into this trap? Let me know in the comments.Maintaining your flooring’s integrity over time is essential to preserve its beauty and functionality. Invest in high-quality tools like the Rubio Monocoat Floor Care Kit, which I personally use for routine cleaning and minor touch-ups. This kit includes a specialized microfiber mop and eco-friendly detergents that effectively remove dirt without damaging the finish, ensuring your hardwood or tile floors stay pristine. Additionally, using a moisture meter, such as the Tramex CM-57, helps monitor subfloor conditions regularly, preventing issues like buckling or cracking caused by unseen moisture buildup. Incorporating these tools into your maintenance routine can extend your floors’ lifespan significantly.
Considering future trends, automation and smart sensors are starting to play a role in floor health monitoring. Imagine a system that alerts you to humidity spikes or structural shifts before visible damage occurs—this predictive approach could revolutionize maintenance.
How do I keep flooring in top shape over the years? Regularly inspecting for signs of wear, promptly addressing scratches with buffing techniques from this guide, and scheduling annual professional assessments are key steps. For tile-specific care, using grout sealing products like the 100% Silicone Grout Sealer helps prevent staining and deterioration.
Don’t overlook cleaning methods—using a damp microfiber mop combined with pH-neutral cleaners preserves both the surface and underlying adhesives. For hardwood finishes, the secrets to longevity include avoiding excess water and choosing the right maintenance products.
If you’re aiming to scale your flooring project or upgrade with durable materials, my advice is to incorporate these tools early in your planning. They not only simplify ongoing care but also help catch issues before they escalate. Try implementing a moisture meter check every quarter and see how catching early signs of moisture or structural shift can save you time and money in the long run. For comprehensive strategies, exploring expert tips on flooring maintenance can set you on the path toward enduring results.
The Hardest Lesson I Learned About Flooring Installation, Floor Leveling, Tile, Hardwood Floors
One pivotal moment in my journey was realizing that rushing the surface preparation was the root of most failures. Properly assessing subfloor conditions early on saved me from headaches later. Patience and diligence during preparation often outweigh quick fixes.
Another lesson was understanding the subtle effects of climate on hardwood expansion. Forgetting to leave adequate gaps led to buckling, reminding me how important environmental considerations are in flooring projects.
The importance of thorough moisture testing cannot be overstated. I learned the hard way that unseen moisture caused tiles to loosen over time, emphasizing that preventive testing is worth every penny.
Lastly, consistent maintenance and using quality tools have dramatically extended the life of my floors. Routine care isn’t just about aesthetics but about protecting your investment in the long run.