
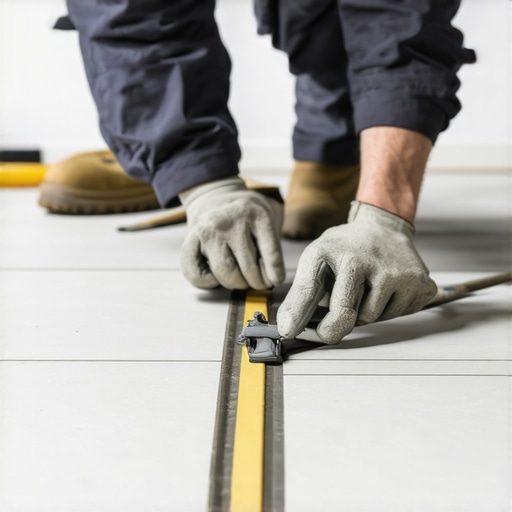
If you’ve ever stood back after laying your new tile, only to realize that the lines are slightly skewed, you know how frustrating it can be. I remember spending hours trying to correct the crooked grout lines, feeling my confidence draining with each misaligned row. That was my lightbulb moment—discovering that a simple trick, called the Chalk Line Hack, could make all the difference in ensuring flawlessly straight tile installations every time.
The Secret is Simplicity: Why the Chalk Line Hack Changes the Game
For years, I struggled with freehand markings and unreliable measurements. It wasn’t until I learned to use a chalk line effectively that everything clicked. This hack involves snapping a taut chalk line across your surface, giving you a visual guide that guarantees perfect straightness. It’s surprising how such a straightforward tool can eliminate guesswork and save you time and frustration on your project.
Is the Chalk Line Hack Actually Worth the Hype?
Initially, I was skeptical. Would a simple line really keep my tiles aligned? My early mistake was trusting rough measurements without securing a reliable guide. Once I started incorporating this technique, my installations were more precise and professional-looking. The key is to ensure the chalk line is tight and straight, providing a clear visual cue that’s easy to follow. According to flooring experts, using visual guides like chalk lines can improve accuracy and reduce errors—something that can save you both time and money in the long run. Check out more tips on efficient tile installation.
Now that I’ve seen the undeniable benefits firsthand, I want to share exactly how you can master this simple yet powerful hack. Whether you’re a DIY enthusiast or tackling your first big project, this approach is a game-changer. Ready to eliminate crooked lines and create stunning, professional-quality tile layouts? Let’s dive into the step-by-step process that will transform your installation skills and ensure perfect results each time.
Snap the Straight Line with Confidence
Start by securing one end of your chalk line at a corner or a fixed point close to your work area. Pull the line taut across the surface, ensuring it stays straight and free of slack. Imagine you’re stretching a tight guitar string: the tension is key to a crisp, accurate line. When ready, snap the chalk line against the surface, leaving a vivid, straight mark that guides your tiles or hardwood planks precisely where they should go.
Pro Tip: Keep the Line Taut and Straight
In my first attempt, I used a loose chalk line, and the resulting mark was wobbly—like trying to draw a straight highway with a spaghetti noodle. The fix was simple: double-check the tension, and make sure the line is perfectly straight before snapping. This small step dramatically improved my accuracy, preventing crooked grout lines or uneven floorboards.
Align and Mark for Perfect Precision
Once you’ve snapped your guide line, it’s time to mark your materials accurately. Use a pencil or chalk to mark where each tile or plank should sit, referencing the line consistently. Think of it as drawing a blueprint directly onto your workspace. If you’re installing tiles, mark the center points of each tile along the line to ensure a balanced pattern. For hardwood floors, marking the starting point and subsequent lines helps maintain symmetry across the room.
Pixel-Level Accuracy Matters
In a project I undertook in my living room, I used painter’s tape along the chalk line to protect the surface and give my markings extra precision. The result? Absolutely aligned edges and a professional finish. Remember, even small deviations can become glaring issues once grout or finish coats are added. Using your guide line as a backbone, double-check measurements at multiple points to spot errors early.
Test Before You Commit
Before proceeding with full installation, lay out a few tiles or planks along the marked lines to double-check your measurements. This is akin to a dry run—it uncovers potential setbacks, such as tiles that don’t fit or planks that are slightly too long. Adjust your markings as needed, and retrace the chalk line if any changes are made. I learned this the hard way when I installed a section of tile only to find it was misaligned after setting; a quick redo with a fresh chalk line saved my project from having to redo everything.
Use Level and a Long Straightedge to Confirm
Complement the chalk line with a level or a straightedge to verify the straightness across multiple points. When I was working on leveling a uneven subfloor, I used a long level across my marked line, adjusting where necessary to ensure the surface beneath was as flat as possible before installation. This double assurance ensures your tiles or hardwood have a stable, level base, preventing future cracking or uneven wear.
Keep Your Workspace Clean
After marking, brush away any excess chalk dust or debris to ensure that your tiles or planks adhere properly and align correctly. A clean surface prevents small debris from causing micro-misalignments, which can be especially noticeable on large format tiles or glossy hardwood finishes. During my last project, neglecting this step led to grout gaps and uneven surfaces, a mistake easily avoided with a quick sweep or vacuum.
By mastering these precise steps—securing and snapping a taut chalk line, marking meticulously, testing layout, confirming levelness, and maintaining cleanliness—you set a strong foundation for professional-quality flooring. Proper execution of these details transforms a DIY project into a showcase of craftsmanship, saving time and preventing costly mistakes down the line.
Even seasoned DIYers can fall prey to misconceptions about flooring installation, especially when it comes to leveling, tile, or hardwood floors. One of the most pervasive myths is that a perfectly level subfloor isn’t crucial—many believe minor bumps won’t affect finish quality. However, improper leveling is a primary cause of cracked tiles and squeaky hardwoods, undermining durability and aesthetics. Experts highlight that neglecting precise subfloor preparation leads to long-term issues and costly repairs; in fact, studies show that nearly 30% of flooring failures are due to improper leveling.
Why Do So Many Get Floor Leveling Wrong?
Many assume that quick fixes like shims or shoddy underlayment will suffice, but they often overlook the nuanced difference between cosmetic correction and structural stability. Advanced mistakes include mixing incompatible leveling compounds or applying too thick a layer, which can crack under weight—an issue discussed thoroughly in our comprehensive guide to floor leveling. A common trap is using low-quality self-levelers that don’t adhere properly or curing too quickly, trapping moisture and causing future warping. Remember, proper surface preparation and correct application techniques are essential for a flawlessly flat and durable foundation. This is especially critical when installing large-format tiles or high-end hardwoods, where imperfections are visually glaring. Thoroughly assessing your subfloor’s condition before proceeding, including moisture testing and surface sanding, can prevent these pitfalls and save you from costly demos later. For a detailed review of effective leveling strategies, check our article on rapid-dry levelers for quick projects. Sometimes, investing in professional tools like laser levels and floor scanners can make all the difference, ensuring your foundation is truly square and stable. Remember, like with finishing hardwood, the initial groundwork dictates the longevity and beauty of your entire project. Don’t overlook its importance—details matter more than most realize.
Choosing the Right Equipment for Long-Lasting Results
Investing in quality tools is essential for maintaining your flooring’s integrity over time. For hardwood floors, I rely heavily on a microfiber dust mop combined with a soft-bristled broom to keep surface debris at bay without scratching the finish. When it comes to tile, a grout cleaning machine with adjustable pressure ensures deep cleaning without damaging delicate joints. These tools provide a balance between effectiveness and gentle care, extending the lifespan of your investment.
For leveling and repair, a laser level paired with a moisture meter is indispensable. The laser level ensures ongoing flatness, especially when dealing with expanding or contracting environments, while the moisture meter prevents issues related to trapped water vapor. Personally, I prefer a laser level with a remote control feature—this allows for quick adjustments across large surfaces, saving time and maintaining precision.
Smart Maintenance Methods to Keep Floors Pristine
Consistent cleaning routines are the backbone of flooring longevity. Regularly sweeping or dust mopping prevents grit from scratching surfaces, while periodic damp mopping with manufacturer-approved cleaners helps preserve finishes. I advise against harsh chemicals; instead, opt for pH-neutral solutions, which are gentle yet effective. For hardwood, proper care and cleaning techniques contribute significantly to their enduring beauty.
Addressing minor issues promptly can prevent costly repairs later. For example, if you notice a soft spot or squeak, consider checking your subfloor with a stud finder and moisture sensor. Quick intervention—like re-gluing loose planks or replacing damp subfloor sections—can restore stability and prevent future damage. Maintaining a detailed log of repairs and general upkeep helps track the health of your flooring over the years.
Scaling Up for Bigger Spaces or Multi-Room Projects
If you’re planning to expand or undertake a large-scale renovation, precision becomes even more critical. Employing a chalk line, as discussed in our previous posts, becomes indispensable for maintaining consistency across vast areas. Additionally, investing in a quality moisture barrier installation system can prevent future issues caused by humidity fluctuations. For extensive projects, I recommend a professional-grade floor leveling system that combines self-leveling compounds with laser-guided application. This combo ensures the subfloor remains uniformly flat, reducing installation errors and enhancing the final appearance.
Future Trends in Flooring Maintenance and Installation
The future of flooring care points toward automation and smart technology integration. Imagine robotic vacuum cleaners equipped with sensors specifically designed for hardwood and tile surfaces or IoT-enabled moisture meters that alert you via a smartphone app when conditions shift. These innovations promise to simplify maintenance, allowing homeowners and contractors to catch problems early and address them proactively. As these technologies mature, expect a significant shift toward more sustainable and low-maintenance solutions that extend the life of your floors.
How do I maintain my flooring system over time?
Developing a routine that combines regular cleaning, prompt repair of minor damages, and periodic inspections using specialized equipment—like a moisture meter and laser level—will ensure your floors remain beautiful and durable. When upgrading your tools, prioritize precision, such as with a high-quality moisture barrier system, to prevent issues like warping or cracking. For detailed guidance, you can explore our comprehensive guide to floor leveling. Don’t hesitate to test advanced methods like sealing grout lines with a penetrating sealant; this small step can significantly cut down on dirt accumulation and maintain appearance for years to come. Embrace these tools and practices, and watch your floors thrive long after installation.
Lessons I Wish I Knew Before Starting
One of the most valuable lessons I learned was never to underestimate the power of a well-placed chalk line. Initially, I thought I could eyeball straight lines, but I quickly realized that precision tools can save hours and prevent costly mistakes. Another insight was the importance of thorough surface prep—skipping this step almost always led to issues like cracking or uneven surfaces. Also, I discovered that investing in quality leveling compounds and tools like laser levels dramatically improved my finishing quality, making my floors look professionally installed. These lessons didn’t just improve my craftsmanship—they boosted my confidence, showing that simple techniques and quality equipment can make a significant difference.
Tools and Resources That Changed My Approach
For anyone serious about elevating their flooring projects, I recommend starting with the comprehensive floor leveling guide. It offers in-depth techniques that have helped me achieve a perfectly flat surface every time. My go-to tool has become an accurate laser level, which I use in conjunction with a moisture meter to ensure subfloors are dry and level before laying flooring. When it comes to cleaning and maintenance, a microfiber dust mop and pH-neutral cleaners have kept my hardwoods gleaming without damage.Lastly, don’t overlook the value of high-quality thinsets and sealants—I’ve found they can prevent problems later, extending the life of your floors. For more expert-recommended products, check out the detailed reviews on low-VOC stains and sealants.
Your Next Step Is Closer Than You Think
Embracing these insights and tools can truly transform your flooring projects from ordinary to extraordinary. Remember, mastery comes from patience, proper planning, and using the right techniques—like snapping perfect chalk lines and verifying flatness before installation. Take action today to implement these tips; your future self will thank you when your floors stand the test of time with impeccable beauty and durability. Ready to start your next flooring adventure? Share your biggest worry or success story below—I’m eager to hear how you plan to improve your craft.
Comments are closed.