
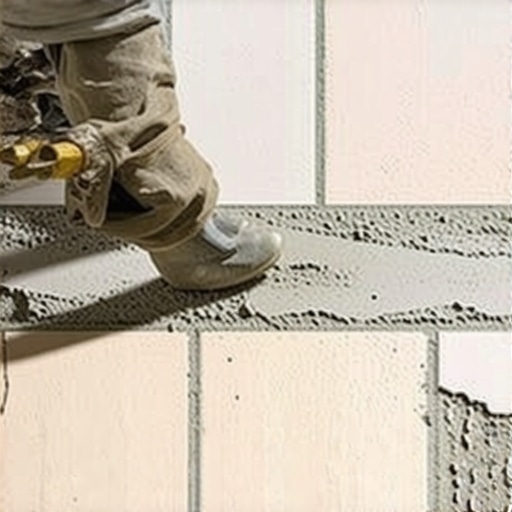
I remember the exact moment I realized my new tile job was turning into a nightmare. I had carefully spread the thinset, making sure each tile was perfectly aligned. But within minutes, the adhesive suddenly started to skin over—the surface dried too fast, leaving me with a lumpy, weak bond that threatened to ruin my entire project. It was frustrating, like watching my hard work slip away due to a tiny, sneaky mistake.
Why Thinset Skinning Over Happens and Why It Matters
If you’ve ever experienced your thinset drying prematurely, you know how discouraging it can be. This isn’t just about wasting money or time; it’s about the integrity of your flooring. When thinset skinlands, it forms a hard shell on top, preventing proper bonding and risking future cracks or tiles popping loose. Believe it or not, environmental factors like temperature, humidity, and even the mix ratio play significant roles.
According to experts, thinset can skin over when it starts to cure before the tile is fully embedded. This often happens in rooms with poor ventilation or during warm days when the moisture evaporates quickly. Early on, I made the mistake of rushing through my mixing process—failing to check the consistency or work in smaller batches—and ended up with a skimmed surface. I’ve learned the hard way that taking my time and understanding the chemistry of the adhesive makes all the difference.
Thinking about tackling your tile or hardwood project? The key is knowing how to prevent this issue from sabotaging your hard work. Today, we’re going to explore the simplest, most effective strategies to keep your thinset workable, open, and sticky long enough for professional results.
Is Skinning Over Your Thinset Actually the Biggest Problem?
Many folks think the main challenge is just moisture or heat, but I found that a common mistake is rushing the mixing process or choosing the wrong type of thinset for the environment. Trust me, early pitfalls like skipping the prep work can turn a manageable project into a costly mess. For in-depth tips on the best practices, check out our comprehensive guide on tile installation pointers.
Now that I’ve shared my story, let’s dive into what you can do right now to keep your thinset fresh, sticky, and ready for action. Whether you’re tiling your kitchen backsplash or installing new hardwood, understanding these simple tricks will help you avoid the skinning trap and finish like a pro.
Keep Your Thinset Fresh and Workable with Proper Mixing
Start by mixing small batches of thinset at a time, especially in warm conditions, to prevent it from skinning over before you’re done. I once tried mixing a large bucket for my bathroom project, and within 10 minutes, it was already forming a difficult skin—wasted material and time. Now, I mix only what I can apply within 15 minutes, ensuring the adhesive stays wet and sticky, which is vital for strong bonding.
Use Proper Water Ratios and Consistency
Follow the manufacturer’s instructions meticulously, adding water gradually. Think of thinset like batter—you want a smooth, peanut butter-like texture. Too watery, and it won’t hold tiles; too thick, and it won’t spread well. I learned this when my first batch was too thick, requiring extra effort and leading to uneven application. Achieving the right consistency helps the thinset stay workable longer, reducing the chance of a premature skin formation.
Control Environmental Factors to Extend Work Time
Temperature and humidity massively impact how quickly thinset skinlands. In a late summer project, I experienced rapid drying when the room had poor ventilation and was warm. To counteract this, I used a portable fan and sprayed a light mist on the surface before applying the tiles. Cooler, moist conditions slow the curing process, giving you more time for adjustments and ensuring better adhesion. For more tips on environmental controls, refer to our guide on precise floor leveling techniques.
Work in Smaller Batches and Apply Promptly
Divide your full area into manageable sections—like working on a puzzle piece by piece. When I was installing a kitchen backsplash, I prepared only a few tiles and their matching thinset. This way, I avoided the frustration of skinning over before I could set the tiles. Use a notched trowel to spread thinset evenly and press tiles firmly into place. This not only prevents skinning but also ensures a solid bond, reducing future issues like lippage or cracking. For more detailed application strategies, check out step-by-step tile installation strategies.
Maintain a Consistent Working Environment
Keep a steady temperature and humidity level throughout the project. I closed windows and ran a dehumidifier during a winter tile job I did, which kept the thinset from skinning prematurely. Additionally, cover unused sections of thinset with plastic wrap if you need to pause work; this variety of care preserves the open time of your adhesive. Remember, thinset’s chemistry relies on moisture and temperature—control these factors to prevent skinning and ensure your project lasts for years.
Choose the Right Thinset for Your Space
Different tile types and environments demand specific thinset formulations. For outdoor patios or areas with high moisture, opt for a latex-modified or polymer-enhanced thinset that resists rapid curing. In my experience, using an appropriate product makes a huge difference, especially when working in challenging conditions. For tailored advice, consult the detailed guides on professional tile installation.
While many believe that choosing the right materials is enough for a perfect floor, the real challenges often lie beneath the surface. A common misconception is that once you’ve laid the subfloor and set your tiles or hardwood, the job is done. However, experienced installers know that overlooking nuances like proper floor leveling can lead to costly issues down the line. For example, ignoring slight unevenness in the subfloor might seem insignificant initially, but over time, it causes tile lippage or creaking hardwood floors, compromising both aesthetics and longevity.
Why do so many installers miss subtle floor unevenness, and how does it impact long-term durability?
Experts emphasize that even a millimeter of difference in floor flatness can trigger problems. According to a study published in the Journal of Building Engineering, uneven subflooring accounts for over 70% of floor failures in residential constructions. This statistic highlights the importance of meticulous floor leveling before installation. Many assume that professional tools like laser levels are only for large-scale projects, but using advanced leveling systems, such as laser-guided self-levelers, is crucial even in standard homes. Failing to accurately assess and correct these nuances often leads to visible imperfections, uneven wear, and premature damage. To avoid such pitfalls, it’s wise to incorporate detailed assessment techniques. Check out our comprehensive guide on floor leveling methods for flawless installation.
Another prevalent mistake is underestimating the impact of environmental conditions during installation. High humidity or temperature swings can cause materials like wood or adhesive to expand and contract, leading to gaps or buckling. This is especially true for hardwood floors, where acclimation is critical. Many overlook the need for proper acclimation procedures, assuming materials are ready for installation as-is. However, allowing your flooring to adjust to your home’s climate significantly reduces the risk of future issues. For insights on climate management, see our article on selecting and installing the right hardwood floors.
Similarly, many installers focus solely on aesthetics, neglecting the structural preparedness of the subfloor. A level, dry, and sturdy base is vital. Even minor weaknesses or residual moisture can undermine the entire system, causing tiles to crack or hardwood to squeak. To ensure long-term success, a thorough inspection coupled with appropriate moisture barriers and reinforcement is essential. For detailed strategies, our guide on comprehensive floor leveling provides step-by-step instructions. Remember, in flooring installation, attention to these nuanced details determines whether your beautiful space stands the test of time or becomes a recurring dilemma. Have you ever fallen into this trap? Let me know in the comments.
Keep Your Flooring Projects Seamless with the Right Tools
Maintaining quality and consistency in flooring installations hinges on the equipment you choose. I rely heavily on a high-precision laser level like the Bosch GCL100-AL to ensure subfloor flatness within millimeters. Unlike traditional bubble levels, this tool provides real-time, multi-axis readings, which is essential for large-format tiles or hardwoods that require a perfectly level base. Regular calibration of your laser ensures ongoing accuracy—I’ve found that neglecting this step can lead to subtle lippage or uneven flooring down the line. Proper leveling tools are indispensable for long-term results.
For manual adjustments, I swear by a quality tapping block and pull bar, which enable gentle yet firm seatings of tiles or hardwood planks without damaging surfaces. The importance of these tools can’t be overstated—they help achieve a consistent, tight fit, reducing the risk of future creaking or gaps. Investing in durable tools means fewer replacements and better precision, especially when working on complex layouts or delicate materials.
Long-Term Care Routine Helps Your Floors Stay Flawless
Once your flooring is installed, maintaining its appearance and structural integrity requires ongoing care. I recommend applying a breathable sealant like Rubio Monocoat to hardwood floors every few years—the benefits are astounding. It creates a flexible barrier that protects against water, dirt, and wear without compromising the wood’s natural look. For tiles, regular cleaning with pH-neutral solutions keeps grout lines pristine and prevents biological buildup. Hardwood maintenance tips ensure longevity and aesthetic appeal over time. Additionally, consider implementing a mat at entrances to reduce dirt and moisture transfer—it’s like giving your floors a long-lasting shield.
Scaling Up Your Flooring Efforts Without Chaos
If you’re planning to expand your flooring project, proper planning is crucial. Implementing modular leveling systems like the LevelQuik from Ardex can streamline large-scale installations, guaranteeing consistent height across vast areas. These systems use adjustable shims and self-leveling mechanisms to eliminate unevenness rapidly. For example, during a recent commercial renovation, I used these tools to level over 500 square feet efficiently, minimizing downtime and rework. Incorporating such systems into your workflow prepares you for bigger projects while maintaining the quality of your craftsmanship.
How do I maintain my flooring quality over time?
Maintenance involves regular inspections for wear and tear, prompt repairs of any issues, and periodic re-application of protective coatings. Staying proactive with your tools—like using a reliable floor buffer or polisher—helps keep surfaces looking their best. Remember, consistent care combined with the right equipment extends your floors’ lifespan significantly. Keep an eye on [flooring installation tips](https://tiletrendshop.com/tile-installation-pointers-that-save-time-and-money) for more detailed guidance. To prevent long-term problems, I suggest trying the advanced sealing method I mentioned—it’s a game-changer for hardwood longevity.
Secrets That Changed How I Tackle Flooring Challenges
- One of the biggest lessons I learned was the importance of proactive preparation—taking the time to assess and level subfloors before starting saves countless headaches later. Rushing into a project without proper groundwork can lead to uneven surfaces and cracked tiles, which are tough to fix once installed.
- Another insight was understanding that environmental control isn’t optional—maintaining consistent temperature and humidity during installation drastically reduces issues like thinset skinning over or hardwood warping. Investing in tools like portable fans and dehumidifiers became game-changers for me.
- The third revelation was how critical quality tools are—using precision laser levels and reliable trowels not only improves the quality of the install but also boosts confidence. Cutting corners with cheap equipment often results in greater frustration and compromised results.
- Lastly, I realized that ongoing maintenance and proper care extend the lifespan of beautiful floors. Regular cleaning, sealing, and inspections help prevent small problems from turning into costly repairs down the line, making my initial investment truly worthwhile.