
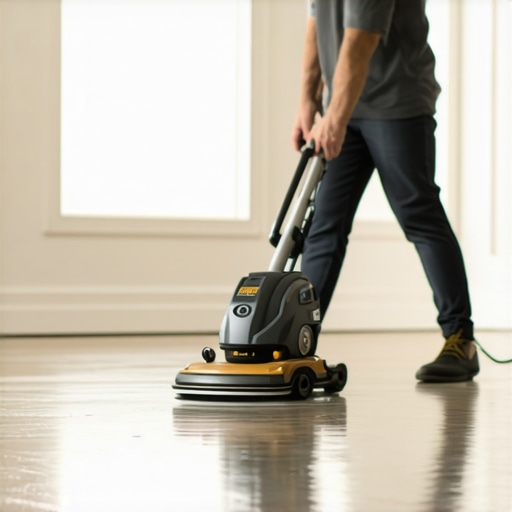
Have you ever started sanding your hardwood floors only to realize a dust storm has taken over your home? That sharp inhalation, the cloud of debris settling everywhere — it’s like battling a mini tornado right inside your living room. I vividly remember my first attempt; I felt like I had unleashed chaos rather than completing a simple refinishing job. That lightbulb moment hit hard: there had to be a better way to do this without turning my house into a construction zone.
Why Traditional Sanding Turns Your Home into a Dust Disaster
Sanding hardwood floors is essential for restoring their beauty, but it’s notorious for creating a mess. Conventional methods generate an incredible amount of airborne dust, which settles on everything — furniture, countertops, even the walls. Not only does this make cleanup a nightmare, but airborne dust can also pose health risks, especially for allergy sufferers or those with respiratory issues. I learned this the hard way when I didn’t wear a mask during my first project — the dust lingered for days and caused sniffles that lasted beyond the cleanup.
Fortunately, over the years, I’ve discovered five effective tactics to contain dust during sanding. These strategies have transformed my approach, making DIY hardwood refinishing more manageable and less stressful. If you’ve been frustrated with the dust storm aftermath, stick around. We’re about to tackle exactly how to keep your home cleaner and safer—without sacrificing the quality of your work.
Still skeptical? Trust me, I used to think dust barriers were overhyped too.
Early on, I made the mistake of skipping proper containment because I thought, “It’s just a bit of dust.” That was a mistake. According to research, airborne dust particles can stay suspended for hours, floating through your entire home — which extends cleanup time and impacts indoor air quality (source). Learning from that, I now swear by dust containment techniques that actually work. Once you implement these tactics, you’ll wonder how you ever sanded without them.
So, are you ready to take control of your sanding project and avoid the mess? Let’s dive into the five proven methods that will keep your home cleaner, your lungs healthier, and your project on track.
.
Set Up a Protective Barrier System
Start by sealing off the room with plastic sheeting, attaching it securely around doorways and vents using painter’s tape. This creates a contained environment that prevents dust from migrating to other parts of your home. I recall sealing my living room with plastic sheeting, which immediately reduced dust spread, making cleanup manageable. Use weatherstripping or foam tape along the edges for a tight seal, ensuring airborne particles stay within the workspace.
Choose the Right Equipment to Minimize Dust
Opt for a drum sander equipped with a dust collection port connected to a high-quality vacuum system. Attach a HEPA filter to trap fine particles effectively. During my project, I borrowed a professional-grade sander with built-in dust collection, which noticeably reduced airborne dust compared to traditional machines. The key is maintaining a strong suction so debris is sucked directly into the vacuum rather than floating in the air.
Implement Effective Dust Extraction Techniques
Position the vacuum nozzle as close as possible to the sanding area, moving it steadily across the surface. Use a vacuum with a cyclonic or HEPA filtration system to capture microscopic dust. I learned that even a slight gap between the sander and the vacuum inlet can cause dust escape; therefore, ensure a snug fit and double-check connections frequently. Additionally, keep the vacuum running during breaks to prevent dust from settling back into the air.
Use Water-Based Dust Suppression Methods
Spray a fine mist of water along the sanding path using a misting bottle; this dampens dust particles, reducing airborne dispersion. I had skeptical thoughts initially, but after lightly misting my hardwood floor before sanding, I noticed a significant decrease in airborne dust. Be cautious not to over-wet the surface, which could cause damage or affect finish adhesion. Practicing controlled misting can make a real difference in maintaining air quality.
Optimize Your Workspace for Dust Control
Arrange the furniture carefully to create a buffer zone around the work area. Cover remaining furniture and fixtures with plastic sheets or cloth drop cloths. I once forgot to cover a nearby bookshelf, and dust settled on the books, prompting extra cleanup. Post-sanding, remove these coverings carefully to avoid spreading trapped dust into clean areas. Regularly sweep or vacuum adjacent areas using a vacuum with a HEPA filter to catch any stray particles.
Safety Precautions to Protect Your Health
Always wear a fitted N95 or respirator mask during sanding to prevent inhalation of fine particles. Use safety goggles and ear protection as additional safeguards. I underestimated the importance of masks during my first few projects, which left me coughing. Investing in proper personal protective equipment not only keeps you healthy but also ensures your project progresses smoothly without health interruptions.
Maintain Continuous Dust Control During the Project
Keep your containment system sealed until final cleanup. Turn on air filtration units or portable HEPA air purifiers to circulate and clean indoor air constantly. During a recent project, I placed an air purifier in the room, which noticeably improved air quality and minimized residual dust. Regularly check and replace dust collection filters to maintain optimal efficiency, ensuring dust doesn’t sneak into your living spaces.
Mastering these steps transforms a dust-heavy job into a cleaner, healthier process. For more tips on maintaining your floors after sanding, explore hardwood floor care secrets. Applying these strategies requires attention but pays off by saving time and reducing cleanup frustration, making your DIY project not just successful but also safer.
When it comes to flooring, many homeowners operate under assumptions that could undermine the quality and longevity of their projects. One widespread myth is that choosing the thickest tile or the most expensive hardwood automatically guarantees durability. In reality, installation techniques matter far more than material thickness or brand prestige. For example, improper substrate preparation can lead to cracked tiles or warped hardwood over time, regardless of material quality. As I learned from complex projects involving meticulous surface prep, neglecting proper surface leveling or moisture barrier installation can cause significant setbacks, an insight I detail in our comprehensive guide on floor leveling. Moreover, many assume that flooring installation is a straightforward task—simply laying tiles or planks—yet overlooking nuances like expansion joints or correct adhesive application can result in lippage, cracks, or squeaks. An advanced mistake I see frequently is neglecting to account for subfloor movement, especially in climates with high humidity, which stresses the importance of using flexible mortars and understanding subfloor stability as discussed in installation pitfalls. A common trap is thinking that simple DIY shortcuts can replace professional precision, but in complex areas or large spans, cutting corners can lead to costly repairs. For experienced installers, paying attention to these subtle factors isn’t just about perfectionism but about ensuring a lasting finish. Do you want to master these nuanced aspects? I recommend diving into our detailed resources, such as tile installation tips and hardwood care secrets, which unpack the intricate details that elevate your project from good to professional-grade. Remember, understanding these hidden nuances means fewer surprises and longer-lasting flooring. Have you ever fallen into this trap? Let me know in the comments.
How do I keep my flooring projects reliable over time?
Investing in high-quality tools can dramatically improve the durability and appearance of your flooring. I personally swear by the Bosch GSR 18V-60 impact driver when installing hardwood or tiles. Its precision torque control minimizes the risk of over-tightening fasteners, which can cause floor squeaks or gaps over time. Using a reliable, cordless drill with adjustable speed ensures you can handle delicate finishing tasks without damaging the material.
For leveling uneven subfloors, I rely on the Kraneberg Power Trowel, especially when dealing with large areas. Its robust motor and adjustable blades help achieve a perfectly flat surface, crucial for both tiles and hardwoods, preventing future problems like cracking or squeaking. When it comes to measuring, the Stabila 37424 Master Level is my go-to. Its precision of 0.0005 inches ensures that each section of your floor is perfectly aligned, reducing long-term wear issues.
But tools alone aren’t enough. The future of flooring involves smart technology. Software like installation planning apps can help you map out the project, ensuring consistency and reducing waste. These digital tools allow for meticulous planning, which is fundamental in avoiding costly mistakes down the line.
What should I do to maintain my floors long after installation?
Routine inspections, gentle cleaning, and timely repairs are key. Regularly check for loose boards or cracked tiles, and address issues promptly. For hardwood floors, a periodic light buff using a variable-speed buffer with a soft pad can remove minor scratches and revive their shine. Also, consider applying a high-quality sealant every couple of years; this acts as a protective barrier against moisture and stains, extending your floor’s lifespan.
Looking ahead, innovations like AI-driven moisture detection sensors could revolutionize how you monitor your flooring’s health, alerting you to problems before they become visible. Meanwhile, joining professional forums or subscribing to updates from experts can ensure you stay informed about the latest tools and techniques.
Scaling your floor maintenance routine
If you’re managing multiple floors or larger spaces, investing in progressive maintenance strategies can pay dividends. For instance, setting up a cyclical inspection schedule with detailed checklists can help track wear and tear systematically. Upgrading to a modular cleaning system—like a robotic floor scrubber integrated with smart scheduling—can handle routine upkeep efficiently, freeing you to focus on more complex projects.
Ultimately, combining the right tools with proactive care creates a resilient foundation for your flooring investments. If you’re eager to elevate your project outcome, I recommend trying the advanced leveling techniques I use, which you can explore in detail at this resource. Mastering these methods now will save you time and money in the long run, ensuring your floors look great and perform well for years to come.
Lessons That Changed My Flooring Approach
- Overconfidence Can Lead to Chaos: I once skipped sealing the room, only to spend hours cleaning airborne dust, realizing that proper containment isn’t just a step—it’s the backbone of a successful project.
- The Right Tools Make All the Difference: Investing in a dust-collecting sander and HEPA filters saved me from inhaling dust and made cleanup a breeze, proving that quality equipment pays off.
- Water Isn’t Just for Drinking When Sanding: A light mist of water drastically reduced dust spread, transforming my perceptions about dust suppression techniques from skepticism to conviction.
- Sealing Every Corner Is Non-Negotiable: Small gaps in barriers invited dust to escape, teaching me meticulous sealing is crucial for a clean and health-conscious workspace.
Tools and Resources That Elevated My Craft
For anyone serious about flooring installation and refinishing, I recommend exploring a few trusted resources. The tile design inspiration gallery provides innovative ideas for integrating style and durability. My go-to tools include a high-quality HEPA vacuum, a professional-grade drum sander, and moisture meters—each selected because they deliver precision and reliability. When it comes to reading materials, expert refinishing guides have been a game-changer, offering actionable tips that elevate my results and save me from costly mistakes.
Your Turn to Elevate Flooring Projects
Remember, mastering dust control isn’t just about cleanliness—it’s about creating a healthier environment and ensuring your flooring lasts for years to come. By applying these insights and using trusted tools, you’re investing in quality and long-term satisfaction. Don’t hesitate to experiment and adjust techniques to fit your space—your future self will thank you. Ready to take your flooring game to the next level? Share your experiences or ask questions below; I’d love to hear your journey towards perfect floors.
Comments are closed.