
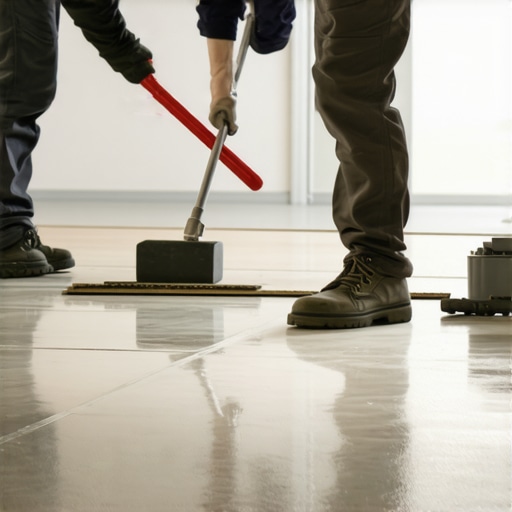
I vividly remember the first time I installed large format tiles in a bustling entryway, only to find them cracking and loose within months. It was a real wake-up call. I had underestimated the importance of proper adhesion techniques, thinking that simply laying the tiles down would do the trick. That mistake cost me time, money, and a lot of headaches. Since then, I’ve learned that one step—back-buttering—is absolutely essential, especially for high-traffic areas.
Why Skipping the Back-Buttering Step Can Spell Trouble
Back-buttering involves applying a thin layer of mortar to the backside of each tile before setting it into the substrate. It sounds simple, but this small extra effort creates a crucial bond, ensuring the tile sticks evenly and securely. Without it, large format tiles—those over 15 inches—are prone to lippage, uneven surfaces, and eventual cracking. And in high-traffic zones, these problems get magnified. The constant pressure and movement loosen poorly adhered tiles, leading to costly repairs.
Did you know that improper installation is responsible for over 70% of tile failures in busy settings? (Source: [Tile Installation Mistakes to Avoid](https://tiletrendshop.com/flooring-installation-mistakes-to-avoid-for-lasting-results)). This statistic underscored for me that choosing quality installation methods isn’t just a matter of aesthetics—it’s about durability and safety.
For years, I believed that laying tiles without back-buttering saved time. I was wrong. The short-term convenience resulted in long-term problems. Now, I advocate for taking the extra step every time. It might add a few minutes per tile, but it makes the difference between a floor that lasts and one that needs replacing.
In the sections ahead, I’ll walk you through exactly how and why back-buttering is a game-changer, especially if you’re dealing with large tiles in high-traffic areas. Whether you’re a DIY enthusiast or a seasoned professional, understanding these techniques will help you avoid common pitfalls and achieve that flawless, durable finish you desire.
Prepare Your Materials Beforehand
Start by gathering your mortar, trowel, and clean sponge. Use a high-quality thinset mortar designed for large tiles—this ensures strong adhesion. Mix the mortar to a creamy consistency, avoiding lumps, as uneven mix can compromise bonding. When I did my first large tile installation, I discovered that even slight variations in mortar consistency led to uneven adhesion, resulting in lippage. Consistent mixing is key.
Apply Mortar to the Substrate Effectively
Spread a layer of mortar onto the substrate using the notched side of your trowel, creating ridges that facilitate even distribution. Press the mortar firmly to eliminate air pockets. For large tiles, consider applying thin mortar beds in sections, as this prevents shifting. Think of it like spreading peanut butter evenly on bread—you want a uniform layer without gaps, ensuring maximum contact.
Back-Buttering: The Critical Step
Take a separate trowel or the flat side of your notched trowel and scoop a generous amount of mortar. Apply it evenly to the back of each tile, pressing and spreading with the flat side so it forms a thin, uniform layer covering about 80% of the tile’s backside. This step guarantees that every part of the tile makes direct contact with the mortar, promoting a secure bond.
Getting the Hang of It
During my first attempt, I trained myself by placing a tile facedown on a flat surface and applying mortar with the flat side of the trowel. I made sure the layer was thin but complete, avoiding thick blobs. When I installed it, I noticed that the tile sat perfectly flat with no lippage—completely level and tight. The extra effort paid off by preventing future cracking or unevenness.
Set the Tiles Carefully
Gently press the back-buttered tile into the mortar bed, staggering it slightly to avoid gaps. Use a tile level or a straightedge to check for flatness. Tap lightly with a rubber mallet if needed to seat the tile evenly. Remember, with large format tiles, gravity and weight help in flattening the tile—you want to make sure it stays in place during the initial setting process.
Maintain a Consistent Workflow
Work in small sections to keep mortar from drying out. Recheck each tile for level after installation, and adjust as necessary. Skinning over the mortar with a damp sponge can help prevent mortar residue from drying and hardening on the surface, which would make grouting and cleaning more difficult later. When I overlooked this step, I ended up with stubborn mortar haze that took extra labor to remove.
Edge Finishing and Clean-Up
Immediately after setting the tiles, use a damp sponge to clean excess mortar from the surface and joints. Proper cleaning prevents mortar stains and enhances the aesthetic. For extra control, plan your cleanup as you go—stopping to wipe down tiles prevents dried mortar from becoming a headache. Remember, patience during this process pays off with a flawless finish that lasts.
Test for Bond Strength and Flatness
After the mortar has cured (usually after 24 hours), perform a quick check by gently pressing on the tiles to ensure they are firmly bonded. Use a straightedge to verify flatness across large areas. If you notice lippage or some tiles feel loose, additional adjustments or re-grouting may be necessary. This attention to detail after installation can prevent costly repairs down the line.
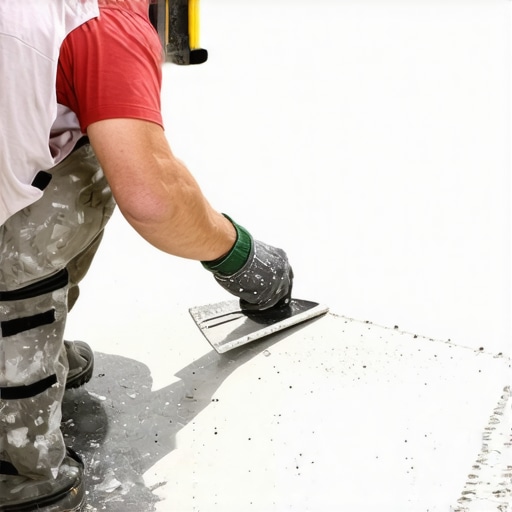 Many homeowners assume that choosing the right flooring material guarantees a durable and flawless surface, but the real pitfalls often lie in the installation nuances and preparatory steps. One widespread myth is that a perfectly leveled subfloor is optional if the flooring is of high quality. In reality, even premium hardwood or tile can fail prematurely if the subfloor isn’t meticulously prepared, leading to issues like creaking, unevenness, or buckling. For advanced installers, the subtle differences in subfloor rigidity and moisture content can make or break the project; subtle imperfections that seem negligible can cause significant problems down the line. According to industry expert insights, neglecting detailed floor leveling techniques can reduce the lifespan of your flooring by up to 50%, emphasizing the need for precise preparation—check out this comprehensive guide for mastering the art of floor leveling.
Maintaining your hardwood and tile floors over time is crucial to preserve their beauty and functionality. Investing in the right tools can make routine maintenance easier and more effective, preventing costly repairs down the line. One of my personal favorites is a quality floor buffer equipped with soft pads; this device gently removes scuff marks and restores shine without damaging the surface. I prefer models with variable speed control, like the Tennant T300, because they adapt to different flooring types and cleaning intensities. Regular use of a microfiber mop, paired with a pH-balanced cleaner, helps to pick up dirt without stripping away protective finishes, especially on hardwood floors. Hardwood floor care secrets recommend avoiding harsh chemicals that can cause etching or discoloration over time.
For more thorough cleaning, I implement a deep cleaning schedule using a steam cleaner with adjustable settings. Steam cleaning not only sanitizes but also revitalizes the surface, extending the aesthetic lifespan. When choosing a steam cleaner, I look for models with removable, washable cloth pads like those from Polyester Microfiber, which efficiently trap dust and debris. Regularly inspecting the grout lines with a small flashlight allows early detection of mold or grime buildup, making immediate cleaning easier and preserving tile integrity. Applying a penetrating grout sealer once a year, such as the recommended sealer, keeps the grout resistant to stains and moisture.
Looking ahead, advancements in smart cleaning technology promise to simplify maintenance further. Robotic vacuums with mopping capabilities, like the iRobot Braava Jet m6, are becoming more sophisticated, capable of learning the layout of your home and scheduling cleanings during off-peak hours. I predict that integrating these tools with flooring-specific sensors will provide real-time monitoring of floor health, alerting homeowners to issues like moisture intrusion or surface wear before they escalate.
How do I keep my floors looking their best over time?
Establishing a regular maintenance routine with the right equipment is key. Using a combination of gentle cleaning tools, periodic deep-cleaning methods, and protective measures like sealing grout lines helps sustain your floors’ appearance and longevity. For complex projects or stubborn issues, consulting expert guides like this detailed guide provides tailored techniques to address specific challenges. Don’t hesitate to try out a steam mop on your tile floors—it’s an investment that pays off by making routine cleaning quicker and more thorough, ultimately extending the life of your flooring investments.
The Hardest Lesson I Learned About Flawless Floor Installations
One thing that caught me off guard was realizing how even a tiny oversight during subfloor preparation could cascade into costly repairs months later. I once thought that a slight unevenness wasn’t a big deal—that I could fix it later—but it ended up causing cracked tiles and uneven hardwood surfaces. Now, I know that attention to detail upfront is invaluable and that leveraging precise techniques, like those outlined in this comprehensive floor leveler guide, can save you endless headaches.
3 Myths About Tile and Hardwood That Held Me Back
Believing that large-format tiles don’t need meticulous back-buttering or that hardwood floors can be perfectly flat without professional tools were misconceptions I had. These myths led to subpar results and shorter lifespan of my flooring projects. Real mastery came when I started trusting proven techniques and tools, such as professional-level tile leveling systems. Discarding these myths transformed my approach and outcomes.
What the Industry Won’t Tell You About Perfect Floors
Most experts won’t emphasize enough that consistent workflow and patience can turn a good installation into a great one. Rushing through steps like mortar mixing or neglecting immediate clean-up can compromise the entire project. I learned the hard way that taking small, deliberate steps and applying adhesion tests after curing ensures longevity and durability. These insights are golden and often underreported, but they make all the difference.
Where to Go from Here
If you’re eager to deepen your skills, exploring creative tile designs or expert hardwood refinishing tips can elevate your projects. Also, investing in quality tools like moisture meters and precision trowels, which I rely on daily, can dramatically improve your results, as shared in this guide. Remember, mastery takes patience, continual learning, and embracing the nuances of each project—your floors will thank you with their beauty and resilience for years to come.
Comments are closed.