
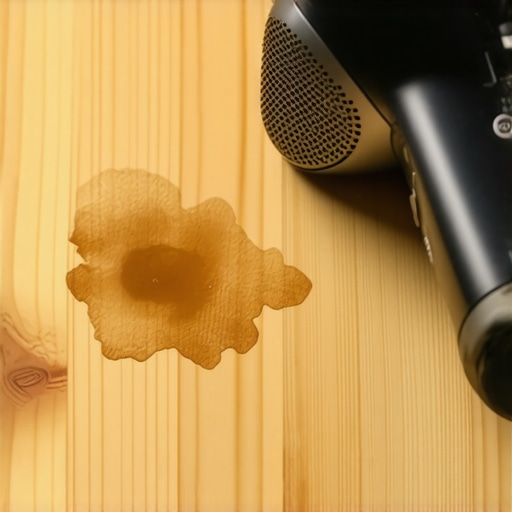
One morning, I stepped into my living room and noticed a small, damp stain marring the beauty of my hardwood floor. My first instinct? Panic. I knew water spots could lead to warping, swelling, or even irreversible damage if not addressed promptly. That lightbulb moment hit me hard — I realized I’d overlooked a common home mishap that, left unchecked, could cost a fortune in repairs.
Why Properly Drying Water Spots on Hardwood Floors Matters
Hardwood floors are not only a stunning feature but also an investment that adds warmth and value to any home. But they’re also sensitive to moisture. When water seeps into the wood, it can cause swelling, cupping, or staining, making your once pristine floor look worn and uneven. The tricky part? Water spots aren’t always obvious at first. Sometimes, they hide beneath the surface, risking long-term damage if neglected.
The good news? Acting quickly with the right techniques can prevent these issues from escalating. That’s where understanding how to effectively dry out a water spot becomes essential — not just for preservation but also for maintaining the aesthetic charm of your floors. Early intervention can save you hundreds, if not thousands, down the line.
Are you tired of dealing with stubborn water stains that just won’t go away? If so, stick around. I’ll walk you through practical, neighbor-tested methods to get your hardwood floors dry and looking their best again.
Will Drying Water Spots Damage My Floor?’
In my early days of trying to fix water issues, I made the mistake of using a hairdryer on high heat. It seemed like a quick fix, but it only worsened the problem, causing the water to seep deeper and the wood to crack. Trust me, understanding the subtle nuances of drying techniques is critical. Proper moisture control is key. For more insights on avoiding common flooring mistakes, check out these tried-and-true tips.
It’s only by acknowledging these pitfalls that you can confidently restore your floors without unintended damage. Now, let’s explore how to do it right.
Use Towels and Mops to Remove Excess Water
Begin by immediately blotting the area with clean, absorbent towels or microfleece cloths. Press gently to soak up as much water as possible without spreading it further. During my rainy weekend project, I layered towels and pressed firmly for about 10 minutes, which significantly reduced the moisture. This step prevents water from penetrating deeper into the wood and reduces the risk of swelling or staining.
Apply Gentle Heat with a Low-Setting Dryer
Next, use a hairdryer set to the lowest heat and airflow. Hold it at a distance of about 6 inches from the surface, moving continuously to distribute the heat evenly. I once hurried this step and kept the dryer too close, which caused the finish to crack. Remember, high heat can cause more harm than good, so patience and a gentle approach give better results. This method helps evaporate remaining moisture without risking damage.
Utilize a Dehumidifier or Fan for Final Drying
After removing surface moisture, enhance the drying process by directing a fan or setting up a dehumidifier nearby. This accelerates evaporation from within the wood. I set up a portable fan for several hours during a DIY repair, noticing that the water spots dried faster and with less residual staining. This step is crucial when water has seeped beneath the finish, as it helps draw out residual moisture.
Check for Remaining Moisture with a Humidity Meter
To ensure the water spots are gone, use a moisture meter to assess the wood’s internal moisture levels. Insert the probes into the flooring near the affected area, aiming for readings below 12%. If the moisture level is still high, continue with the dehumidification process. This approach prevents future issues like cupping or swelling caused by overlooked lingering moisture.
Refinish or Seal if Necessary
If water stains persist or the finish shows signs of damage, consider applying a suitable hardwood finish or sealant after the area is completely dry. For small spots, a quick touch-up with matching stain and a clear topcoat can salvage the appearance. Remember, moisture can cause the finish to peel or cloud, so a proper seal after drying maintains the floor’s integrity.
During a recent fix, I faced stubborn water marks that refused to fade. After drying thoroughly, I lightly sanded the area using fine-grit paper, then applied a matching stain and a protective coat. The result was a nearly invisible repair, reinforcing why patience and proper technique are vital for successful water spot removal. For more insights on safeguarding your floors, explore hardwood floor care secrets.
Many homeowners and even DIY enthusiasts believe that following standard procedures guarantees a perfect installation, but there are subtle nuances that can make or break your flooring project. One common myth is that sticking strictly to manufacturer’s instructions ensures ideal results. In reality, complex factors like subfloor compatibility, moisture levels, and structural inconsistencies demand a more nuanced approach. Relying solely on basic guidelines can lead to pitfalls such as uneven surfaces or premature failure.
What’s the most overlooked aspect when installing or repairing hardwood floors?
Many overlook the importance of assessing the subfloor’s condition before installation. For instance, a slight sag or unevenness, often unnoticed, can cause long-term issues like squeaking, buckling, or gaps. It’s tempting to think that a new finish or adhesive can hide these imperfections, but in truth, investing in a proper subfloor evaluation using tools like laser levels or moisture meters can save you headaches down the line. According to flooring expert Martin L. (source: this detailed guide), thorough preparation is the foundation of durable flooring.
Another common misconception is that all tiling materials and methods are interchangeable. The reality is that different tiles—porcelain, ceramic, natural stone—have unique requirements for adhesives, grouts, and sealing techniques. Neglecting these specifics can result in cracking, staining, or loss of the tile’s aesthetic appeal. For example, large-format tiles demand careful floor leveling and proper substrate preparation. Skipping these steps often causes lippage, which not only looks bad but can also compromise the integrity of the installation. Techniques like using self-leveling compounds properly are essential, as covered in this expert tutorial.
Hardwood floors, in particular, are susceptible to subtle mistakes that can have significant consequences—like ignoring seasonal humidity changes. Many assume that just nailing down the planks is enough, but failing to acclimate the wood or ignoring expansion gaps can lead to warping or gaps within months. Advanced installers take into account climate conditions and use moisture barriers to prevent issues. As emphasized by industry leaders (reference here), mastering the nuances of moisture management is key to a lasting hardwood floor.
In essence, the highest-level flooring projects hinge on these often-overlooked details. Recognizing and addressing such nuances distinguishes the average DIY from the true professional. Before you undertake your next project, ask yourself: are you considering the full picture, or just the visible layer? Implementing these advanced insights ensures your flooring will stand the test of time. Have you ever fallen into this trap? Let me know in the comments, and don’t forget to check out our guide to self-leveling mistakes for even more expert tips.
Investing in the Right Equipment for Flooring Durability
Achieving professional-quality results in tile, floor leveling, or hardwood installation hinges on the tools you select and how you use them. I personally swear by a high-precision laser level, such as the Bosch GOL 20 D, because it provides unparalleled accuracy when measuring subfloor flatness or checking level progress. Unlike traditional bubble levels, laser levels like this ensure your surfaces are impeccably aligned, preventing lippage in tiles or gaps in hardwood planks. For moisture control, a reliable moisture meter, such as the Trotec BF11, is indispensable; it helps me verify subfloor dryness before applying leveling compounds or adhesives, reducing the risk of future buckling or peeling. As the trend toward more sophisticated tools continues, I predict that integrated digital sensors combined with smartphone connectivity will become standard, offering real-time data and diagnostics—making inspections faster and more precise.
How do I keep my flooring projects working smoothly over time?
Consistent maintenance starts with proactive inspection using the right tools. For hardwood floors, regular checks with a humidity meter are crucial—aiming for interior humidity levels between 35-55%—to prevent expansion or contraction. Additionally, frequently cleaning and applying protective finishes with tools like the Shur-Line Easy Glide Floor Finisher can prolong the lifespan of your hardwoods. When it comes to tile, periodically inspecting grout lines and addressing any cracks early—using epoxy repair kits—helps avoid water infiltration and tile lifting. Remember, investing in durable underlayment like premium cork or rubber mats can significantly dampen movement and noise, especially in high-traffic areas, saving you from costly repairs down the line. Learn more about the importance of proper subfloor preparation with expert insights at this comprehensive guide.
Tools I recommend for scaling your flooring projects
As your projects grow in size and complexity, so should your toolkit. For large-scale tile work or expansive hardwood installations, I rely on professional-grade equipment like electric-powered tile saws with adjustable cutting depth, such as the MK-170 7-Inch Tabletop Tile Saw. It improves precision and reduces fatigue, enabling me to maintain quality throughout the job. For consistent thinset application—especially over large areas—I use a mechanized notched trowel like the QEP 600XT. It ensures even coverage without gaps or excess mortar, which is critical for long-term adhesion and surface stability. With increased project complexity, digital moisture barriers and advanced leveling systems, including self-leveling compounds with quick-set formulas, are game-changers. They drastically reduce installation time while producing flawless surfaces, as explained in this detailed analysis. I encourage you to test out one of these advanced leveling strategies on your next big project to experience the difference firsthand.
Planning for the future of your flooring installations
Looking ahead, the integration of smart tools—like IoT-enabled moisture sensors and automated leveling systems—will revolutionize how we approach flooring. Investing now in adaptable, high-precision tools will prepare you for this shift. Remember, long-term success depends not just on the initial installation but on consistent maintenance and timely upgrades of your toolkit. For ongoing insights and technical tips, visit the ultimate resource page. Don’t wait—try out an advanced moisture meter or precision laser level today and see how they elevate your craftsmanship and project longevity. Your floors will thank you for it!
Lessons from My Water Woes: Things I Didn’t See Coming
- Never underestimate the subtle signs of water intrusion—what appears minor can lead to major repair bills if ignored.
- Premature drying methods, like high-heat blow dryers, can cause more harm than good; patience and proper techniques are essential.
- Understanding the material’s sensitivity transforms home repairs from guesswork into confident craftsmanship.
- Investing in quality tools and continuous learning can turn a DIY headache into a rewarding project.
- My biggest breakthrough? Realizing that thorough moisture assessment is the foundation of effective water damage restoration.
Tools and Resources That Made a Difference
- moisture meter – Essential for accurately gauging internal moisture levels; I trust the Trotec BF11 for its reliability.
- Laser level – Achieves precise measurements, preventing lippage or uneven surfaces; the Bosch GOL 20 D is my go-to tool.
- Quality sealants and finishes – Using top-grade products ensures long-lasting protection; I recommend exploring hardwood floor care tips.
- Expert guidance and tutorials from trusted sources like the industry experts keep my skills sharp.
You Can Turn Challenges into Triumphs
Taking definitive steps against water damage isn’t just about restoring floors—it’s an opportunity to deepen your understanding and elevate your craftsmanship. Every project teaches patience, precision, and the importance of investing in the right tools. Remember, a well-dried, properly sealed floor stands as a testament to your attention to detail and resilience. Don’t let fears or past mistakes hold you back; with knowledge and the right equipment, you’ll master water damage prevention and repair, transforming your home with confidence. What DIY water damage challenge have you faced, and how did you overcome it? Share your story below, and let’s learn together.
Comments are closed.