Ever spent hours installing new hardwood or tile only to watch it warp, crack, or peel within a few months? I know that sinking feeling all too well. I once rushed through a flooring project without paying attention to proper leveling, and the results were disastrous—uneven surfaces, stubborn gaps, and a nightmare to fix. That lightbulb moment taught me a crucial lesson: the foundation you lay is everything. If your subfloor isn’t perfectly prepared, even the most beautiful tiles or hardwood planks won’t stand the test of time.
Why Proper Floor Preparation Is the Key to Long-Lasting Results
When I first started tackling DIY flooring, I underestimated how much floor leveling could make or break the project. I thought that once the visible part looked good, the rest would follow suit. Boy, was I wrong. An uneven subfloor can cause tiles to crack or hardwood to squeak and buckle. That’s why I always recommend investing time and effort into proper prep. For detailed techniques on achieving flawless surfaces, check out this guide. It highlights how critical it is to create a level, stable base for lasting beauty and durability.
Is Floor Leveling Really Worth the Extra Effort?
Absolutely. I remember thinking, “It’s just a little uneven—won’t be noticeable.” But over time, those tiny imperfections grew into big problems. A mistake I made early on was skipping the detailed surface assessment and not using proper leveling compounds. That led to tiles cracking and hardwood developing squeaks. The truth is, rushing through this step can cost you a lot more down the line. Reliable installation starts with a solid foundation. For more insights on common mistakes and how to avoid them, visit this article.
If you’re ready to tackle your flooring project with confidence, understanding the importance of proper preparation is your first step. Next, I’ll walk you through the essential tips that will help ensure your hardwood and tile floors remain beautiful and durable for years to come. Let’s get started!
Level the Floor Like a Pro
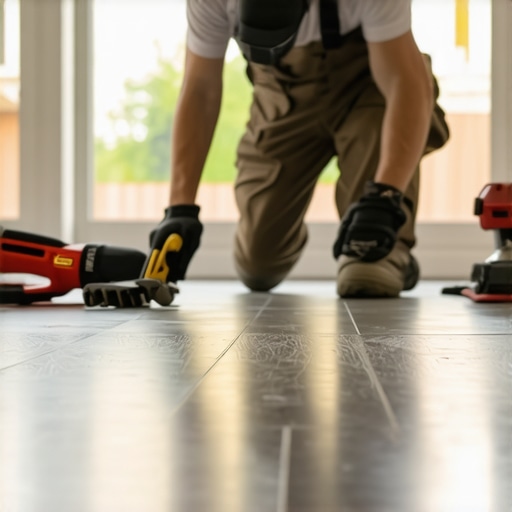
Start by assessing the entire subfloor using a long straightedge or a level. When I tackled my first hardwood installation, I used a 4-foot level and found uneven spots that needed attention. Then, apply a self-leveling compound, following the manufacturer’s instructions, to fill dips and create a flat surface. For precision, I recommend consulting this guide to master the leveling process. Wait for the compound to cure completely before proceeding.
Prepare the Surface Thoroughly
Remove all debris, dust, and old adhesive residues using a vacuum and damp cloth. A clean surface ensures proper adhesion. For hardwood, ensure the subfloor is dry and stable; for tiles, check for cracks or loose spots. I once overlooked this step and ended up with a squeaky hardwood floor that had to be refinished later. Proper surface prep is your best defense against future problems.
Use the Right Underlayment
The underlayment acts as a buffer, smoothing out minor imperfections and providing moisture protection. I always opt for a high-quality underlayment compatible with my flooring type. For example, foam underlayment for hardwood adds comfort and reduces noise. When installing tile, a cement backer board prevents cracking and water damage. Proper underlayment installation is essential for durability and longevity.
Follow Precise Installation Techniques
Lay your flooring in a staggered pattern to distribute weight evenly and prevent weak spots. Use spacers to maintain consistent gaps around the perimeter for expansion. During my project, I made sure to leave a 1/4-inch gap around walls, which I sealed with baseboards later. Always follow manufacturer instructions closely, and consider consulting expert strategies for best results. Proper spacing and alignment prevent buckling and gaps over time.
Secure and Finish Properly
Fasten the flooring tightly using appropriate nails, staples, or adhesive, depending on the material. For hardwood, I used a pneumatic nailer for a tight fit; for tile, a high-quality thinset mortar provided excellent adhesion. Pay attention to the manufacturer’s curing times. Once installed, seal the edges with a flexible caulk to accommodate expansion and contraction. Finishing touches like sanding the hardwood or grouting the tile should be done carefully to avoid damage.
Regular Maintenance Extends Longevity
Keep your floors clean by sweeping regularly and using gentle cleaning solutions. Avoid excessive water or harsh chemicals that can damage the finish. I discovered that applying a quality hardwood floor polish, as recommended in this guide, keeps the surface looking new and prevents scratches. Consistent care preserves the integrity of your investment for years to come.
Many DIY enthusiasts and even seasoned contractors often fall prey to misconceptions that can compromise the durability and appearance of their flooring projects. Let’s dig deeper into what most people get wrong about floor preparation and installation, and how you can steer clear of these pitfalls to ensure your floors stay beautiful for years to come.
Why Overlooking the Nuances Can Cost You Big
One of the most significant misconceptions is the belief that a quick, superficial level check suffices. In reality, subtle imperfections in the subfloor—sometimes just a millimeter out of level—can lead to major issues like cracked tiles or squeaky hardwood. For example, many assume that using a small bubble level is enough, but a 4-foot straightedge or a laser level provides a more accurate assessment. According to this comprehensive guide, investing in proper leveling tools and techniques is crucial for long-lasting results.
Another common myth is that moisture content doesn’t matter as much as it actually does. Excess moisture in the subfloor or slab can cause swelling, warping, and even mold growth, which compromises the integrity of your flooring. Experts recommend performing moisture tests before installation and using appropriate moisture barriers. Skipping this step is a frequent mistake that leads to costly repairs down the line.
The Hidden Danger of Rushing the Surface Prep
Many underestimate the importance of surface cleaning and removal of old adhesives or debris. Even tiny particles can prevent proper adhesion, leading to lifting or uneven wear. I once skipped this step, thinking my new tiles would cover up minor dust, only to find tiles popping up months later. The key is thorough cleaning—vacuuming, followed by damp wiping—to create an ideal bonding surface. For intricate details on surface prep, check this guide.
Advanced Question: How does improper expansion gap management lead to long-term damage?
Neglecting to leave proper expansion gaps or sealing them incorrectly can cause your flooring to buckle or develop gaps over time. Hardwood and tile floors expand and contract with temperature and humidity changes; without sufficient space, this movement creates stress points. An expert tip is to leave a 1/4-inch gap around the perimeter, which should be sealed with flexible baseboards or molding. Failing to do so is a common mistake that many overlook, yet it significantly affects the lifespan of your floors. For more detailed strategies, visit this resource.
In summary, understanding and respecting the nuances of proper flooring preparation and installation can save you from costly repairs and frustrations. Don’t rush the leveling, surface prep, or moisture testing—these are the behind-the-scenes steps that make or break your project. Have you ever fallen into this trap? Let me know in the comments, and remember, careful planning is your best investment in a beautiful, durable floor!
Invest in Quality Tools for Longevity
When it comes to maintaining your floors and ensuring they stay beautiful over time, having the right tools makes all the difference. Personally, I rely on a high-quality, cordless oscillating multi-tool for minor repairs and touch-ups. Its versatility allows me to sand, cut, or scrape with precision, saving me time and preventing damage to the finish. For deep cleaning, I swear by a steam mop; it effectively sanitizes without harsh chemicals, preserving the integrity of your flooring’s surface. Investing in a good-quality vacuum with adjustable height settings and a soft brush attachment is essential for daily maintenance, especially on hardwood floors. Regularly clearing debris prevents scratches and keeps your surface looking pristine.
Master Routine Maintenance Practices
Consistent cleaning is the bedrock of long-term flooring health. Sweep or vacuum at least twice a week to remove dirt that can cause wear. When I notice stubborn spots, I use a damp microfiber mop with a gentle cleaning solution recommended in this guide. Avoid excessive water, as it can seep into seams and cause damage. Applying a high-quality hardwood or tile-specific polish every few months helps maintain the surface’s luster and provides a barrier against dirt and moisture. Additionally, periodic inspections for loose tiles or creaking hardwood can help catch issues early before they escalate.
Future Trends in Floor Maintenance and Tools
Looking ahead, I believe smart cleaning devices equipped with sensors will become standard, offering automated maintenance schedules and real-time damage detection. Innovations like robotic vacuums capable of gentle scrubbing and moisture sensing will simplify upkeep, especially for large areas. Staying ahead of these trends, I plan to try out the latest robotic cleaners integrated with app controls—saving time and ensuring consistent care. As technology advances, the key will be selecting tools that not only clean but also diagnose issues before they worsen, extending the lifespan of your floors.
How do I maintain my floors over time?
To keep your floors in top shape, establish a simple but consistent maintenance routine. Regular sweeping, gentle cleaning, and timely repairs are crucial. Don’t forget to check for signs of wear or moisture intrusion, which can be mitigated with proper sealing and ventilation. For more comprehensive strategies, visit this resource. Remember, the right tools combined with good habits will maximize your investment and keep your floors stunning for decades.
The Hardest Lesson I Learned About Floor Leveling
One of my biggest lightbulb moments was realizing that rushing the floor leveling step can lead to cracks, squeaks, and costly repairs. I once skipped thorough assessment and used a minimal amount of leveling compound, thinking it wasn’t a big deal. The result? An uneven surface that caused my tiles to crack within months. That experience taught me that patience and proper leveling are essential for a long-lasting floor.
3 Myths About Floor Preparation That Held Me Back
First, I believed that a quick surface cleaning was enough—wrong. Tiny particles can prevent adhesion, leading to future problems. Second, I thought moisture content didn’t matter if the floor looked dry—big mistake, as excess moisture causes warping. Third, I assumed that leaving expansion gaps wasn’t crucial—yet, neglecting this causes buckling and gaps over time. Busting these myths early saved me from a lot of headaches.
What Experts Won’t Tell You About Installing Floors
Many professionals emphasize the importance of using the right tools and techniques, but what often goes unsaid is how critical the initial assessment is. Using a laser level or a long straightedge reveals subtle dips that a small bubble level might miss. Also, proper moisture testing and leaving adequate expansion gaps are overlooked by amateurs but are vital for durability. Learning these hidden details transformed my approach and results.
Curated Recommendations for Lasting Floors
First, I trust the ultimate guide to floor leveling because it offers detailed techniques that ensure a flat, stable base. Second, the mistakes to avoid in flooring article helped me identify pitfalls before they happened. Lastly, I recommend investing in a quality moisture meter; it’s an inexpensive tool that saves a lot of trouble by detecting hidden moisture issues early. These resources have been game-changers for me.
Your Turn to Elevate Your Flooring Skills
Now that I’ve shared my lessons learned about proper floor preparation, I encourage you to approach your project with patience and precision. The effort you put into leveling, surface prep, and moisture testing will pay off with beautiful, durable floors that last for decades. Don’t rush—your future self will thank you for it.
Have you ever struggled with the surface assessment or moisture testing? Share your experience below—I’d love to hear your story!
Reading this posts really resonated with me, especially about the importance of proper floor leveling. When I did my first DIY hardwood install, I underestimated how much even small dips could cause long-term problems. I thought a quick assessment was enough, but I ended up with squeaks and slight buckling over time. Since then, I always use a laser level and self-leveling compounds for accuracy, which has saved me a lot of hassle and repairs. It’s amazing how investing time in that initial step pays off with a smoother finish and a more durable floor.
I’m curious, has anyone here tried using digital moisture meters? I’ve heard they’re quite precise and help prevent issues like warping or mold later on. Do you think these devices are worth the extra cost compared to traditional methods? Also, what’s been your biggest challenge when managing expansion gaps? I’ve found that sealing them properly with flexible moldings makes a big difference. Would love to hear more tips or experiences on these aspects from other DIY enthusiasts!
This post really hits home for me. A few years ago, I rushed through the surface prep part of my DIY tile project, thinking I could just cover everything up at the end with grout and sealant. Big mistake! I learned it the hard way when I noticed tiles lifting and cracking after just a few months. Temperature and humidity fluctuations really do affect how well the floor holds up over time. Now, I always use a moisture meter before starting, and I leave a proper expansion gap, sealing it carefully with flexible moldings. Those extra steps make a huge difference in the long run.
On a related note, I recently started experimenting with a digital moisture meter and found that it gave a very accurate reading, helping me catch hidden moisture issues early. Has anyone here noticed a difference in floor longevity after switching to digital tools? Also, managing expansion gaps seems tricky, especially in older houses with irregular wall alignments. How do you effectively seal or hide those gaps without sacrificing style? Would love to hear your tips or experiences on these finer points of flooring installation.
This post really underscores the importance of meticulous preparation, especially the floor leveling and surface cleaning steps. I totally agree that rushing through those can lead to serious issues down the line, like cracking tiles or squeaky hardwood. From my experience, using a laser level and self-leveling compounds has been a game-changer in ensuring a flat surface. I also found that doing moisture testing with a reliable meter before starting really prevents future warping, which is something I overlooked initially.
Regarding expansion gaps, I’ve learned that sealing them with flexible moldings not only prevents dust accumulation but also accommodates seasonal shifts, minimizing buckling. It’s interesting to see how these small details can vastly improve the longevity of a floor.
Have any of you experimented with smart tools or sensors that monitor moisture and temperature early during installation? I’m curious whether these tech advancements make a noticeable difference in long-term durability or ease of troubleshooting.