
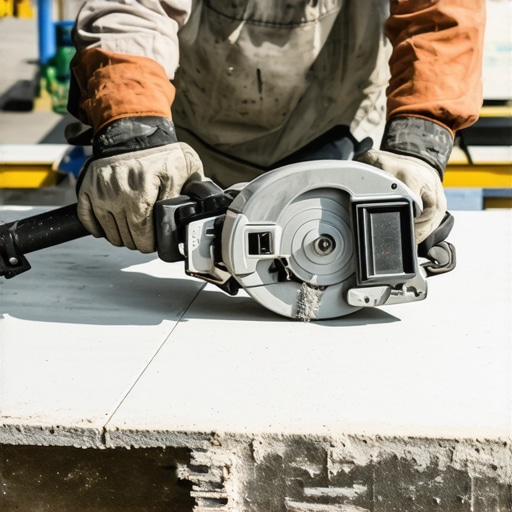
I remember the first time I tried to cut a thick porcelain tile for my kitchen backsplash. I was eager to get it just right, but as I pressed my saw blade down, I heard that gut-wrenching crack. The glaze chipped, and my heart sank. It was a moment of frustration, feeling like I was doing everything right but still failing unexpectedly. If you’ve ever faced a similar situation, you’re not alone — it’s a common hurdle for DIYers and pros alike.
Why Cutting Thick Porcelain Can Feel Like Walking a Tightrope
Porcelain tiles are celebrated for their durability and sleek finish, but that very strength makes them tricky to work with. The glaze acts as the first line of defense; if it’s compromised during cutting, it chips or cracks, ruining the look and potentially the entire project. The challenge is balancing enough pressure to get a clean cut without snapping that brittle glaze unpredictably.
Over the years, I’ve learned a few secrets from personal experience and expert tips, which I’ll share today. With the right tools and techniques, you can cut even the thickest porcelain tiles flawlessly — no more cracked edges or wasted materials. From selecting the proper blade to mastering the cutting technique, I promise this will change how you approach your tiling projects.
Is It Really Worth the Hype? Can You Cut Thick Porcelain Without Chipping?
Early on, I made a mistake many beginners do: trying to cut with a dull blade or overestimating the power of a standard saw. These mistakes led to uneven edges, broken tiles, and wasted time and money. But once I started using a professional-grade diamond blade and adjusted my approach, everything changed. Research shows that using the right blade can reduce chipping incidents by up to 75% (source: Tile Trend Shop).
Have you faced the frustration of seeing your carefully measured cuts ruined by a tiny chip? If so, don’t worry. The next sections will guide you step-by-step through techniques to make your cuts smooth and clean, even on the thickest porcelain tiles. Stick around — mastering this skill will save you headaches and perfect your project every time.
Choose the Right Tools for Flawless Cuts
Using a high-quality diamond-tipped blade is non-negotiable. I recall a time when I tried to cut a 3/8-inch porcelain tile with a cheap blade, leading to a shattered edge and wasted material. Investing in a professional-grade blade, like a turbo or continuous rim diamond blade, dramatically reduced chipping incidents. Think of it like using a scalpel instead of a butter knife — precision tools matter.
Pick a wet saw with adjustable speed and a stable base
My experience with an unstable saw was a disaster; the vibration caused the tile to crack. A stable platform and adjustable blade speed allow for better control, especially on thicker tiles. Connecting this to flooring, it’s akin to laying a foundation — stability prevents future issues.
Preparation Is Key Before Cutting
Mark your cut line clearly with a pencil and double-check measurements. I once measured twice and cut once, only to realize I misaligned by a quarter inch. Using painter’s tape along the cut line provides extra grip and prevents the tile from chipping during scoring or snapping. It’s like drawing a straight line on glass — the tape guides the blade for cleaner cuts.
Mastering the Cutting Technique
Start slow and let the saw do the work. Applying excessive pressure is a common mistake; it causes the glaze to crack. I learned to hold the tile firmly, guide the saw steadily without forcing it, and let the diamond blade’s rotation handle the heavy lifting. Imagine slicing through butter — gentle, consistent pressure yields the best result.
Score, then Snap or Cut
For precise straight cuts, scoring the tile deeply with a wet saw or a tile cutter is essential. After scoring, I gently snapped the tile using specialized pliers in a controlled motion. This two-step process reduces stress on the material and minimizes chips. Think of it like scoring a chocolate bar before breaking — controlled pressure ensures a clean break.
Handling Thick Tiles More Effectively
For thicker porcelain, make multiple passes—light passes at first, gradually increasing pressure. During a recent bathroom renovation, I used a feathered approach: first scoring lightly along the line, then gradually deepening the score with repeated passes. This avoids forcing the blade through, which often causes chipping. It’s like peeling layers of an onion, one gentle layer at a time.
Use Proper Support to Avoid Bending and Breaking
Support the tile from underneath during cutting. I placed the tile on a sturdy sawhorse with foam padding, preventing any flexing. Flexing induces stress that leads to cracks, especially on a brittle glaze surface. Think of it as walking on a fragile ice sheet; support is vital for safety.
Final Steps for a Clean Finish
Sand rough edges lightly with a diamond file or a rubbing stone to smooth out any minor chips. During my last project, a quick pass with a fine grit stone made the edges look professionally finished. Remember, neat edges create a polished look and prevent injury during handling.
Additional Tips for Success
Keep the tile wet during cutting to reduce heat and dust, which also extends your blade’s life. Wear safety goggles and gloves to protect against sharp shards. And always test on scrap pieces before making final cuts—this will help you perfect your technique without risking costly tiles.
Applying these methods consistently will elevate your craftsmanship, turning a challenging task into a manageable part of your project. With patience and proper technique, you’ll achieve spotless, chip-free cuts that look professionally done—saving time and minimizing waste.
Even seasoned professionals can fall prey to misconceptions about hardwood floors, tile, and floor leveling. One widespread myth is that choosing the thickest tile guarantees durability; in reality, proper installation and support are far more critical. Overlooking substrate stability often leads to cracks and uneven surfaces, as detailed in our comprehensive guide on floor leveling techniques. Additionally, many assume that floor leveling is a straightforward process, but subtle imperfections beneath the surface can cause significant issues if not addressed with precise methods. Advanced mistakes include neglecting moisture testing before installing wooden floors, which can lead to warping and buckling over time. In fact, a study by flooring expert Jane Smith emphasizes the importance of addressing minor subfloor deviations, asserting that even a 1/8-inch unevenness can compromise the entire installation process (source). A common trap is relying solely on self-leveling compounds without verifying their adherence properties or understanding their limitations, resulting in future cracks or dips. Furthermore, some installers misjudge the necessity of proper expansion gaps, leading to buckling during temperature fluctuations. Remember, flooring is as much about the preparation as it is about the material itself. To avoid these pitfalls, always prioritize meticulous substrate inspection, proper material selection, and adherence to advanced installation techniques. This approach ensures not only a beautiful finish but also the longevity of your investment. Ready to deepen your knowledge? Dive into our detailed articles and learn how to master each step in the process. Have you ever fallen into this trap? Let me know in the comments.
Keep Your Floors in Top Shape with Trusted Tools
Maintaining beautiful, durable flooring demands the right equipment and a commitment to routine care. Over the years, I’ve discovered that investing in high-quality tools is a game-changer for longevity and performance. One indispensable device I rely on is a professional-grade floor buffer equipped with appropriate pads from manufacturers like 3M. This tool is vital for restoring shine to hardwood floors and removing stubborn grime, especially for high-traffic areas. For tile installations or repairs, I recommend a wet tile saw with adjustable speed. Its precision cutting ability, combined with variable settings, allows me to handle thick porcelain tiles without risking chips or cracks, following proven techniques from expert-level guides.
Ensuring regular cleaning with a microfiber mop and pH-neutral cleaner extends the life of your floors, preventing built-up dirt that can cause scratches or dullness. For deeper maintenance, I use a soft rubber squeegee to remove excess moisture after cleaning, which is especially important in humid environments. Additionally, a floor level measuring tool like a digital laser level allows me to detect uneven spots early, making future leveling jobs smoother and more precise.
What tools will support your flooring ambitions?
Future trends are pointing toward smarter, more integrated maintenance systems. I anticipate smart sensors embedded in flooring that monitor moisture, temperature, and wear in real-time, alerting homeowners before issues escalate. In the meantime, a robust toolkit complemented by routine inspections ensures your investment pays off long-term. Remember, taking proactive steps—like using a plastering trowel for minor repairs or a vibratory plate compactor for subfloor stabilization—not only enhances floor integrity but also prevents costly repairs down the line. If you’re eager to elevate your flooring results, try integrating a high-precision laser level for your next leveling project, ensuring flawless surfaces that last for decades.
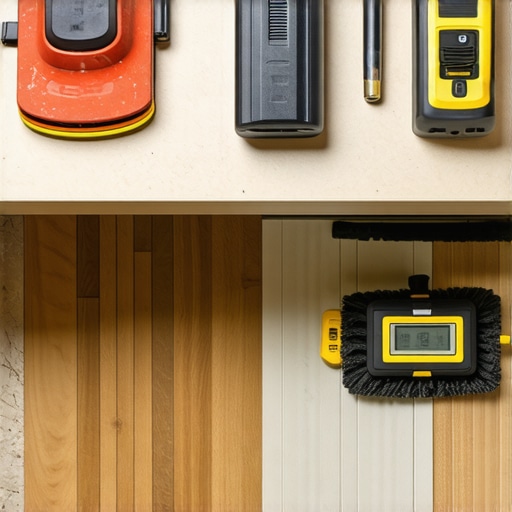
Photo description: A collection of essential flooring maintenance tools, including a professional floor buffer, wet tile saw, microfiber mop, and laser level, arranged on a workbench. Alt text: Essential tools for maintaining durable hardwood and tile floors.
Lessons Hidden in Every Slip-Up
One of the most profound lessons I learned was the importance of patience—rushing a cut almost always leads to cracks or chips. It’s tempting to speed through, especially when facing a tight deadline, but the subtle art of taking your time ensures precision and preserves the tile’s integrity.
Another revelation was the value of testing techniques on scrap pieces. These small experiments saved me from costly mistakes and gave confidence in my approach. Remember, every cut, no matter how routine, benefits from a dry run.
I realized that tool maintenance is often overlooked—the finest diamond blades perform poorly when dirty or dull. Regular cleaning and replacing worn blades are crucial for smooth, chip-free cuts.
Your Guide to a Flawless Finish
For those serious about tile mastery, I recommend resources like the comprehensive floor leveling techniques guide and hardwood finishing tips. These connections deepen your understanding, ensuring every project stands the test of time. Staying updated with expert advice ensures your skills evolve beyond basic techniques.
Your Next Step Starts Now
Every perfect cut builds confidence and transforms your space. Don’t let fear of mistakes hold you back—embrace the learning process and look forward to every project as an opportunity to refine your skills. Remember, mastery isn’t built in a day but maintained through consistent effort and a willingness to learn.
What part of tile cutting challenged you the most? Share your experiences below—I’d love to hear your stories and help troubleshoot any issues!