
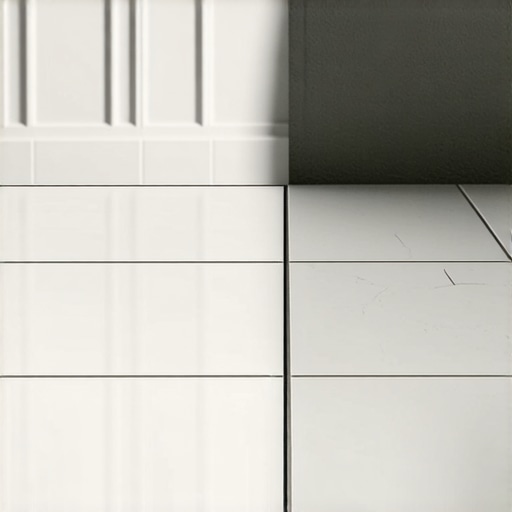
I remember the exact moment I stepped into my living room and noticed those maddening, perfect straight cracks running across my porcelain tiles. It was like a neat fault line had decided to invade my beautiful floor overnight. Heart sinking, I felt a mix of frustration and curiosity—why had this happened to me, and more importantly, how could I fix it? That lightbulb moment kicked off my journey into understanding the real reasons behind such cracking issues.
Understanding Why Your Tiles Crack in Perfect Lines
Is It Really Just a Fluke or Something More?
Many homeowners, including myself early on, assume that cracks are just cosmetic or caused by something trivial. But the truth is, these cracks often point to deeper issues like improper subfloor preparation, floor movement, or even temperature fluctuations. Addressing them without diagnosis is like treating a fever without knowing the underlying infection—ineffective and temporary. According to industry experts, a significant number of tile cracks stem from poor substrate leveling before installation, which underscores the importance of proper groundwork for lasting results. For a comprehensive understanding, I recommend checking out this guide on floor leveling techniques.
My own mistake early in the process was rushing through the subfloor repair, thinking that a quick fix would suffice. That oversight cost me dearly down the line when the cracks appeared in a perfect straight line, following the natural expansion joints of my floor. It taught me an invaluable lesson—correcting foundational mistakes is essential for enduring beauty and stability.
So, if you’ve faced this frustrating problem or fear it might happen, know you’re not alone. The good news is, with the right diagnosis and approach, you can prevent or eliminate those telltale cracks, transforming your flooring into a durable, eye-catching feature instead of a constant source of disappointment. Now, let’s dive into what causes these cracks and how to fix them, step by step, so you can regain confidence in your flooring.
Prepare Your Subfloor With Precision
Start by inspecting your existing subfloor for flex or unevenness. Use a long straightedge or a 3-foot level to identify high or low spots. Once detected, mark these areas clearly. Applying shims or adding a layer of plywood in low spots can create a solid, flat foundation. I once found a noticeable bounce in my plywood subfloor; shimming those weak spots restored stability and prevented future cracks.
Level the Surface Accurately
Mix a high-quality self-leveling compound according to manufacturer instructions, ensuring proper consistency. Pour and spread it evenly over the affected area with a gauge rake or margin trowel. For contouring around obstacles, use a concrete trowel for precise application. I remember pouring leveler in my laundry room, then aggressively spreading it with a notched squeegee, which resulted in a smooth, seamless surface. For best results, follow detailed guides on floor leveling techniques.
Addressing Cracks Before Installation
Cracks in existing tiles or grout can mirror subfloor shifts. Use a crack isolation membrane if cracks are minor; this prevents transfer of movement to new tiles. For wider cracks, remove loose material, clean the area thoroughly, and fill with a flexible, crack-bridging sealant. Allow it to cure fully before proceeding. I had a stubborn crack in my kitchen, and sealing it properly saved me from tile damage later. Proper prep ensures that cracks don’t telegraph through your new surface, avoiding future repairs and costly replacements.
Choose the Right Underlayment and Adhesives
High-quality underlayment, like uncoupling membranes or foam underlayment, absorbs movement and isolates tiles from substrate flex. When laying tiles, use a notched trowel appropriate for your tile size — large-format tiles require a specific notch size to ensure adequate thinset coverage, preventing voids that can cause cracking. I learned this the hard way with 24-inch porcelain tiles; mismatched trowel notches led to hollow spots and cracked tiles. Consulting guides on proper tile installation minimizes these risks.
Master the Tiling Technique
Apply thinset evenly with a notched trowel, holding it at a consistent 45-degree angle. Comb the adhesive in one direction for better buildup and adhesion. When setting tiles, lightly tap and wiggle them to seat firmly into the thinset, ensuring full contact. Use spacers to maintain uniform grout lines. Once set, check for lippage — uneven edges that can compromise the flatness. I remember using a straightedge across my tiles and adjusting any high pieces immediately, which guaranteed a flawless finish and prevented future cracks due to uneven settling.
Ensure Proper Curing and Jointing
Allow sufficient curing time before walking on or grouting the tiles. Keep the surface protected from rapid temperature changes and moisture during this period. Use expansion joints and control joints strategically, especially in large or open areas, to accommodate movement and prevent cracks. In my living room, incorporating movement joints where walls met the floor proved vital — the absence of these could have led to unsightly cracks. Learning to anticipate and plan for structural movement is key to long-lasting, crack-free flooring.
Finalize with Careful Grouting and Sealing
Choose high-quality grout suitable for your tile and environment. Apply it using a rubber float at a 45-degree angle, pressing it into joints thoroughly. Wipe excess grout with a damp sponge before it hardens. Once cured, apply a grout sealant to protect against moisture and staining. Proper sealing prevents grout deterioration, which often causes cracks and crumbling over time. I remember sealing my grout and noticing my tiles stayed cleaner longer, maintaining that sleek, new look for years.
Every step, from subfloor prep to final sealing, contributes to a durable, crack-resistant floor. Skipping or rushing any stage contributes to problems down the line. For a comprehensive understanding of the entire process, exploring detailed guides on tile installation tips can provide further insights.Many homeowners believe that achieving a flawless, crack-free floor is simply about pouring self-leveling compound and hoping for the best. However, this misconception overlooks the critical nuances that can determine the success or failure of your project. One widespread myth is that surface-level leveling alone guarantees a perfect tile application. In reality, neglecting the importance of substrate stability and detailed subfloor assessment can lead to long-term issues like cracks, unevenness, or tiles lifting over time. Expert sources emphasize that proper floor prep involves meticulous inspection of subfloor rigidity, moisture levels, and material compatibility, which many DIYers tend to underestimate. I learned this the hard way when rushing through leveling, resulting in cracks that mimicked natural fault lines across my tiles. To truly master the craft, it’s essential to understand that leveling is just one piece of the puzzle in a comprehensive installation process—see flooring fundamentals for deeper insights. Another trick is over-relying on popular quick-fix products without recognizing their limitations. For instance, many assume that patching with cheap leveling compounds will fix underlying issues, but these often peel or crack if the substrate moves or is too moist. Always assess the root cause—moisture, substrate flex, or improper material selection—and tackle it holistically. This involves strategic planning, such as using uncoupling membranes to absorb movement, rather than just patching surface imperfections. Advanced installers are aware that the real secret lies in understanding how various elements interact, preventing issues before they manifest. A common trap is overlooking expansion joints or misjudging the influence of environmental factors like temperature and humidity, which can cause materials to expand or contract unexpectedly. According to construction experts, neglecting these details can undo months of work in a matter of weeks. So, instead of shortcuts, invest in proper preparation and detailed knowledge—techniques outlined in step-by-step guides—to ensure your flooring remains durable and crack-free for years to come. Remember, the devil is in the details, and recognizing these hidden nuances can save you from costly repairs in the future. Have you ever fallen into this trap? Let me know in the comments.
Keeping Your Floors in Top Shape: Essential Tools and Maintenance Strategies
To ensure your flooring remains beautiful and crack-free over the years, investing in the right tools and adopting a consistent maintenance routine is crucial. I personally recommend a high-quality flooring moisture meter, such as the Protimeter Surveymaster, to regularly check subfloor moisture levels—this proactive approach helps prevent issues before they start and aligns with expert advice found in the flooring fundamentals. Additionally, a specialized tile repair kit, including color-matched epoxy filler, can be invaluable for addressing minor cracks promptly, preventing them from expanding. Since hardwood floors are susceptible to scratches and wear, I swear by using a microfiber mop combined with hardwood floor-specific cleaning solutions like Bona Hardwood Floor Cleaner — it minimizes damage and preserves shine. For long-term results, consider applying a high-quality penetrating sealer every 3-5 years; I prefer Waterbased Sealers because they maintain the floor’s breathability, which reduces movement and cracking over time. Moreover, maintaining a controlled environment—around 40-50% humidity—is essential, and a reliable humidifier or dehumidifier can help achieve this. Regularly inspecting your floors using a 3-foot level or a straightedge ensures any early signs of unevenness are caught and corrected swiftly. As technology advances, smart sensors integrated into flooring systems might revolutionize maintenance routines in the future, offering real-time data on structural health—this trend is gaining traction in the industry.
How do I keep my flooring installation flawless over time?
The key lies in routine checks and prompt repairs. Clean spills immediately to prevent moisture infiltration, especially on hardwoods, and avoid harsh chemicals that can damage sealants. Schedule periodic professional inspections to assess for underlying issues such as subfloor flex or moisture buildup—these hidden problems can jeopardize your investment. For a quick review of best practices, visit this guide on flooring maintenance. Taking these steps will extend your floor’s lifespan and keep it looking its best for decades. Ready to improve your maintenance routine? Start by purchasing a moisture meter and schedule a yearly inspection—small investments that pay off long-term.
Hard-Earned Truths About Achieving Flawless Floors
One of the most profound lessons I learned was that perfection in floor leveling and tile installation isn’t achieved by luck—it demands meticulous attention to detail and patience. Skipping even a small step, like thoroughly checking for substrate flex or moisture, can lead to cracks that mar the entire look and longevity of your floor. My mistake was rushing through these foundational steps, which resulted in recurring cracks and frustration. Embracing a methodical approach, inspired by industry experts, transformed my results. Remember, every crack is a lesson hiding in plain sight—listen carefully, and you’ll build floors that stand the test of time.
Tools and Reads That Changed My Perspective
If you’re serious about restoring or installing floors, investing in a high-quality moisture meter like the Protimeter Surveymaster became my game-changer. It provided real-time data, helping me detect subfloor issues early. Additionally, ‘The Ultimate Guide to Floor Leveling for a Perfect Finish’ offered insights that saved me from common pitfalls. These tools and resources aren’t just gear—they’re part of a craftsman’s secret arsenal that ensures lasting results. For step-by-step strategies that have served me well, check out this comprehensive guide.
Sealing Your Success: Taking Action Today
Now it’s your turn to elevate your flooring game. Start with thorough assessments, equip yourself with the right tools, and don’t be tempted to rush—each step builds towards a durable, crack-free surface. Remember, the effort you put in now will pay dividends over years of beautiful, stable floors. Are you ready to take your project from good to exceptional? Share your plans or questions below—I’d love to hear your story and help you succeed.