Ever spent hours laying down a new floor only to realize it wobbles, creaks, or worse—looks uneven? I’ve been there. The frustration of finishing a project and then noticing imperfections can be disheartening. But here’s the lightbulb moment I want to share: proper floor leveling isn’t just about aesthetics; it’s the backbone of durability and long-term beauty.
Why Flawless Floor Leveling Changes Everything
When I first started installing floors, I underestimated the importance of meticulous leveling. I thought a quick patch here and there would do the trick. Big mistake. That oversight led to uneven tiles, squeaky hardwood, and even cracks over time. The truth is, rushing through the leveling process can sabotage your entire project. According to industry experts, poor leveling can reduce a floor’s lifespan by up to 30%. That’s a statistic I wish I knew early on. It’s why I now swear by thorough preparation and strategic leveling techniques, which you can learn from comprehensive guides like this expert resource.
Is Floor Leveling Really Worth the Extra Effort?
Honestly, I’d ask myself the same question when I was starting out. The answer? Absolutely. Skipping or rushing this step might save time upfront, but it often results in costly fixes later. Plus, a well-leveled floor enhances the overall look and feel of your space, making everything from hardwood to tile look pristine and professional. If you’ve ever faced the sinking feeling of uneven flooring, you’re not alone. I’ve made that mistake, and I can tell you, it’s not worth it. To avoid such pitfalls, check out this guide on common mistakes and how to sidestep them.
Now that we understand why floor leveling matters, let’s dive into the practical steps that will transform your project from a potential disaster into a masterpiece. Ready to become the neighbor everyone admires for perfect floors? Let’s go!
Start with a Solid Base
When I tackled my first leveling project, I realized the importance of a clean, dust-free surface. I removed all debris, dust, and loose particles, much like preparing a canvas before painting. This step is crucial because any dirt or debris can create bumps or dips in the finished floor. Use a broom and vacuum thoroughly, then wipe the surface with a damp cloth to ensure complete cleanliness.
Assess and Mark the Surface
Next, I used a long, straightedge to identify high and low spots. Think of it as a giant ruler that reveals imperfections. Mark these areas with chalk so you know where to focus your leveling efforts. This visual guide helps prevent missing spots and ensures you address every uneven section.
Apply a Primer or Bonding Agent
Before pouring leveling compound, I applied a primer to enhance adhesion. It’s like giving the surface a handshake—making sure the compound sticks firmly. Check the manufacturer’s instructions for drying time, and don’t rush this step. Proper bonding reduces the risk of future cracks or separation.
Mix the Leveling Compound Correctly
Mixing is an art I had to learn by trial and error. I used a drill with a paddle attachment to combine the compound with water, following the manufacturer’s ratio precisely. Think of it like making pancake batter—too thick, and it won’t spread; too thin, and it won’t level properly. Achieving the right consistency is key to smooth, self-leveling results.
Pour and Spread the Compound
Pour the mixture starting from the highest point and work towards the lowest. Use a trowel or a squeegee to spread it evenly across the surface. During my first attempt, I found that working in small sections prevented the compound from setting before I finished spreading. Work swiftly but carefully to maintain control and avoid creating air pockets or ridges.
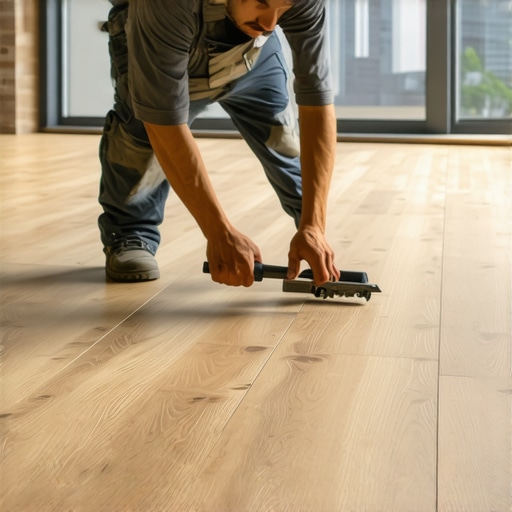
Use a Squeegee or Spiked Roller to Remove Bubbles
After pouring, I ran a spiked roller over the surface to eliminate trapped air and help the compound settle. This step is like popping bubbles in a cake batter—small but essential for a smooth finish. Be thorough, especially in corners and edges, to ensure uniformity.
Allow Proper Curing Time
Patience is vital. I left the floor untouched for the recommended curing time, typically 24-48 hours. Moving too soon can cause cracks or uneven settling. During curing, I avoided any foot traffic or vibrations that could disturb the compound’s setting process.
Final Inspection and Touch-Ups
Once cured, I checked the surface with a straightedge again. Any minor dips were filled with a second layer of leveling compound. This step guarantees a perfectly flat surface ready for the final flooring installation. Remember, precision at this stage prevents costly repairs later.
By mastering these core techniques—thorough preparation, correct mixing, swift application, bubble removal, and patience—you can achieve a perfectly leveled floor that forms a durable foundation for any flooring type. For deeper insights and expert strategies, check out this comprehensive guide.
Many DIY enthusiasts and even seasoned pros often fall into traps when it comes to floor leveling. One of the most widespread myths is that a quick, rough patch can substitute for meticulous preparation. In reality, rushing this step can lead to long-term issues such as cracks, squeaks, and uneven wear, which are tough to repair later. For a deeper understanding of how to avoid these mistakes, I recommend checking out this guide on common flooring installation errors.
Another nuance that trips people up is thinking that the type of leveling compound is a one-size-fits-all solution. In truth, choosing the wrong compound or applying it without considering the specific surface and flooring material can compromise adhesion and durability. For example, some compounds are better suited for concrete slabs, while others excel on wooden subfloors. Mastering these details can significantly impact your project’s longevity.
What Advanced Installers Know About Floor Leveling That Beginners Don’t
Advanced professionals understand that the key to a flawless finish is not just the leveling process itself but also the preparation of the underlying surface. Moisture content, surface texture, and even subtle dips can cause issues if not correctly assessed. I highly recommend using a laser level or a high-precision straightedge to identify even the tiniest imperfections, which can be overlooked by the untrained eye. Moreover, experts often perform a moisture test before applying leveling compounds, especially in basements or areas prone to humidity, because excess moisture can lead to future failures.
Furthermore, many underestimate the importance of curing time and environmental conditions. Applying a second layer without proper curing, or working in a room with high humidity or temperature fluctuations, can cause the compound to crack or separate. Patience and attention to detail are essential for professional results. If you want to ensure your project stands the test of time, check out this expert-level guide for more in-depth strategies.
Lastly, a common mistake is neglecting to recheck the surface after curing. Even the slightest movement or settling can create dips. Using a long straightedge or a laser level to verify flatness again is a crucial step that separates amateur results from professional-quality floors. Remember, the devil is in the details—skipping this step can undo all your hard work.
Have you ever fallen into this trap? Let me know in the comments. Mastering these nuances will elevate your flooring projects from good to extraordinary!
Maintaining your flooring and using the right tools can significantly extend its lifespan and ensure that your investment continues to look stunning for years. From specialized equipment to routine check-ups, I’ll share exactly what I use personally and recommend for keeping your floors in top shape.
Invest in a Quality Laser Level
One of my most valuable tools is a high-precision laser level. Unlike traditional bubble levels, laser levels project a consistent, straight line across large areas, making it easier to spot uneven sections or shifts over time. I personally rely on models like the Bosch GLL3-330CG because their accuracy and ease of use help me monitor my floors periodically without needing a second pair of eyes. As flooring trends move toward even more precise installations, laser levels will become indispensable for ongoing maintenance checks.
Use a Spiked Roller Regularly
To keep your leveling compound in optimal condition after installation, I use a spiked roller once a month. This tool helps remove trapped air bubbles that might have formed due to temperature fluctuations or minor shifts. It’s a simple yet effective way to prevent future cracks or dips. I’ve found that maintaining this habit can reduce the need for costly repairs down the line. For best results, combine this with a routine visual inspection using your laser level.
Apply a Sealant to Protect Your Finish
After your floors are installed and thoroughly leveled, sealing is a crucial step. I recommend applying a high-quality sealant suitable for your flooring type—whether hardwood, tile, or laminate. Sealants create a protective barrier against moisture and wear, which is especially important in high-traffic areas. I prefer products like Bona Mega for hardwood floors because they are durable and easy to reapply when needed. Regular maintenance with appropriate cleaners and sealants can keep your floors looking new for decades.
Keep Moisture in Check
Moisture can be a silent adversary, causing delamination or warping over time. I use a digital moisture meter, such as the Wagner Meters Orion 940, to periodically check the humidity levels of my subfloor and ambient environment. Controlling humidity levels ensures that your flooring materials stay stable and prevents issues that can undermine your leveling efforts. As the industry advances, integrated smart sensors will likely become standard for real-time monitoring—so stay tuned for future innovations.
Plan for Regular Reassessments
Lastly, I recommend scheduling annual inspections with a professional or using your tools to verify the flatness of your floors. Small dips or shifts can develop due to settling or environmental changes. Catching these problems early is much cheaper than repairing extensive damage later. For detailed guidance on how to perform these assessments, check out this resource.
By investing in these specific tools and committing to routine maintenance, you can keep your floors looking pristine and functioning perfectly for the long haul. I encourage you to try using a laser level or moisture meter in your next project—these small investments pay off big over time. For more advanced strategies and expert advice, don’t forget to explore this comprehensive guide.
The Hardest Lesson I Learned About Floor Leveling
One of my biggest realizations was that no matter how perfect your tools are, if the surface isn’t prepped properly, your entire flooring project can suffer. I once skipped cleaning thoroughly, and the uneven spots haunted me through the entire installation. This taught me that meticulous surface preparation is the secret ingredient that many overlook but is absolutely essential for a flawless finish.
3 Myths About Floor Leveling That Held Me Back
- Myth 1: Rushing the curing process saves time.
Reality: Patience during curing prevents cracks and dips, saving time in repairs later. - Myth 2: Any leveling compound works on all surfaces.
Reality: Choosing the right compound for your specific surface ensures better adhesion and durability. - Myth 3: The surface doesn’t need rechecking after curing.
Reality: Always verify flatness again after curing to catch subtle dips early.
What Experts Won’t Tell You About Floor Leveling
Many professionals use laser levels and moisture meters not just for installation but for ongoing maintenance. These tools help detect hidden issues that might cause future problems. I’ve learned that investing in a high-quality laser level like the Bosch GLL3-330CG and a moisture meter such as the Wagner Orion 940 can dramatically increase the lifespan of your floors and prevent costly repairs down the line.
My Essential Toolkit for Achieving Perfect Floors
- Laser Level: Precision tools like laser levels ensure long-term flatness and are worth the investment.
- Moisture Meter: Monitoring humidity levels keeps your flooring stable and prevents warping.
- Spiked Roller: Regularly using a spiked roller post-installation helps eliminate trapped air and smooths out minor dips.
- Sealant: Applying a quality sealant extends your floor’s beauty and durability.
Keep Your Floors Flawless and Your Home Happy
Now that you know some of the insider secrets and essential tools, it’s time to take action. Properly leveling your floors isn’t just about aesthetics; it’s about creating a solid foundation that lasts for decades. Embrace patience, invest in quality tools, and don’t rush the process. Your future self—and your floors—will thank you for it. Ready to make your next flooring project a success? Dive into more expert tips here and start transforming your space today.