
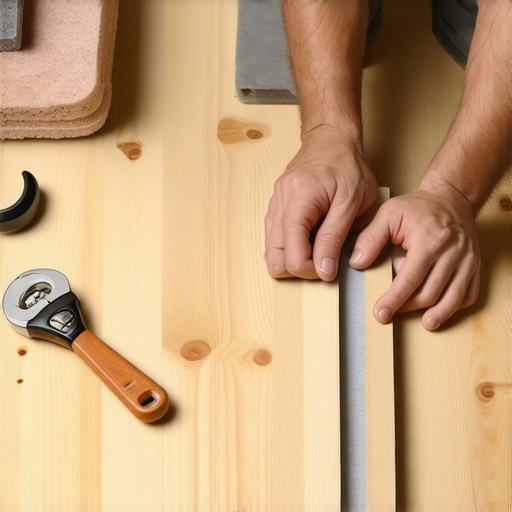
I remember the day I finally decided to address the huge gap forming in my floating floor. It was late in the evening, and I was trying to enjoy a smooth, seamless look in my living room. But as I stepped onto the floor, I noticed a visible gap running along one of my rows—a flaw that made the entire room look unfinished. Frustration set in; I knew I wasn’t alone, because many homeowners face this exact problem. That lightbulb moment made me realize—there has to be a way to fix this, and I was determined to learn how.
Understanding the Big Deal About Floor Gaps
Large gaps in floating floors don’t just look bad—they can lead to more serious issues like creaking, shifting, and even damage over time. When your flooring isn’t properly secured or leveled, these spaces give way to movement and dust accumulation, making routine cleaning a chore. Plus, gaps can spoil the aesthetic appeal and decrease your home’s value. Fortunately, fixing this isn’t as daunting as it seems once you know the right techniques and pitfalls to avoid.
Have you ever experienced a stubborn gap in your flooring that just wouldn’t close? Well, you’re not alone. My early mistake was ignoring the initial small gaps, thinking they would fill themselves over time. But I learned the hard way that addressing these issues early, with proper knowledge, saves a lot of headaches later. For a comprehensive approach, I recommend checking out [step-by-step flooring installation and leveling success](https://tiletrendshop.com/step-by-step-guide-to-flooring-installation-and-leveling-success), which guided me through the process.
Is Fixing Flooring Gaps Really Worth the Hassle?
One of my biggest doubts before tackling this problem was whether it was worth the effort. I feared it might be complicated or expensive. The truth is, if done correctly, fixing large gaps can be a straightforward project that restores your floor’s beauty and durability. And trust me, the result is well worth the small investment of time and material.
In upcoming sections, I’ll walk you through proven methods to close large gaps effectively, ensuring your floor looks flawless and functions well for years to come. Ready to transform your space? Let’s get started.
Assess the Extent of the Gaps
Before diving into repairs, inspect your flooring to measure the size and location of gaps. Use a ruler or a gap gauge to identify areas where gaps exceed 1/8 inch. This initial evaluation helps determine the appropriate fixing method. I remember facing a particularly stubborn 1/4-inch gap in my living room. I carefully marked the spots with painter’s tape for clarity.
Prepare the Area for Repair
Clear furniture and rugs from the affected section. Sweep or vacuum debris to ensure a clean surface. This step is crucial because dust or dirt can interfere with adhesive bonding or leveling compounds. I also wore a dust mask to avoid inhaling particles. Proper preparation sets the stage for a seamless fix.
Choose the Correct Fixing Method
Adding Transition Strips or Moldings
If gaps are near doorways or transitions, installing a transition strip can conceal imperfections and provide a smooth surface. This method is quick and minimally invasive, making it ideal for small gaps. I used a T-molding at my doorway, which instantly improved the room’s appearance.
Using Floor Leveling Compound
For larger gaps, applying a floor leveling compound is effective. Mix the compound as per manufacturer instructions, ensuring a smooth consistency. Pour or trowel the compound into the gap, filling it evenly. For my project, I followed this technique, using a putty knife to smooth the surface, then allowed it to cure for the recommended time. This approach creates a flat, even surface that blends with the existing floor.
Installing Shims or Underlayment
In cases where the subfloor is uneven, shims or an additional underlayment can level the surface before laying new flooring. Use a spirit level to identify high and low spots. Secure shims with a hammer or adhesive tape. I once shimmed a corner that was uneven, which eliminated creaking and improved overall stability.
Secure and Finish the Repair
Once the gap is filled or the surface is leveled, gently sand any protrusions or rough spots. Use fine-grit sandpaper to achieve a flush finish. Then, re-install any baseboards or molding, sealing gaps with caulk if necessary. I sealed the edges with paintable caulk, which provided a clean look and prevented debris from entering the gaps.
Check the Results and Make Adjustments
After completing the repair, walk on the floor to ensure smoothness. Listen for creaks or movement. If you notice discrepancies, apply additional leveling compound or adjust the molding. This iterative process ensures a durable, gap-free floor that enhances your space.
Many homeowners assume that laying hardwood, tile, or leveling a floor is straightforward, but scientific studies and expert insights reveal otherwise. One widespread myth is that choosing cheaper materials will always save money; in reality, subpar products often lead to costly repairs and uneven surfaces, as emphasized in a report by the National Institute of Building Sciences. Moreover, a common mistake is believing that perfect levels can be achieved without precise subfloor preparation. Skipping proper prep results in uneven floors and cracks, a pitfall I encountered early in my projects. To truly master flooring, understanding the subtle differences in subfloor composition and moisture content is crucial. For example, wood and concrete respond differently to humidity, affecting adhesion and stability. Advanced installers pay close attention to these nuances, often using moisture meters and specific primers, which drastically improve outcomes. A question I often get is, “Is there a shortcut to flawless leveling?” The answer is a resounding no—perfection demands meticulous attention to detail and patience. For those seeking a comprehensive approach, expert techniques like detailed subfloor assessment and proper use of leveling compounds are essential. You can enhance your skills by exploring resources such as [floor leveling success guides](https://tiletrendshop.com/step-by-step-guide-to-flooring-installation-and-leveling-success). Remember, rushing these steps may save time initially but will cost you more in repairs later. The key lies in embracing the complexity and respecting the science behind each material’s behavior. Making this shift in mindset transforms flooring from a stressful chore into a rewarding project. Have you ever fallen into this trap? Let me know in the comments.Maintaining your flooring system is crucial to ensuring its longevity and appearance. Precision tools and disciplined upkeep routines help prevent issues like uneven wear, damage, or shifting that can compromise your investment. One of my go-to tools is a high-quality moisture meter, such as the Tramex MEP conveniently used during initial installation, but also invaluable for periodic checks. Moisture imbalance can cause hardwood planks to buckle or tiles to delaminate over time, especially in humid environments. Regularly testing your subfloor moisture levels helps catch problems early, saving significant repair costs later.
Why I Recommend a Laser Level for Floor Maintenance
During my projects, I always rely on a laser level to verify that floors remain perfectly level over the years. Unlike traditional spirit levels, laser levels provide continuous, comprehensive coverage and are especially useful in large, open spaces. They help detect subtle shifts or dips that aren’t immediately visible, allowing timely corrections. As technologies evolve, laser levels are becoming more affordable and easier to use, making DIY maintenance more precise and less stressful. Integrating a laser level into your routine ensures your floors stay smooth and even, which is vital for both aesthetics and future refinishing work.
Planning for the Future of Floor Upkeep
Looking ahead, I believe smart home integration will revolutionize floor maintenance. Imagine sensors embedded in your subfloor that notify you directly of any moisture buildup or structural shift via your smartphone—then prompt immediate action. This proactive approach could drastically extend flooring life and reduce invasive repairs. Devices like the Fibaro Flood Sensor are already paving the way, and staying updated with these advancements guarantees you’re ahead of potential floor issues.
How do I keep my floors looking flawless over time?
Adopting a regular cleaning schedule tailored to your flooring type is essential. Use soft-bristled mops and pH-balanced cleaners for hardwoods, and avoid excessive water. For tiles, sealing grout lines periodically prevents moisture infiltration that can cause looseness or mold. Additionally, implementing preventative measures like felt pads under furniture and area rugs can protect your surfaces from scratches or dents. Remember, consistent inspection and prompt repair of small problems can prevent major disasters down the line.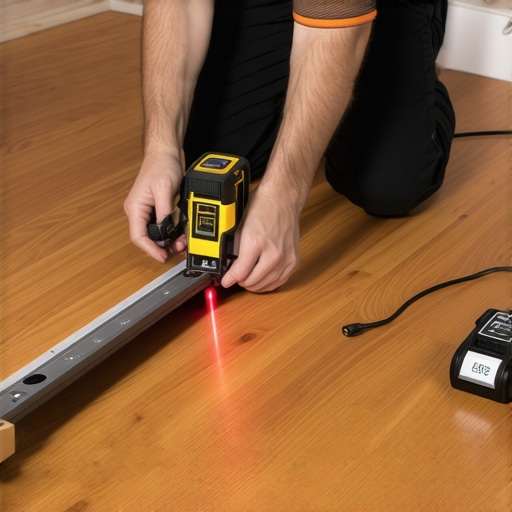
To illustrate, I often use a precise tile puller for delicate removal and re-installation of grouted tiles when maintenance requires replacing damaged sections. This tool minimizes damage and keeps your overall flooring system intact. Explore this technique further in my article on [tile installation pointers that save time and money](https://tiletrendshop.com/tile-installation-pointers-that-save-time-and-money).
Why a Good Maintenance Routine is Worth It
Investing in the right tools and following disciplined maintenance routines offers exponential benefits. Not only do you prolong your floor’s lifespan, but you also maintain its value and aesthetic appeal. Regular inspections combined with strategic upkeep—such as reapplying sealants or adjusting high-traffic areas—are key. And don’t forget to leverage modern tools like moisture meters and laser levels—tech advances that make a significant difference in proactive maintenance.
Try integrating a laser level into your routine inspection today. It’s an easy yet powerful step toward keeping your floors in top shape for years to come.
The Hidden Pitfalls That Changed My Approach to Flooring
One lesson I learned early was that ignoring minor gaps amplifies problems later, often turning a simple fix into a costly project. Seeing small spaces in my floor made me realize that proactive maintenance and understanding materials could save me from major headaches. Also, I discovered that the reputation of tools like moisture meters and laser levels goes beyond convenience—they are essential for precision and long-term durability. Lastly, I found that a patient, detail-oriented approach is what truly separates amateur repairs from professional outcomes, transforming floor maintenance from a chore into a source of pride.
The Toolbox That Elevated My Flooring Game
For anyone serious about flooring efficiency, I recommend tools like the precise floor leveler for achieving an impeccable finish. The fundamentals guide to leveling helped me understand proper procedures. Combining these with high-quality professional-grade tools and reliable resources have revolutionized my approach. By investing in the right equipment, I turned a daunting project into a manageable, even enjoyable task, inspiring confidence that I could handle future flooring challenges with skill.
Believe in the Power of Continuous Improvement
Above all, I’ve learned that consistency and a willingness to refine your technique make all the difference. Every successful fix has reinforced my belief that detailed prep work and proper tool use prevent future issues. Staying curious and open-minded about innovations like smart sensors for moisture detection or advanced leveling compounds keeps your flooring game ahead of common problems. Remember, patience and precision are your best allies—embrace the journey, and your floors will thank you for years to come.
Are You Ready to Take Your Flooring Skills Further?
Now that you’ve seen what’s possible with the right knowledge and tools, I encourage you to experiment confidently. Whether you’re fixing a stubborn gap or upgrading your entire floor, every step builds your expertise. Curious about specific techniques or tools? Feel free to ask or share your experiences below. Let’s elevate your flooring project to a professional level together!