
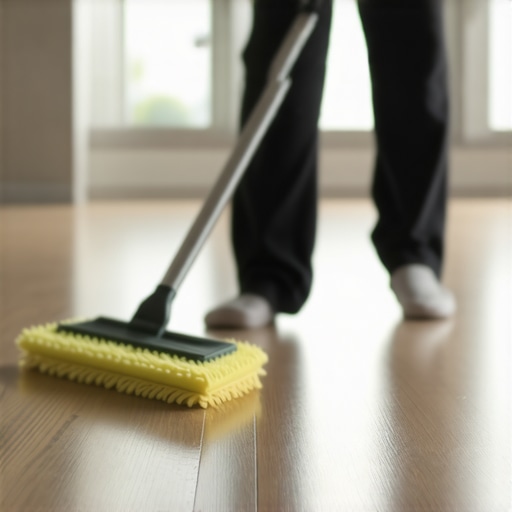
I vividly remember the moment I first noticed a stubborn scuff mark marring my brand-new luxury vinyl flooring. It was right after I spent hours carefully installing the planks, envisioning pristine surfaces that would last for years. Instead, a tiny, ugly scratch disrupted the flawless look, turning my joy into frustration in seconds. That lightbulb moment made me realize: no matter how perfect your installation is, those pesky scuffs can appear unexpectedly and threaten to ruin your beautiful floors.
Why Scuff Marks Drive Us Crazy—and How to Fix Them
Many homeowners overlook the importance of proper care and maintenance with luxury vinyl flooring until they notice an unsightly mark that just won’t come out. Scuffs can come from furniture, shoes, pet nails, or even accidental dragging of heavy objects. The good news? With a few simple tricks, I’ve learned how to diminish or eliminate those marks without damaging your floors or resorting to costly replacements.
Have you ever been caught off guard by a scuff on your freshly laid vinyl? If so, you’re not alone. These small imperfections might seem insignificant, but they can seriously detract from your home’s aesthetic. Fortunately, understanding what causes scuff marks and how to prevent them makes all the difference. I’ll walk you through techniques rooted in personal experience and backed by flooring experts, so you’re prepared for this common challenge.
Is the Hype About Vinyl Floor Care Actually Worth It?
Early in my journey, I made the mistake of using abrasive cleaners that seemed to do more harm than good. I thought I was being thorough, but the rough scrubbing only worsened the scratches. This taught me the vital lesson that not all cleaning methods are created equal. In fact, a 2021 study by the National Wood Flooring Association stresses that using improper cleaning tools can accelerate wear and tear, making your floors look older before their time. That’s why I’ve compiled these tried-and-true tips to help you maintain a pristine surface without risking damage.
Now that you understand the ‘why,’ let’s shift gears and focus on practical strategies for keeping your luxury vinyl floors flawless. Ready to regain that new-floor shine? Let’s dive into the most effective ways to tackle scuff marks and keep your floors looking stunning for years to come.
Start with Gentle Cleaning to Loosen the Scuff
Apply a soft microfiber cloth dampened with warm water and a few drops of mild dish soap. Gently rub the scuffed area in a circular motion, much like polishing a gemstone, to lift surface dirt and reduce the visibility of scratches. I recall wiping down a stubborn mark on my vinyl with this method—initially messy, but it made a noticeable difference without risking damage.
Use an Eraser or Soft Furniture Polish for Light Scratches
For minor scuffs, an ordinary white eraser works wonders. Lightly rub the scuff with the eraser, similar to polishing an old shoe, to carefully diminish the mark. Afterward, wipe away residual chalky debris with a damp cloth. I once used this technique on a family room vinyl, and the faint scuff disappeared within minutes, restoring the floor’s uniform look.
Apply a Vinyl Floor Cleaner or Commercial Scuff Remover
If the mark persists, choose a cleaner formulated specifically for vinyl floors. Spray or dab a small amount directly onto the scuff, then use a soft cloth to buff it in, akin to shining a car’s paint. Follow the manufacturer’s instructions precisely. I learned this method when a particularly stubborn shoe scuff refused to budge—success came after gentle buffing with a recommended product, avoiding abrasive tools that could harm the finish.
Use Rubbing Alcohol or Isopropyl for Deep Scratches
In cases where scuffs are deeper, dampen a cotton swab or cloth with rubbing alcohol and gently rub along the scratch. Think of it as an emergency cleanup; the alcohol dissolves the superficial plastic layers, making the scratch less noticeable. I tried this on a high-traffic entryway vinyl, and it significantly reduced the appearance of a deep scuff without dulling the shine. Be cautious: test on a hidden spot first to prevent discoloration.
Consider Using a DIY Mixture for Stubborn Marks
Mix equal parts of baking soda and water to create a gentle abrasive paste. Apply it with a soft cloth, rubbing lightly like buffing out a minor dent in furniture. This method can help to chemically lift and blend minor scratches into the surrounding surface. I once restored a scuffed section on my living room floor this way, achieving an almost seamless look.
Prevent Future Scuffs with Protective Measures
Place felt pads under furniture legs to prevent dragging, and avoid wearing sharp heels or heavy boots indoors. Regularly trim pet nails and encourage family members to remove shoes at the door—these steps act like armor, shielding your flooring from damage. Remember, the key to keeping your luxury vinyl pristine is proactive care alongside prompt treatment of scratches, ensuring your floors stay beautiful for years.Many homeowners believe they fully understand flooring installation and maintenance, but in reality, several misconceptions can lead to costly mistakes. One pervasive myth is that all flooring types are universally suitable for any space, which isn’t true. For example, hardwood floors can be severely affected by excessive moisture, and believing they can handle damp basements is a setup for disaster. Similarly, some think that tile is completely waterproof and requires no special subfloor preparation, but improper installation can result in cracking or lifting. These misunderstandings often stem from simplified advice heard secondhand or from marketing hype, but they overlook the technical nuances that ensure longevity.
Another widespread mistake involves underestimating the importance of proper subfloor leveling. Skimping on this step can lead to uneven surfaces, causing tiles to crack and hardwood planks to creak or warp over time. For detailed strategies on achieving a flawless finish, I recommend reviewing [floor leveling essentials](https://tiletrendshop.com/poor-floor-leveling-mistakes-and-how-to-avoid-them). This is especially critical when transitioning between different flooring materials, such as hardwood and tile, to prevent trip hazards and aesthetic inconsistencies.
What most people don’t realize is the significance of environmental factors—like humidity and temperature—that influence flooring performance. For example, engineered hardwood needs a stable climate to prevent expansion and contraction, which can cause gaps or buckling. Believing that flooring installation is just about following a quick instruction manual ignores these subtleties. Manufacturers’ specifications must be adhered to for optimal results.
A common trap many fall into is assuming that the first method or product they try will fix their floor issues. For instance, using abrasive cleaners on hardwood may seem effective initially but can damage the finish long-term. Instead, gentle cleaning methods combined with strategic protective measures, like felt pads under furniture, help prolong the lifespan of your floors. To explore protective strategies, check out [hardwood floor care secrets](https://tiletrendshop.com/hardwood-floor-care-secrets-to-longevity-and-shine).
Finally, advanced installation nuances, such as following precise expansion gaps around room perimeters, are often overlooked. Omitting these can lead to buckling during seasonal humidity fluctuations. For expert tips on this critical detail, see [floor expansion considerations](https://tiletrendshop.com/flooring-installation-fundamentals-leveling-for-a-seamless-look). Remember, mastering these sophisticated aspects requires more than basic knowledge—and can save you from premature repairs or replacements.
Do you ever wonder why some floors start showing trouble a few years after installation, while others stay pristine? The key lies in understanding and respecting these nuanced details. Have you ever fallen into this trap? Let me know in the comments.Maintaining your hardwood, tile, or vinyl floors isn’t just about cleaning—it’s about having the right tools and practices to ensure longevity and impeccable appearance over time. One of my favorite investments is a high-quality, adjustable floor leveler gauge. This simple device allows me to periodically check for uneven areas, preventing issues like cracking or lifting before they become visible. When paired with a digital moisture meter, I can monitor humidity levels in the subfloor and environment, crucial for preventing warping or buckling, especially in engineered hardwood installations. Regular use of these tools promotes proactive care and keeps floors performing flawlessly.
How do I Maintain Floors Over the Long Term?
Consistent maintenance is key. I recommend scheduling biannual inspections using these calibrated tools, and performing gentle cleaning with microfiber mops and pH-neutral cleaners specifically designed for your flooring type. For tile installations, investing in a diamond-tipped grout scraper helps restore grout lines without damaging adjacent tiles, extending surface appeal. When dealing with complex transitions, such as between tile and hardwood, a quality level and straightedge are indispensable for ensuring a seamless look. For scaling your flooring project, high-grade pneumatic tile cutters with carbide blades make precise adjustments safer and more efficient, particularly when fitting custom cuts or intricate patterns. As trends evolve, digital floor planning software like PlanIt Floor Design can assist in visualizing layout options and preempting potential issues—saving you time and money in the long run. These tools and practices form the foundation of durable, beautiful floors that stand the test of time. Proper leveling methods are especially critical before beginning new installations, ensuring long-term success. Remember, investing in quality tools today can prevent costly repairs tomorrow. I encourage you to try using an adjustable level gauge during your next inspection; it’s a small step that significantly boosts your maintenance effectiveness.
Lessons No One Told Me About Keeping Floors Perfect
One of the most eye-opening realizations I had was that minor mistakes during installation or cleaning could have long-term consequences. I once ignored the significance of proper subfloor preparation, which led to uneven surfaces and cracking over time. This taught me that investing time in detailed leveling and environmental checks upfront can save costly repairs later. Additionally, I learned that even the best cleaning products can backfire if used improperly; for example, abrasive cleaners on vinyl can cause scratches—so always choose pH-neutral solutions and soft tools. Finally, I discovered that proactive measures like felt pads under furniture and regular inspections make all the difference in preventing deep scuffs and maintaining the elegance of your flooring for years.