
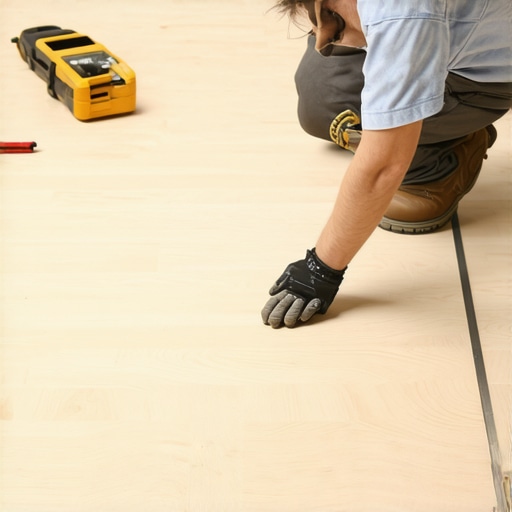
I remember the moment vividly: after hours of frantic tile laying, stepping back to admire my work, only to realize the surface was anything but flat. Crooked tiles, uneven spots—my hard work was wasted if I didn’t catch the problem early. That lightbulb moment hit hard—my subfloor was the culprit. It’s a common nightmare among DIYers and pros alike. But here’s the truth: detecting subfloor imperfections isn’t just guesswork; there’s a simple, hands-on tactic that can save your project.
Why Proper Subfloor Evaluation Can Make or Break Your Flooring Project
Are You Falling for the Hype of Fancy Tools?
Many folks think high-tech gadgets are the only way to achieve perfect flooring. I used to believe that, too—until I learned that a good old-fashioned 3-foot level is often enough to find the hidden dips and rises. Early in my career, I bought expensive moisture meters and laser levels, convinced they were mandatory. Turns out, these tools can be helpful, but nothing beats a simple level and a keen eye for real-world imperfections. As the National Association of Home Builders notes, proper subfloor assessment is vital to avoid costly fixes down the line.
My mistake was relying solely on visuals; I overlooked how subtle dips could affect tile adhesion or hardwood stability. Since adopting the 3-foot level test, my accuracy has improved dramatically, and I’ve saved myself from major headaches.
Are you facing a similar dilemma? Have you ever installed flooring only to notice unevenness later? If so, stick around. In the upcoming sections, I’ll show you exactly how to perform the 3-foot level test like a seasoned pro, helping you achieve a perfectly flat foundation every time.
Get ready to transform your approach to subfloor evaluation with simple, effective techniques that even beginners can master without breaking the bank. Let’s ensure your floor is truly level before you lay the first tile or hardwood plank. Curious to learn the step-by-step process? Keep reading.
Get Your Hands Dirty: The 3-Foot Level Test
Start by clearing your workspace and laying out a fresh sheet of paper for notes. Place a reliable 3-foot level directly on the subfloor at a 45-degree angle. Gently press down and observe whether the bubble centers perfectly. I once did this in my basement, and it revealed a subtle dip near the door jamb that I hadn’t noticed visually. Mark any uneven spots with chalk or painter’s tape for reference. This straightforward step quickly highlights problem areas that could compromise your flooring’s stability.
Identify and Mark High and Low Spots
Next, systematically check the entire subfloor, moving the level across different sections. When you find dips or humps, mark them clearly. Think of it like a landscape map—you want to smooth out these “valleys” and fill in the “peaks”. My favorite trick is to hold a straightedge or a long piece of lumber over the marked spots; if gaps show underneath or if it’s uneven, it’s time for corrective action. These markings serve as your guide for the leveling process, ensuring accuracy and consistency.
Assess the Magnitude of Imperfections
Use a straightedge or a long spirit level to quantify how deep or high the unevenness is. Place it across the marked areas; if it rocks or has noticeable gaps underneath, the discrepancy is significant enough to warrant attention. For minor dips under 1/8 inch, a simple layer of self-leveling compound may suffice. Larger issues might need more extensive correction, like adding a plywood overlay or grinding down high spots. Remember: the goal is a flat, sturdy surface that will make tile or hardwood installation seamless and durable.
Refine Your Surface with Corrective Measures
For small dips, applying a high-quality self-leveling compound, such as those described in this guide, can restore flatness quickly. Mix it according to manufacturer instructions, and pour it over the marked areas. Use a trowel or a squeegee to spread evenly, working from the lowest points upward. For larger imperfections, consider installing an additional layer of plywood or screed to bring the surface into level. Patience is key—allow adequate curing time before proceeding to your flooring installation.
Create a Visual Map for Smooth Installation
Keep a detailed record of your markings and leveling steps. This will act as a visual map, directing precise placement during tile or hardwood installation. Remember, a well-evaluated subfloor not only prevents cracks and gaps but also ensures your finished floor looks professionally done. Take the extra time now—the effort will pay off during the actual laying process and in the longevity of your project. Ready to learn how to apply these corrections effectively? Dive into this comprehensive technique and elevate your flooring game.Many homeowners and even experienced DIYers assume that achieving a perfectly level subfloor or a flawless hardwood installation hinges solely on fancy tools or surface appearance. However, let’s dig deeper into a crucial nuance often overlooked: the importance of understanding subtle subfloor imperfections. Far too often, people rely heavily on laser levels or moisture meters without appreciating the significance of small but impactful deviations. These tiny dips or humps, if left unaddressed, can cause uneven tile surfaces or create stress points leading to cracking over time. An advanced mistake is treating minor imperfections under 1/8 inch as negligible; in reality, even these can compromise the integrity of your finished floor. Experts like the National Association of Home Builders emphasize that proper assessment involves thorough, multi-directional checks—using straightedges, calibrated levels, and visual tests—to truly gauge the subfloor’s condition. Rushing through this evaluation phase often results in costly repairs or replacements later on. For an in-depth approach, review detailed techniques on perfecting your surface leveling and avoid common pitfalls. One particularly tricky aspect is the misconception that surface smoothness guarantees structural flatness; this is false because hidden voids or flex can be hidden beneath apparent flatness. Incorporate a comprehensive assessment protocol—combining tactile feedback, visual cues, and simple tools—to preempt these issues. Remember, the goal isn’t just to make the surface visually appealing but to ensure long-term stability and durability. Making this nuanced distinction can save you time, money, and frustration. Have you ever fallen into this trap? Let me know in the comments.Maintaining your floors isn’t a set-it-and-forget-it task; it requires deliberate care, right tools, and consistent attention to preserve their beauty and functionality over time. From hardwood to tile, selecting the right equipment can significantly extend the lifespan of your flooring investment. One tool I personally rely on is a high-accuracy moisture meter like the Tramex CME5, which I use to monitor moisture levels beneath the surface before, during, and after installation. This device helps me catch potential issues early, preventing warping or mold growth that could develop months down the line. As experts in flooring installation emphasize, controlling moisture content is critical to long-term durability.
The Hardest Lesson I Learned About Floor Leveling and Flooring Installation
One of the most impactful lessons came when I underestimated the importance of thorough subfloor evaluation. Rushing through initial assessments led to uneven floors and future headaches. Now, I know that patience and detailed checking—like the beloved 3-foot level test—are the foundations of a successful project. Don’t make my mistake: invest time early to save frustration later.
Tools and Tips That Changed My Approach
While high-tech gadgets are tempting, I rely on simple tools like a good level, straightedge, and chalk for marking imperfections. For deeper insights, books like this guide have revolutionized my understanding. Keep reliable tools handy, and stay open to learning from seasoned professionals to elevate your flooring craftsmanship.
Embrace Your Inner DIYer: Action Fuels Change
Getting your floors right is more than a task—it’s a process of continuous learning. Remember, every mistake offers wisdom, and each successful project boosts confidence. Challenge yourself to apply the techniques discussed, and watch your space transform into a finished masterpiece that you can truly be proud of. Ready to take the next step? Start with the evaluation method that resonated most with you, and let your flooring journey flourish.