
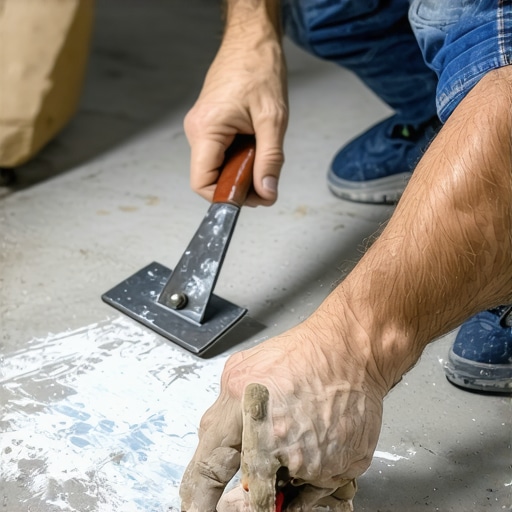
I’ll never forget the moment I realized I had a major challenge ahead. After tearing out my old carpet, I stared at that stubborn glue residue marring my concrete subfloor. A sinking feeling crept in—I had no desire to spend days sanding or, worse, exposing myself to harsh chemical fumes. Sound familiar? If you’ve ever been there, you know exactly what I mean. That messy, adhesive nightmare can turn a simple flooring project into a frustrating ordeal. But here’s the good news: you don’t need to drown in chemicals or grind away endlessly. Instead, through some trial, error, and a bit of neighborly persistence, I discovered effective ways to remove carpet glue using only natural, household items. Today, I want to share what I learned so you can tackle your project without the stress or risks associated with harsh chemicals.
Why Bother with Non-Chemical Carpet Glue Removal?
Concern Over Toxic Fumes and Environmental Impact
First off, let’s be honest. Many commercial adhesives contain solvents and chemicals that can be harmful to your health and the environment. According to the EPA, indoor air pollution from chemical sources can cause respiratory issues and skin irritation. So, if you’re like me, avoiding unnecessary chemical exposure while restoring your floors is a no-brainer.
Plus, using natural solutions is often more budget-friendly and accessible. Think about the times you’ve run out to buy expensive, special-purpose products only to find they don’t work as promised. With household items—like vinegar, baking soda, or heat—you might already have what you need, saving you both time and money.
The Risks of Improper Removal Techniques
Now, I must admit I made a classic mistake early on: I tried scraping the glue without softening it first. Spoiler: it damaged my concrete surface, and I ended up having to patch and resurface. Lesson learned! This experience taught me that patience and proper preparation are key—especially when you want to avoid costly repairs down the line. It might seem tempting to go straight for heavy tools or chemicals, but a gentle, deliberate approach yields better results and saves your floor from unnecessary harm.
If you’re wondering whether this approach is worth the effort, I promise it is. Not only will you be preserving your floor’s integrity, but you’ll also be creating a safer environment for yourself and your family. Ready to see how simple household items can soften and lift that stubborn carpet glue? Let’s dive into the step-by-step solutions that worked for me—and may very well work for you, too.
Begin by applying heat to soften the glue. Use a hairdryer set on high heat, holding it about 6 inches above the area. Move the dryer steadily to avoid overheating. As the glue warms, it will become more pliable, making removal easier. When I did this in my own project, I used a plastic scraper to gently lift the softened residue, and it came away in larger chunks, reducing the mess and effort.
Next, pour white vinegar directly onto thick patches of glue. Let it sit for 10-15 minutes; vinegar’s acidity breaks down the adhesive bonds. Afterward, scrub with a stiff-bristled brush or use a white nylon scrub pad. I found applying vinegar in sections enabled me to target stubborn spots without saturating the entire floor, preventing potential damage to the concrete. This method is especially effective on thinner residue layers.
For a more abrasive approach, create a paste of baking soda and water. Spread it over the remaining glue, then scrub with a scouring pad. The gentle abrasiveness helps lift adhesive without harming concrete. I once used this technique after vinegar, resulting in a cleaner surface and a better foundation for new flooring. Be sure to rinse the area thoroughly to remove any baking soda film.
Layer heat with manual scraping for efficiency. After warming the glue and applying vinegar, use a plastic putty knife or a scraper with a soft edge. Sit or kneel to apply even pressure, avoiding metal tools that could scratch the surface. I made my job easier by using a wide-angle scraper, which covered more area quickly, reducing fatigue and the chance of damaging the concrete.
Split your workspace into manageable zones—this prevents feeling overwhelmed and ensures thorough cleaning. Always reheat each section before scrubbing or scraping. Consistency in this approach prevented the residue from hardening or spreading once cooled. I found that working systematically from one corner outward kept the process orderly.
If vinegar isn’t sufficient, consider household lemon juice as a natural solvent. Its acidity helps weaken glue, especially in small patches. Applying lemon juice with a sponge and letting it sit for a few minutes can soften stubborn areas. I tested this on a small spot and noticed the adhesive becoming less sticky, allowing easier removal.
Throughout the process, ensure proper ventilation. Open windows or set up fans to disperse fumes from vinegar or heated surfaces. This low-impact method minimizes health risks and odor, unlike commercial solvents. I always appreciate the fresh air, especially when working indoors for extended periods.
Once the glue is removed, sweep or vacuum the area thoroughly. Wipe down with a damp cloth to eliminate any residual debris. Allow the surface to dry completely before proceeding with flooring installation or leveling. Proper cleaning guarantees better adhesion for new materials and a smooth finish. I learned this the hard way—skipping this step led to issues with my tiling later on, emphasizing the importance of a clean subfloor.
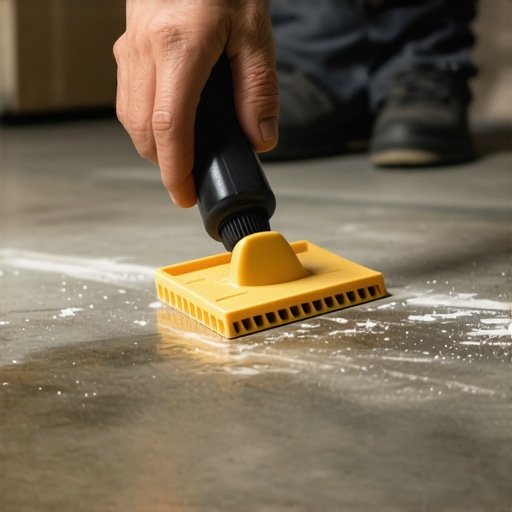 When it comes to hardwood flooring and installation, many homeowners underestimate the complexity and fall prey to common misconceptions that can lead to costly mistakes. One prevalent myth is that laying hardwood floors is straightforward and forgiving, but in reality, subtle nuances like subfloor preparation and humidity control play a critical role in long-term success. For instance, skipping proper moisture testing can cause expansion and contraction, leading to gaps or buckling over time. Experts emphasize that understanding the importance of a level subfloor is essential; uneven surfaces can compromise the entire installation, as discussed in detail in our guide to flawless floor leveling. Many assume that the adhesive or nails are all they need, but the type of subfloor, material compatibility, and climate considerations influence the durability of the finished surface. A frequent mistake is sealing or finishing hardwood without considering the underlying board’s condition, which can trap moisture and cause warping. For tile installations, the biggest misstep is neglecting to properly prepare and level the substrate. An uneven base can lead to cracked tiles and uneven grout lines, undermining the aesthetic and structural integrity. To ensure a pristine finish, following precise leveling techniques outlined in floor leveling methods is non-negotiable. Another hidden nuance is the choice of transition trim between different flooring types; many overlook this, risking trip hazards or unsightly gaps. Fabricating seamless transitions requires attention to detail and proper measurements, as elaborated in our transition tips. Additionally, the misconception that high-end materials always guarantee durability neglects the importance of installation quality and maintenance. Regular care, such as those shared in floor care secrets, can prolong the lifespan regardless of material cost. Ultimately, meticulous preparation, understanding subtle technicalities, and avoiding shortcuts are what distinguish a professional-looking hardwood or tile floor from a subpar finish. Have you ever fallen into this trap? Let me know in the comments.
Keep It Working: Tools I Recommend for Flooring Success
Achieving professional results in flooring projects hinges on having the right tools at hand. Over the years, I’ve tested and refined my toolkit, discovering that certain equipment can significantly enhance quality, efficiency, and longevity. A high-quality laser level, for instance, ensures your subfloor is perfectly flat, preventing issues like tiles cracking or hardwood gaps down the line. I personally rely on the Bosch GPL 3 laser level because of its accuracy and ease of use, which has saved me countless hours during leveling and layout phases. Remember, proper leveling is foundational; you can explore advanced techniques in this guide.
For measuring and marking, I prefer the Lufkin Tape Measure—robust and reliable, it helps in precise cut lines and spacing, crucial when matching tile patterns or ensuring tight hardwood seams. When it’s time to cut tiles, nothing beats a Rubi Tile Cutter. Durable and capable of making precise cuts without chipping, I use it instead of cheaper alternatives, especially for large-format tiles where accuracy counts. For wooden flooring, a good Finney Flooring Knee Kicker ensures tight seams and reduces gaps, extending the lifespan of your installation.
Power Tools That Make a Difference
Don’t underestimate the power of a quality drywall sander, like the Makita BO5041, for smoothing surfaces before finishing or leveling. It reduces coating imperfections and speeds up prep time. When it comes to adhesives or leveling compounds, a dual-speed MiG Feiyue Electric Mixer guarantees thorough mixing, preventing lumps and ensuring even application. A reliable angle grinder, such as the Dewalt DWE43116, becomes handy if you need to cut or grind tougher materials or remove stubborn old adhesive residues. invest in quality and maintenance of these power tools, and they’ll serve you reliably for years to come.
Regular maintenance of your tools is vital. Keep them clean, lubricate moving parts, and check blades or bits for wear. This not only prolongs their lifespan but also ensures your work remains precise and safe. Using the right equipment isn’t just about convenience—it’s about guaranteeing the durability and beauty of your flooring, from initial installation to future updates.
Predicting Future Trends in Flooring Tools
Looking ahead, I predict that smart tools integrated with IoT technology will become standard. Imagine laser levels or measuring devices that sync with your smartphone, providing real-time data and error alerts, reducing mistakes further. Also, innovations in cordless tech will make heavy-duty equipment more portable, enabling on-site adjustments without cumbersome cords or air compressors. Staying updated with these advancements will be key for anyone serious about long-term flooring success.
Quick Tip for Longevity: Regularly Calibrate Your Equipment
Calibrating your tools periodically ensures measurement accuracy, which directly impacts the lifespan of your flooring. Accurate leveling and precise cuts prevent uneven settling or cracking that might necessitate costly repairs later. Make it a habit to check your laser level’s calibration before every project—you’ll be surprised how much this simple step can save you over time. Need more expert insights? I recommend reviewing this resource for advanced tips on equipment maintenance and setup.
If you’re ready, try calibrating your laser level before your next job—it’s a small step that yields big results in durability and appearance. Implementing proper tool maintenance and choosing quality equipment forms the backbone of lasting flooring installations, ensuring your work stands the test of time and foot traffic.
Unveiling Secrets That Changed My Approach to Flooring
One of the most eye-opening lessons I learned was the importance of patience when dealing with stubborn adhesive residues. Rushing the process often led to damage or uneven surfaces, which I only realized after costly repairs. Another lightbulb moment was discovering that natural household items, like vinegar and baking soda, could be surprisingly effective, saving me from hazardous chemicals and extra expenses. Lastly, I understood that meticulous surface preparation—cleaning and leveling—is the backbone of a successful flooring project, a detail many overlook until it’s too late. Embracing these insights transformed my approach from trial-and-error to strategic, and I hope they help you avoid similar pitfalls.