
Ever experienced the sinking feeling of installing beautiful new hardwood or tile only to find it warped, cracked, or uncomfortable beneath your feet? I’ve been there. It’s that frustrating realization that something went wrong right after the installation, leaving me wondering if I overlooked a crucial step. One of the most overlooked culprits? Excess moisture lurking beneath the surface.
In my early days of flooring projects, I naïvely believed that a clean, level concrete slab was enough. The result? Buckling floors, moldy odors, and frequent repairs. It wasn’t until a stubborn, dark stain and a squeaky section made me dig deeper that I discovered the silent enemy: moisture seepage.
**
Why Moisture Testing Matters Before You Start
**
The truth is, understanding the moisture content of your concrete slab can make or break your flooring project. If moisture levels are too high, no amount of good installation techniques will prevent future issues. The Buck Test, a simple yet effective moisture check, is often overlooked by DIYers and even some pros. It’s that small step that can save you a ton of time, money, and headaches later.
In fact, a study reported by the Concrete Network shows that moisture problems are among the top reasons for flooring failures, accounting for nearly 80% of warranty claims on new installations. That’s a staggering number, highlighting how critical this step really is. If you skip this test, you’re essentially rolling the dice on the longevity and appearance of your new floor.
Have you ever installed a seemingly perfect floor only to see it bubble or peel within months? If so, you’re not alone. Many homeowners and contractors have faced this issue after neglecting to assess and address the moisture in the subfloor.
**
Common Mistakes That Can Cost You
**
One mistake I made early on was trusting the slab’s appearance and surface dryness alone. I didn’t realize that moisture could be migrating from deep within the concrete, invisible to the naked eye. This ignorance led to unexpected problems down the line, significantly increasing repair costs. To avoid this, proper testing and understanding of your subfloor’s moisture levels are essential.
Fortunately, I learned that a simple and affordable test — the bucket test, also known as the “water drain test” — can provide a clear indication of whether your slab is suitable for flooring. If you want to dive deeper into how to evaluate your concrete’s readiness, check out this comprehensive guide on [flooring installation fundamentals](https://tiletrendshop.com/flooring-installation-fundamentals-leveling-for-a-seamless-look).
Now, with this initial insight, let’s explore the steps to accurately test your concrete slab and ensure your new floor will stand the test of time. Are you ready to transform your space without the fear of future failure?
Start With the Bucket Test to Gauge Moisture Levels
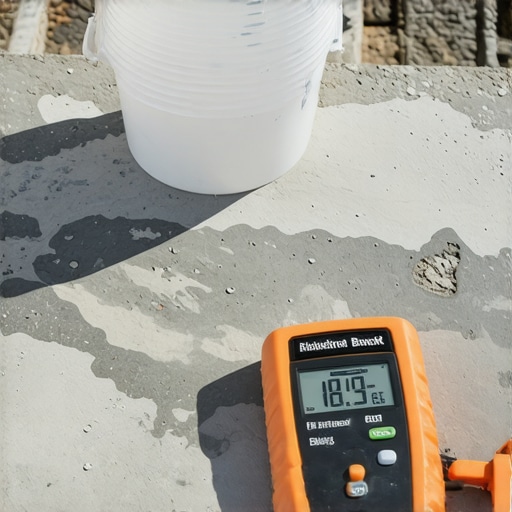
Begin by performing the straightforward bucket test. Place a sturdy, clear plastic container filled with water directly onto the concrete slab, then cover it with a plastic sheet secured with masking tape. Leave it undisturbed for 24 hours. After this period, inspect the inside of the plastic for condensation or dampness. Excess moisture indicates high humidity within the slab, signaling that it’s not ready for installation yet. This simple method can prevent costly mistakes, and I’ve seen firsthand how skipping this step led to bubbling tiles and delaminating hardwood within months of installation.
Use a Moisture Meter for Precise Readings
For a more accurate assessment, employ a digital moisture meter designed for concrete floors. These devices measure the relative moisture content at various points across your slab. Insert the probes into the concrete at different locations, especially in areas prone to higher moisture, like near plumbing lines or basement walls. Record the readings and compare them to the manufacturer’s recommended moisture thresholds—usually below 3% for interior flooring. During my last project, I used a meter to test multiple spots; some areas registered as high as 4.2%. This prompted me to install a vapor barrier layer, saving me from future moisture-related disasters. Check out this resource on floor leveling techniques for more details about preparing a suitable subfloor surface.
Perform the Plastic Sheet Test for Hidden Moisture
This test involves taping a 4×4-foot plastic sheet tightly onto the slab, ensuring there are no edges loose. Leave it in place for 48 hours, then check underneath for moisture accumulation or dampness. The presence of water droplets or increased humidity confirms moisture migration from below. I had a project where the plastic sheet revealed significant moisture after just a day, prompting me to delay installation and implement a proper vapor barrier. This step is critical; a lack of moisture prevention measures can cause tiles to crack or hardwood to warp down the line. For comprehensive advice on floor leveling and moisture mitigation, explore our detailed guides.
Address Moisture Issues Before Proceeding
If tests show elevated moisture levels, resolve the problem before installation. Options include applying drying agents, increasing ventilation, or installing a vapor barrier. Remember, rushing into flooring installation with residual moisture is like trying to paint a damp wall — the results will be compromised and potentially costly to fix. I once ignored high moisture tests and paid the price with a floor that bowed and developed mold within months. It’s better to spend extra time preparing thoroughly than to deal with repairs later. For expert techniques on precise floor leveling and moisture control, consulting professional advice can make all the difference.
While many assume that following basic installation steps guarantees flawless results, there are nuanced pitfalls that even seasoned professionals can miss. One common myth is that a perfectly level subfloor is all you need; however, the reality is more complex. Subtle imperfections, such as slight variations or residual moisture, can compromise flooring longevity if not addressed with advanced techniques like proper floor leveling and moisture mitigation. For example, relying solely on visual inspection or simple tests might lead you astray—many believe that a dry surface means readiness, but underlying humidity can cause issues down the road. To truly excel in flooring projects, understanding the intricacies of proper floor leveling techniques is essential, especially when working with materials like tile or engineered wood that demand high precision. Additionally, there’s a misconception that big tools and fancy gadgets are necessary for perfect results, but in my experience, mastering foundational skills like step-by-step installation strategies can be more effective than expensive equipment.
One crucial ‘oops’ factor to watch out for is neglecting the expansion gaps or not accommodating for structural movement, which causes floors to buckle or crack over time. This is a subtle mistake that catches many off guard, especially in climates with fluctuating humidity. Advanced installers often consider the environment, using materials that adapt to conditions, and ensure proper floor leveling, which broadly influences performance. As research indicates, failure to account for these nuances accounts for a significant percentage of long-term flooring issues, emphasizing that meticulous preparation saves money and stress later.
Ever wondered why some floors look picture-perfect initially but deteriorate within months? It’s often linked to overlooked details like moisture control, precise leveling, or inadequate subfloor preparation. Recognizing these nuances isn’t just for pros; homeowners eager to DIY should educate themselves to avoid costly rework. If you’re curious about specific advanced troubleshooting, I recommend diving into this comprehensive guide. Remember, a successful flooring project hinges on attention to these underlying complexities—so don’t settle for superficial checks. Have you ever fallen into this trap? Let me know in the comments.
Invest in Precision Tools for Consistent Success
Maintaining high-quality flooring work relies heavily on the right equipment. I personally swear by a high-precision laser level, such as the Bosch GLL 3-330C, because it ensures perfectly flat and level surfaces—crucial for tile and hardwood installations. Unlike traditional bubble levels, laser levels offer quick, accurate readings across large areas, helping to identify subtle imperfections before they become costly mistakes. Regular calibration, which I perform every few months according to the manufacturer’s instructions, keeps these devices reliable over years of use. Additionally, a quality moisture meter like the Tramex CM-7 or a similar digital device provides instant, accurate readings of subfloor humidity, enabling me to address moisture problems proactively, rather than reacting to issues later. To deepen your understanding, check out this comprehensive guide on flooring installation and leveling.
How do I maintain flooring tools over time?
Proper maintenance extends the lifespan and accuracy of your tools. For laser levels, I recommend cleaning the lenses with a microfiber cloth after every use and storing them in a padded case to prevent damage. For moisture meters, ensuring the probes are dry and free from debris is key—periodic calibration checks against known standards can prevent drift in readings. I also suggest establishing a routine: inspect, clean, and calibrate your tools before each project. This not only guarantees accurate results but also saves you money in the long run, avoiding costly reworks due to faulty measurements. As advancements continue, digital tools with Bluetooth connectivity and automatic calibration features are becoming more accessible, promising even greater ease of use in the future.
Keep Your Floors Healthy with Routine Maintenance
Once your floors are installed, ongoing care is vital. Regular cleaning with suitable products prevents grime buildup that can wear down surfaces. For hardwood, using a damp microfiber mop and avoiding excessive moisture can prevent warping; I recommend using a high-quality cleaner like Bona’s Hardwood Floor Cleaner for best results. Checking for signs of damage or moisture intrusion every few months helps catch issues early. Installing a dehumidifier in basements and high-humidity areas can maintain optimal conditions, prolonging your floor’s lifespan. Remember, prevention is always better than cure; addressing minor problems promptly can save you from extensive repairs later. For more insights, explore these hardwood floor care secrets.
Scaling Up Your Flooring Projects with Confidence
If you’re considering larger or more complex installations, investing in advanced leveling systems like self-leveling compounds combined with a brace mechanism can make a significant difference. These tools ensure surfaces are not only flat but also structurally sound, which is essential as project size increases. Additionally, employing software solutions like laser-guided leveling apps helps visualize and plan layouts, reducing errors during installation. In the coming years, I predict that integrated digital measurement tools and real-time moisture monitoring systems will become standard in professional flooring setups, further enhancing accuracy and efficiency. Incorporating these technologies now can set you apart in DIY or professional projects alike.
Endeavor to try methods such as the use of a high-precision leveling primer combined with your laser level. This simple step can greatly improve surface uniformity, especially in challenging environments. Remember, consistent maintenance of your tools and proactive care of your floors are the keys to long-term success. By integrating these practices, you’ll ensure your flooring remains beautiful and durable for decades to come, making every project a rewarding experience.
What I Wish I Knew Before Installing Floors
The most valuable lesson I learned is that rushing in without proper moisture assessment is a recipe for disaster. I once skipped thorough testing, believing surface dryness was enough, only to face buckling and peeling within months. Now I understand that moisture lurking beneath can sabotage even the most careful preparations, highlighting the importance of comprehensive testing from the start.
Another revelation was that no single test is infallible. The bucket test, moisture meters, and plastic sheet checks each reveal different aspects of the moisture profile. Integrating these methods provides a clearer picture, preventing surprises that can derail your project midway.
I also discovered that addressing moisture issues early is a form of investment rather than delay. Implementing vapor barriers or moisture mitigation strategies upfront can save you significant time and money down the line, maintaining the integrity and appearance of your floors.
My Go-To Resources for Flooring Precision
I trust the comprehensive guides at Flooring Installation Success for foundational techniques that make a real difference. Their step-by-step instructions demystify complex tasks, ensuring I avoid common pitfalls like improper leveling or moisture oversight.
The Absolute Guide to Floor Leveling has helped me master subtle adjustments that prevent future cracks or uneven surfaces, especially on tricky substrates.
For tools, I rely on a trusted moisture meter like the Reliable Digital Moisture Meter, which provides quick, accurate readings, giving me confidence that my groundwork is solid. Combining these resources empowers me to tackle flooring projects with precision and peace of mind.
Seize the Chance to Elevate Your Flooring Game
Don’t let hidden moisture undermine your hard work. The future of flooring installation lies in meticulous preparation and embracing the right tools and knowledge. Every successful project begins with understanding your surface, and with these insights, you’re well on your way to impeccable results that stand the test of time.
Are you prepared to implement comprehensive moisture testing in your next flooring project? Share your experiences or ask questions below—let’s learn together!
**Note:** Remember, integrating proper moisture assessments is not just about avoiding problems—it’s about elevating your craftsmanship and enjoying peace of mind for years to come.