
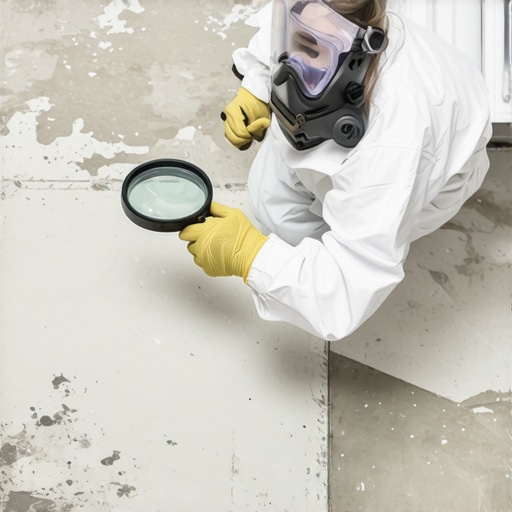
I remember the moment clearly. I was rummaging through my grandma’s old basement, looking to update the flooring, when I stumbled upon a faded, peeling linoleum sheet. It looked innocent enough, but a tiny nagging voice in my head reminded me to be cautious—what if this old flooring contained asbestos? That lightbulb moment changed everything for me, and I realized how many homeowners might unknowingly put themselves at risk.
If you’ve ever wondered whether your vintage linoleum might hide dangerous fibers, you’re not alone. Old flooring, especially pre-1980s, often contained asbestos for its fire-resistant properties. However, disturbing these materials without proper precautions can release harmful fibers into your home environment. So, today, I promise to guide you through a safe, simple process to check for asbestos in your old linoleum flooring, helping you avoid unnecessary risk.
Why You Can’t Ignore the Danger of Hidden Asbestos
As those of us with a passion for home improvement know, sometimes our eagerness to transform a space can blind us to hidden hazards. My early mistake was assuming that all old flooring was safe to remove without professional tests. I didn’t realize that DIY asbestos testing could be straightforward—and crucial for health. According to the Environmental Protection Agency (EPA), exposure to asbestos fibers can cause serious health issues, including mesothelioma and asbestosis, even years after initial contact. In fact, the CDC reports that approximately 3,000 cases of mesothelioma are diagnosed in the U.S. annually, often linked directly to asbestos exposure.
If your home has vintage linoleum, there’s a chance it contains asbestos—sometimes as Friable asbestos, which can easily release fibers if disturbed. That makes cautious testing a top priority.
Is Asbestos Testing Really Necessary Before Removing Old Floors?
I used to think that visual inspection was enough. I was wrong. Asbestos fibers are microscopic, hidden within the material, and look identical to regular linoleum when intact. An early mistake I made was attempting to scrape a corner to check—unaware that any disturbance could release fibers. Now, I always recommend professional testing or, at the very least, using an authorized DIY kit, especially if your linoleum has frayed edges or is crumbling.
This approach isn’t just about perfectionism. It’s about protecting yourself and your loved ones from invisible, persistent dangers. Next, I’ll walk you through the safest ways to test your flooring without exposing yourself or your environment to risk. Let’s turn that worry into a manageable project that gets your home renovation back on track, confidently.
Prepare Your Workspace for Testing
Before you begin, clear the area around the flooring to ensure smooth access and minimize disturbing untested sections. Wear disposable gloves, a dust mask rated N95 or higher, and protective goggles to prevent inhaling or contacting any fibers. Open windows and turn on fans to promote airflow, but avoid sweeping or vacuuming, as this can stir up asbestos fibers. Instead, gently dampen the surface with a damp sponge or cloth to reduce dust. This preparation is like setting the stage before a delicate performance, ensuring safety is your top priority.
Collect a Sample with Precision
Using a small utility knife, carefully cut a corner of the linoleum where it’s already peeling or frayed—this reduces the risk of releasing fibers from undisturbed areas. Extract a sample about the size of a quarter, including a small piece of backing material if visible. Place the sample into a resealable plastic bag or an airtight container labeled with the location and date. Think of this step as a precise scoop for a scientific experiment—it must be handled carefully to ensure accuracy and safety.
Avoid Common Mistakes
Never rip or pry large sections of flooring; doing so can release a cloud of fibers. Also, don’t scrape or sand the material to examine it — this can disturb asbestos fibers dangerously. I once tried scraping a corner for a quick look and accidentally created a cloud of dust that lingered for hours, making me realize the importance of gentle handling.
Seal and Label Your Sample Properly
Ensure the bag or container is airtight to prevent fiber escape during transport. Label each sample with the date, exact location, and your initials. This step is crucial because it maintains chain-of-custody and ensures lab accuracy later. If you plan to test multiple areas, keep samples separate and clearly marked. It’s like tagging evidence at a crime scene: clarity prevents costly mistakes down the line.
Send the Sample to a Certified Laboratory
Find an EPA- or state-certified laboratory specializing in asbestos testing. You can locate a qualified facility through local health departments or trusted online directories. Follow their specific submission instructions closely, which typically include filling out a form and paying a fee. Shipping is usually best via courier with tracking to ensure safe arrival. Remember, handling the sample yourself minimizes risk, but accurate testing requires professional analysis—think of it as entrusting delicate work to specialists.
Review Your Results and Plan Your Next Step
Once you receive the lab report, interpret whether asbestos was detected. Most labs will specify if the levels are below or above safety thresholds. If asbestos is present, avoid disturbing the flooring any further. Instead, consult professionals for abatement or removal. If the test comes back negative, you can proceed with renovations confidently, knowing you’ve minimized risk. This clarity transforms uncertainty into actionable knowledge, empowering you to move forward safely.Many homeowners believe that choosing the right hardwood flooring is solely about aesthetic appeal, but there’s more nuance beneath the surface. A frequent mistake is assuming that all hardwood species perform equally well in every environment; in reality, factors like humidity, foot traffic, and wood density significantly influence longevity. For instance, some species expand and contract more than others, leading to gaps or buckling over time, which highlights the importance of selecting the right type for your home’s climate. When it comes to installation, many think that a perfect floor is just about laying the planks as quickly as possible. However, attention to detail in subfloor preparation and precise leveling is crucial for a seamless finish, as poor leveling not only affects appearance but can cause tiles or planks to crack prematurely.
How can advanced leveling techniques prevent common problems in hardwood and tile installations?
Advanced leveling methods, such as self-leveling underlayment or careful substrate testing, help ensure flatness and stability, reducing the risk of cracks, squeaks, or uneven wear. According to industry expert Mike Holmes, investing in proper leveling can extend the lifespan of your flooring and save money long-term, illustrating that rushing the prep stage is a false economy. Additionally, many overlook the importance of transitional profiles between different flooring types, like hardwood and tile, which can create trip hazards or visual dissonance. Proper transition solutions not only enhance safety but also elevate the overall aesthetic for a cohesive look.
Another misconception is that the simplest installation methods are always the best. While nail-down or glue-down options may seem straightforward, they each have nuances—such as substrate compatibility and environmental considerations—that can impact the result. For example, improper adhesive selection may lead to bonded planks lifting or deteriorating over time, especially in areas prone to moisture. As noted in industry guides, understanding the detailed requirements of your chosen method is essential for durability.
Furthermore, many believe that maintenance is optional and neglect regular care routines. However, hardwood floors require specific cleaning practices to preserve their finish, such as avoiding excessive water or harsh cleaners that can damage the surface. Regular refinishing, when needed, can restore appearance and longevity, but neglecting this aspect accelerates aging and wear.
In summary, mastering the subtleties of flooring choices, installation, leveling, and maintenance transforms a good-looking floor into a long-lasting asset. For more insights into achieving flawless installation results and preventing common pitfalls, check out our guides on flooring installation mistakes to avoid and precise floor leveling techniques. Have you ever fallen into any of these traps? Let me know in the comments.Maintaining your hardwood and tile floors requires more than just periodic cleaning; it demands the right tools and a strategic approach for longevity. One of my go-to tools is an electric hand planer, specifically the DEWALT DW733, which I use to smooth out high spots on uneven subfloors before installation. This tool ensures a level foundation, preventing tiles or planks from cracking prematurely and reducing long-term maintenance costs. For leveling, I favor rapid-setting self-leveling compounds like Ardex K 19, because they allow me to achieve seamless surfaces in a fraction of the time, leaving me more room for finishing work. Regular monitoring of floor flatness with a long level or a laser level helps catch issues early, enabling proactive fixes that save me from expensive repairs later.
Lessons That Changed My Approach to Flooring Projects
One of the most unexpected insights I gained was realizing how crucial it is to prioritize subfloor preparation before installing new hardwood or tile. Early in my career, I underestimated the importance of a perfectly level surface, which led to cracks and squeaks down the line. The moment I started investing in proper leveling techniques, like using self-leveling compounds and accurate tools, my results improved dramatically.
Another lightbulb moment was understanding the risks of rushing the sealing and finishing stages. I once hurried through sealing my hardwood floors and ended up with uneven sheen and premature wear. Now, I take the time to follow recommended drying times and proper application methods, ensuring a durable and beautiful finish that lasts for years.
Discovering the power of quality tools that fit the task at hand transformed my workflow. For example, using a quality notched trowel and a rubber float for grout application makes a noticeable difference in appearance and longevity. Investing in these tools and learning their correct use paid off in smoother projects and happier clients.
Tools and Resources That Became My Go-To Arsenal
- Self-leveling compounds like Ardex K 19: They are game-changers for achieving a flawless surface, saving time and reducing errors that can cause long-term issues.
- Industry books like “The Ultimate Guide to Floor Leveling”: These resources expanded my understanding of complex issues and provided practical solutions I could apply immediately.
- Online tutorials and forums: Platforms like [Tile Trends Shop](https://tiletrendshop.com/) offer in-depth guides and community support, helping me troubleshoot unique challenges and refine my technique.
- Professional certification courses: They enhanced my confidence and knowledge, ensuring I’m always updated on best practices and safety standards.
Your Next Step Towards Flooring Excellence
Every project teaches us something new, and embracing continuous learning can elevate your craftsmanship to professional levels. Remember, the key isn’t just finishing a project but doing it with confidence, precision, and pride. Whether you’re tackling hardwood restoration or tile installation, applying these insider lessons will lead to better results and greater satisfaction. Don’t wait to implement small improvements that can make a big difference—your perfect floor is within reach!
What unexpected lesson have you learned from a flooring project? Share your story below and inspire others to grow!