
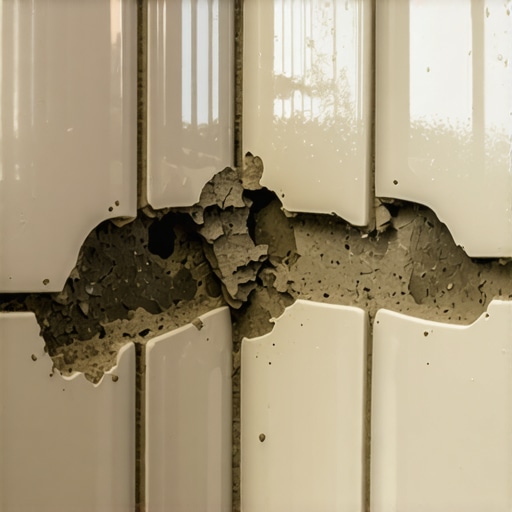
Ever stepped into your shower, only to notice flaking, crumbling grout unraveling in the corners? I remember my lightbulb moment vividly: it was a Saturday morning, and I was scraping away at stubborn grout that had turned to dust. That sinking feeling—that I had messed up something simple—hit hard. Turns out, grout deterioration is a common headache that many homeowners face, and trust me, you’re not alone.
Why Your Shower Corners Are Falling Apart and What It Means for You
When I first encountered crumbling grout, I thought it was just an aesthetic issue. Little did I realize, it could signal underlying problems with moisture, substrate stability, or improper installation. The good news: with a bit of knowledge and the right approach, you can fix this problem and prevent it from recurring. We’ll dig into the root causes and share insider tips — like avoiding typical mistakes early on I wish I had known— to help your shower stay fresh and durable.
Is Repairing Your Grout Worth the Effort or Just a Temporary Fix?
It’s natural to wonder if investing time and money into grout repairs is worthwhile. I initially thought a quick patch job would do, but I soon learned that neglecting underlying issues only led to more crumbling down the line. Making this mistake early on—like installing cheap grout materials—can cause more damage over time. According to industry experts, using high-quality grout and proper sealing techniques greatly extends the life of your shower surfaces. For more detailed strategies, check out this guide on tile design.
Now, let’s get to the practical steps that will empower you to tackle grout issues head-on, starting with understanding how and why they happen in the first place. Are you tired of fighting that endless cycle of repairs? Well, I’ve been there, and I’m here to show you the best route forward.
Prepare the Area Precisely
Start by removing the loose grout with a grout removal tool, like a manual grout saw or oscillating multi-tool fitted with a grout removal blade. Be careful not to damage adjacent tiles. I once used a utility knife, and it barely scratched the surface — a quick tip I learned the hard way.
Clean and Dry Thoroughly
Vacuum or brush out all remaining debris, then wipe down the area with a damp cloth to remove dust and small particles. Follow up with a fan or dehumidifier to ensure the surface is completely dry. I made the mistake of skipping drying, which caused applied grout to cure unevenly and crumble faster.
Apply Primer for Better Adhesion
Use a penetrating primer suited for grout repair, like a tile bonding primer. Apply it with a brush or spray, and let it dry for at least 15 minutes. This step is crucial—without it, new grout can peel off prematurely. I once ignored this and faced a patch of peeling grout within weeks.
Mix High-Quality Grout Correctly
Use a premium, mold-resistant grout, following the manufacturer’s instructions precisely. Mix in small batches to prevent it from setting before application. Think of it like cooking; you need the right balance to ensure consistency and durability. I experimented with cheap grout once, and it turned to dust within months.
Apply Grout with a Trowel or Grout Float
Spread the grout evenly into the joints at a 45-degree angle, pressing firmly to fill all gaps. Remove excess grout from the tile surface with the edge of the float, then clean the tile with a damp sponge before the grout hardens. During my first attempt, I used too much grout and had unsightly gaps that needed redoing.
Seal the Grout for Longevity
Once the grout has cured for at least 72 hours, apply a penetrating grout sealer with a foam brush or spray bottle. Ensure it permeates deeply to prevent water ingress. I learned this step the hard way — neglecting sealing led to moisture seepage and crumbling over time.
Maintain Proper Ventilation and Moisture Control
Keep the bathroom well-ventilated—use exhaust fans or open windows—to reduce moisture levels. Regularly inspect grout lines for early signs of damage. I installed a humidity monitor and caught issues before cracks formed, saving me costly repairs later.
Tip: Tackle Common Challenges Early
If you notice persistent mold or efflorescence, address it immediately by cleaning with a solution of bleach and water. For stubborn issues, consult a professional or revisit the sealing process. Recognizing these early signs prevents extensive damage and unnecessary rework.
By following these concrete steps, you’ll improve the durability of your grout and enhance your shower’s longevity. Remember, patience and precision are key — rushing often leads to the same crumbling problems you’re trying to fix. Keep at it, and soon you’ll enjoy a durable and pristine shower space that stays fresh for years.
Many homeowners believe that flooring installation is straightforward—pick your tiles or wood, lay them down, and you’re done. However, this oversimplification leads to overlooked nuances that can drastically affect the longevity and appearance of your floors. As an expert with years of hands-on experience, I’ve seen how common misconceptions can cause costly mistakes, especially for those attempting DIY projects.
Why Most People Overlook Subfloor Conditions
Contrary to popular belief, the condition of your subfloor plays a crucial role in flooring success. Many assume a clean, flat surface suffices, but subtle issues like slight unevenness or residual moisture often go unnoticed, leading to cracks or buckling down the line. Proper inspection and preparation are vital; a comprehensive approach is detailed in this guide on floor leveling. Skipping this step is a common trap that results in uneven floors and premature wear.
Dispelling the Myth of Easy Floor Leveling
Another misconception is that floor leveling is quick and simple. Many assume applying leveling compounds in a thin layer guarantees a perfect surface. In reality, achieving flawless flatness requires specific techniques—like properly mixing the compound to avoid bubbles (see detailed mixing tips)—and understanding the substrate’s porosity and humidity levels. Advanced mistakes, such as over-using self-leveling compounds, can lead to cracking, which is why mastering floor leveling techniques is essential for a lasting finish.
How Misjudging Material Compatibility Causes Problems
Many underestimate the importance of selecting compatible materials—like adhesives, primers, and sealants—that match your flooring type. For instance, using the wrong thinset or failing to prepare the substrate with a suitable primer can cause tiles to loosen or grout to crack. This subtle misstep, often overlooked by DIYers, is extensively discussed in these expert installation tips. Remember, a mismatch in materials is a silent thief that shortens your floor’s lifespan.
What Advanced Installers Keep an Eye On
Experienced professionals recognize that external factors like ambient temperature, humidity, and subfloor movement are critical. They employ sensitive tools—laser levels, moisture meters, and pressure gauges—to monitor conditions throughout installation. Neglecting these can lead to warped planks, cracked tiles, or uneven grout lines. Awareness of these nuanced factors distinguishes a professional from an amateur. For a comprehensive understanding, explore precise floor leveling techniques and refine your skills.
Remember, flooring isn’t just about aesthetics—it’s about creating a durable foundation. By debunking these myths and understanding subtle pitfalls, you set yourself up for success. Have you ever fallen into this trap? Let me know in the comments, and I can help guide you toward smarter, longer-lasting installation practices.
Keeping Your Floors in Prime Condition
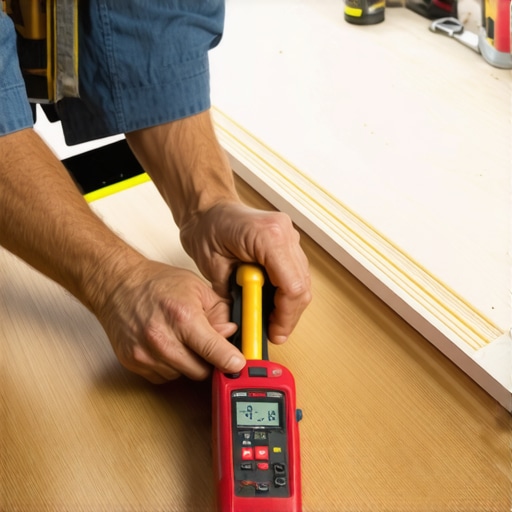
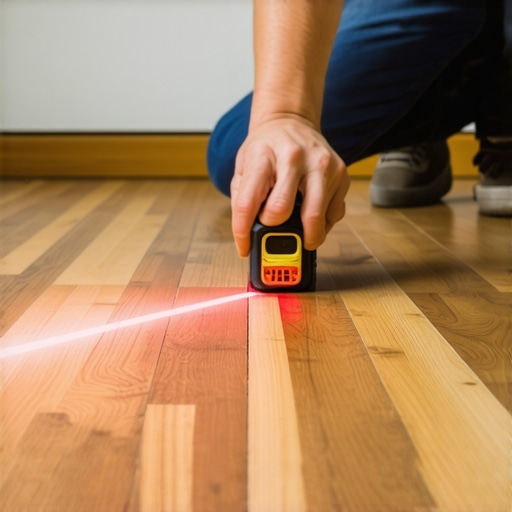
Investing in the right tools not only simplifies your flooring projects but also ensures long-term durability. For example, I personally swear by a high-quality laser level like the Dewalt DW089K. Its precision and easy-to-read laser line help me achieve impeccable flatness, which is crucial when installing tiles or hardwood floors. A reliable moisture meter—such as the Protimeter Aquant—allows me to verify subfloor dryness before laying any material, preventing future warping or mold issues. These tools, used correctly, become invaluable in maintaining the integrity of your flooring over time.
Tools I Recommend for Flooring Maintenance
For maintaining hardwood floors, I recommend a microfiber mop coupled with a pH-neutral cleaner. This combo effectively removes dust and grime without damaging the finish. Also, a soft-bristled vacuum cleaner helps lift debris from grout lines and between tiles, reducing wear. To keep things shiny, I use a polish specifically formulated for hardwood, like Bona Hardwood Floor Polish, which renovates the surface without building up residue. Regular use of these tools and products extends the lifespan of your floors and preserves their aesthetic appeal.
Embracing Advanced Maintenance Techniques
In the future, I see smart sensors integrated into flooring systems, providing real-time moisture and wear data. This tech will enable homeowners to act proactively—addressing issues before they develop into costly repairs. Meanwhile, adopting a routine of frequent inspections combined with these tools ensures your floors remain in top shape. For example, periodically examining grout lines for cracks and resealing them with proper sealers can prevent water infiltration and deterioration. Remember, consistent maintenance using the right equipment is key—like the suggested strategic upgrades— to keep your flooring investments safe and beautiful for years to come.
How do I maintain hardwood floors over time?
Establish a regular cleaning schedule with gentle tools and suitable products, inspect for signs of damage, and reseal or refinish as needed. Implementing these practices ensures your floors retain their beauty and resilience, minimizing unexpected repairs. Take the initiative today by trying out a microfiber mop routine combined with a hardwood-specific polish; it’s a simple step that offers significant long-term benefits.
Lessons That Changed My Approach to Flooring and Tile Care
- Patience and Precision Trump Speed: I once rushed through a grout sealing project, only to see it peel in a few months. The lightbulb moment? Taking time to let each step cure properly ensures durability and saves time in the long run.
- High-Quality Materials Are Your Best Investment: Using cheap grout or adhesives might save money upfront but cost me more later. Now, I prioritize trusted brands and genuine products, which consistently deliver lasting results.
- Understanding the Subfloor Is Half the Battle: I used to neglect detailed subfloor inspections. Once I learned to identify subtle issues like moisture or unevenness, my installations became smoother, and repairs less frequent.
- Early Signs Are The Key to Prevention: Spotting minor mold or cracking early can prevent major damage. Regular inspections and prompt action have become part of my routine, extending the life of floors and grout.
- Mastering Proper Technique Is Essential: Whether mixing grout correctly or applying leveling compounds with the right tools, technique matters. Watching expert tutorials and practicing have elevated my craftsmanship exponentially.
Tools and Resources That Elevate My Flooring Projects
- Elegant Tile Design Guide: This resource transformed my understanding of tile aesthetic pairing and inspired creative, durable choices.
- Floor Leveling Precision Techniques: Investing in the right tools and knowledge here has made my installations look flawless, saving time and money.
- Avoid Common Flooring Mistakes: A no-fail guide that helps me identify pitfalls before they become costly issues.
- Hardwood Maintenance Tips: Regular care and professional insights keep my floors looking brand new year after year.
Your Next Step Starts Today
Embracing these lessons and tools can elevate your flooring and tile projects from temporary fixes to lifelong investments. Remember, the key is consistency and a willingness to learn from every experience. Whether you’re repairing grout or installing a new hardwood floor, the right knowledge and attitude make all the difference. Take action now—your beautiful, durable space is within reach.
What part of your flooring or tile installation are you most eager to improve? Share your challenges below, and I’ll help you craft the perfect solution.