

One afternoon, I stood in my living room staring at a patch of newly refinished hardwood that stuck out like a sore thumb. The color was just off, and no matter how many times I tried to match the stain, it never looked quite right. That moment was a real lightbulb for me—understanding how to properly match stain for a hardwood floor repair isn’t just about picking the right color; it’s about knowing the nuances to get a seamless blend.
Why Color Matching Stains Can Make or Break Your Floor Repair
Matching stain shades perfectly can feel like trying to hit a moving target. The problem? No two boards age or absorb stain exactly the same way, which can turn a promising repair into a glaring patchwork. When I first started, I underestimated how much the wood’s age, previous finishes, and even lighting could affect color outcomes. That mistake made me realize that success hinges on understanding the nuances of staining techniques and the type of stain you choose.
Is It Really Worth All the Fuss Over Slight Variations?
Absolutely. A mismatched stain can ruin the entire look of your flooring project, turning a minor repair into a costly redo. Plus, poor color matching can devalue your home’s aesthetic—something I learned the hard way early on. Remember, even professionals often spend hours blending stains to achieve that perfect match, and it’s more of an art than just a science.
If you’re eager to learn how to confidently match stains and blend repairs seamlessly, you’re in the right place. I’ll walk you through the key steps, from understanding the wood’s original finish to selecting the right stain and applying it with precision.
What’s Next? Transform Your Floor Repair with Confidence
In the sections to come, I’ll share my personal tips and proven strategies to help you avoid common mistakes—like choosing the wrong stain base or misjudging the color depth. Plus, I’ll explain how to test stains on scrap pieces before committing to your main project. Making the right choices now will save you time, money, and countless headaches down the line. Ready to turn that patchy mess into a flawless part of your home? Let’s dive into the details and master this essential skill together.
And hey, if you’ve ever faced the frustration of mismatched stains, let me know in the comments—I’ve been there too!
Prepare Your Workspace and Gather Essential Supplies
Start by clearing the area around the repair site and setting up good lighting. Collect your stain samples, gloves, a clean cloth, a putty knife, and fine-grit sandpaper. Having all tools ready prevents unnecessary delays and mistakes.
Identify the Original Finish and Wood Type
Examine the existing floor to determine its finish—oil-based, water-based, or polyurethane—and note the wood species. This step is crucial because different woods absorb stain differently, influencing the final color. When I did my first repair, I realized that matching oak completed my project seamlessly, but pine required a different approach. See how tile and hardwood combinations can blend better with proper matching.
Test Stains on Scrap Pieces
Match the Color Base
Pour small amounts of different stain shades onto scrap wood similar to your flooring. Use a brush or cloth to apply each stain, then let them dry. Comparing these test patches to your existing floor allows you to choose the closest match. Remember, wet stain looks darker; drying will bring out the true tone. I once tried five different stains before settling on the perfect match for my maple floor.
Layer and Adjust
If the stain is too light, apply additional coats once the first dries. Too dark? Use a wood conditioner or dilute the stain with a bit of thinner. Practice layering on scrap until you achieve the right hue—think of it like building a watercolor painting gradually for a better blend.
Apply the Stain Precisely
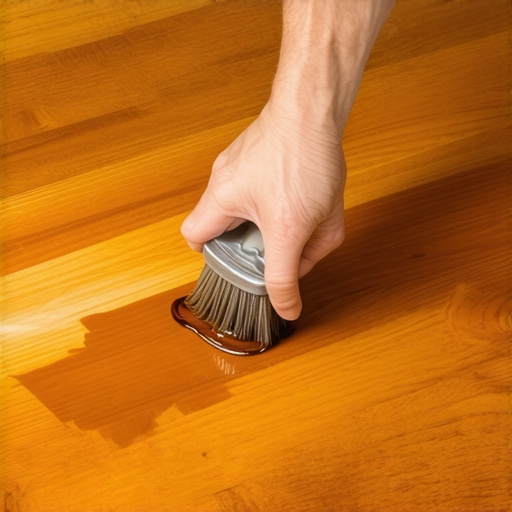
Using a fine brush or foam applicator, carefully stain only the repaired area, feathering the edges to blend with the surrounding floor. Work in small sections to prevent overlapping streaks. I found that working from the center outward minimizes visible lines. Always wipe off excess stain with a clean cloth to prevent unevenness.
Blend the Repair into the Existing Floor
Once the stain is dry, lightly sand the edges of the repaired patch with fine-grit paper. This step smooths out any ridges and helps the color transition seamlessly. Follow up with a soft cloth to remove dust before applying a finish. For tricky corners or tight spots, a small artist’s brush can be your best friend.
Seal and Protect Your Work
Apply a clear topcoat—urethane or lacquer—that matches the original finish. This final layer seals the stain, enhances durability, and further blends the repair. Remember, avoid rushing this process; curing times are critical for a flawless outcome. I always recommend consulting this guide for detailed finishing tips.
By following these steps, you’ll develop confidence in matching stains and making repairs that are virtually invisible. Practice on scrap pieces first to understand how different stains behave and always test before working on the actual floor. Precision, patience, and preparation are your best tools for a professional finish.
< >Many DIY enthusiasts and even professionals often fall prey to misconceptions about floor leveling, installation, and finishing that can lead to costly mistakes. One prevalent myth is that a perfectly flat subfloor isn’t crucial—contrary to belief, overlooking the importance of proper subfloor preparation can cause long-term issues like squeaking, cracking, or uneven tiles, as emphasized in expert guides like [floor leveling challenges](https://tiletrendshop.com/floor-leveling-challenges-common-mistakes-and-how-to-avoid-them).
Keeping Your Floors in Top Shape: Practical Tools and Tips
Achieving a flawless floor installation isn’t a one-and-done task; it demands ongoing maintenance and the right tools to ensure longevity. In my experience, investing in high-quality equipment has made all the difference in preserving the beauty and integrity of hardwood, tile, and other flooring types. Let’s explore the specific tools I rely on daily to keep my floors looking pristine and functional.
Precision Moisture Meters for Consistent Results
One tool I can’t live without is my moisture meter, especially when working with wood or installing tiles on subfloors. A reliable moisture meter allows me to quickly assess the moisture content of subflooring and materials, preventing issues like warping or bond failure. I personally recommend the Protimeter Surveymaster for its accuracy and ease of use, which has helped me diagnose problems early and avoid costly repairs down the line. Proper moisture levels are critical, as emphasized in this comprehensive guide.
Vibration-Free Sanders for Seamless Refinishing
When it’s time to refinish hardwood floors, I opt for a vibration-reducing sander, such as the Festool RTS 400 REQ. This tool minimizes vibration and dust, giving me better control and a smoother finish. Using a quality sander not only saves time but also reduces the risk of uneven surfaces—crucial when blending repaired patches or replacing damaged sections. Remember, well-maintained sanding equipment leads to more professional results and extends the lifespan of your tools.
Smart Laser Levels for Leveling Perfection
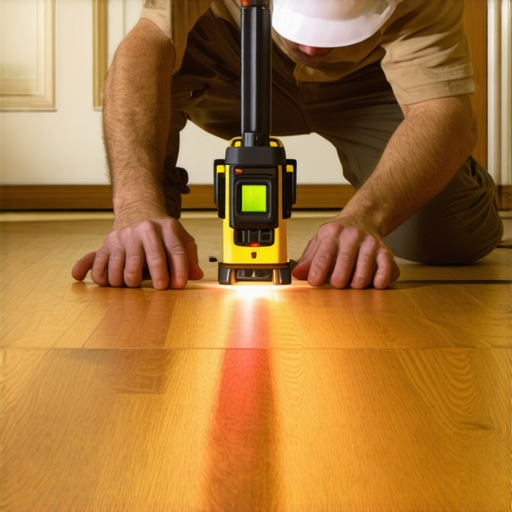
Achieving a perfectly level floor is the foundation of any successful installation. I use a laser level like the BOSCH GCL 2-160 to ensure my subfloor and finish layers are impeccably flat. Laser levels produce a consistent line across the room, making it much easier to spot high or low spots and correct them early in the process. For long-term floors, this precision reduces creaks and cracks, preserving your investment over time. For expert-level tips, check out this guide.
Effective Maintenance Practices to Extend Floor Life
Beyond tools, routine maintenance plays a crucial role in preserving your floors. Regular sweeping or vacuuming removes debris that can scratch surfaces, while using appropriate cleaning products prevents damage to finishes. Applying protective pads under furniture and controlling humidity levels—especially in hardwoods—can prevent buckling and warping. I also recommend periodic inspections to catch minor issues before they escalate.
Future Trends in Floor Care and Installation
Advancements like IoT-connected sensors for real-time humidity and moisture monitoring are on the horizon, promising even better control during installation and long-term care. These innovations will likely make maintenance more intuitive, saving homeowners and contractors alike time and money. Staying informed on emerging tools will give you a significant edge and ensure your floors remain stunning for decades.
How do I maintain my floors over time?
Routine cleaning combined with periodic professional checkups and the use of precise leveling tools can dramatically extend the life of your floors. Adopting a proactive approach—like addressing minor scratches with touch-up kits or reapplying sealers—can keep your investment looking fresh. Remember, consistent maintenance is key to avoiding costly repairs and beautiful floors.
Ready to elevate your flooring projects? I encourage you to try incorporating a laser level into your next installation for unmatched accuracy. It might just be the game-changer you need to achieve professional results that stand the test of time!
< >
>
By consistently applying these maintenance strategies and utilizing specialized tools, you’ll ensure your floors not only look great but also last for years to come. For more insights and expert tips, don’t hesitate to reach out through our contact page.
Reflecting on my journey with flooring projects, one lesson consistently stands out: precision and patience turn a good repair into a flawless finish. Watching a patch blend seamlessly into the surrounding hardwood isn’t just about matching color—it’s about understanding the subtle nuances that make the difference. The most rewarding moments come from knowing I’ve avoided common pitfalls by investing time in proper preparation and testing.
The Hidden Truths That Changed My Approach to Floor Fixes
- Every wood piece is unique: Even in the same species, aging and previous finishes alter absorption. Recognizing this has helped me select stains more effectively, ensuring a harmonious look.
- Testing pays off: Spending extra minutes on scrap samples saves hours and money later. It’s a small step that significantly boosts confidence and results.
- Smart tools reduce stress: Quality moisture meters and laser levels have revolutionized how I assess floors and subfloors, preventing issues before they start.
- Patience is key: Rushing finishes or applying extra coats without drying can lead to mismatched shades. Waiting and layering carefully yield superior blends.
Tools and Resources That Elevate My Craft
- Protimeter Surveymaster: Its accuracy in detecting moisture levels keeps my projects dry and stable, aligning with expert installation guidelines.
- Festool RTS 400 REQ: Its vibration reduction offers smooth refinishing, minimizing unevenness—critical for blending repairs seamlessly.
- BOSCH GCL 2-160: This laser level’s precision helps me maintain flatness, preventing future cracks or squeaks.
- Educational Reads: Books like “Choosing the Right Hardwood Floors” have deepened my understanding of materials and techniques, guiding better decisions.
Embrace Your Flooring Journey with Confidence
Take the lessons from my experiences: meticulous prep, testing, investing in quality tools, and patience can transform your flooring projects. Remember, the key is continuous learning and adapting—each floor you work on is an opportunity to refine your skill and create stunning, durable results. Don’t wait for perfection to start; every successful repair adds to your confidence and mastery.
What’s the biggest challenge you’ve faced in matching stains or installing new floors? Share your stories below—let’s learn from each other’s experiences!