I remember the first time I noticed a strange, popping sound coming from my floor on a cold morning. It was almost like the floor was protesting, and I couldn’t help but feel a twinge of frustration. After investing in a radiant heat system to keep my home warm and cozy, I never expected it to turn into a source of noisy chaos. That lightbulb moment made me realize there’s more to radiant heating than just flipping a switch.
Dealing with Floor Pops: The Hidden Challenge of Radiant Heat
Many homeowners like you and me install radiant heat systems to enjoy warm floors during chilly days. But sometimes, instead of comfort, you get the unsettling sound of your floors popping or cracking. It’s more than just an annoyance; it can indicate underlying issues that might compromise your flooring’s integrity.
What we will uncover today is why these floor pops happen in the presence of radiant heat and how you can effectively address this problem. Armed with personal experience and insights from industry experts, I’ll guide you through the causes, prevention, and solutions to keep your floors smooth, silent, and long-lasting.
Ever Wondered If Radiant Heat Is Worth the Hassle?
In my early days, I made the mistake of thinking all floor popping was due to improper installation. Turns out, I overlooked the importance of proper subfloor preparation and correct expansion gaps. According to flooring professionals, neglecting these details can lead to costly repairs and ongoing noise issues. This realization drove me to learn more about flooring installation fundamentals, such as those discussed on [this comprehensive guide](https://tiletrendshop.com/the-ultimate-guide-to-floor-leveling-for-a-perfect-finish), which emphasizes the critical role of proper leveling and expansion considerations.
So, have you faced similar problems with your radiant heating system? Or are you just starting to plan your installation and want to avoid these pitfalls? Either way, understanding the root causes now can save you time, money, and frustration later.
In the upcoming sections, I’ll share practical tips and step-by-step strategies to prevent your radiant heat system from making your floors pop. Whether you’re tackling hardwood, tile, or laminate, there’s a solution waiting for you. Let’s get started on creating a warm, quiet, and beautifully installed floor that truly complements your home’s comfort.
Ensure Proper Subfloor Preparation
Before installing or fixing your flooring, verify the subfloor’s stability and levelness. I once faced uneven subflooring while remodeling my living room. Using a long straightedge and a spirit level, I identified low spots and high ridges. To correct this, I applied a high-quality self-leveling compound, carefully pouring it into low areas and spreading it evenly with a notched trowel. This process created a flat surface, crucial for preventing future popping issues. For detailed techniques, consult floor leveling methods that ensure your subfloor is ready for flooring installation.
Control Temperature and Humidity Fluctuations
Maintaining consistent environmental conditions is vital. During winter, I noticed my hardwood floors started cracking because indoor humidity dropped below recommended levels. I invested in a humidifier and used a hygrometer to monitor moisture levels, keeping them within 35-55%. This stabilization minimized wood expansion and contraction, reducing popping sounds. Learn more about environmental control at humidity management tips.
Allow for Proper Expansion Gaps During Installation
In my first attempt at flooring, I overlooked expansion gaps—the space left around the perimeter of the room. When I installed the hardwood without these gaps, temperature shifts caused the planks to push against each other, resulting in creaks and pops. I learned that leaving a gap of about 1/4 inch is standard practice, as it accommodates natural expansion. Using spacers during installation ensures consistent gaps. For expert insights into this process, review installation fundamentals.
Apply Proper Adhesives and Fastening Methods
Loose planks can cause popping sounds, especially with heavy radiant heat. I secured my hardwood with proper adhesives and nails designed for heat-prone environments. Choosing the right adhesive is critical; I opted for a flexible, temperature-resistant glue recommended by professionals. This secured the flooring, minimized movement, and maintained its integrity over time. For guidance on best practices, see professional installation steps.
Implement Controlled Heating Settings
Sudden temperature changes can cause rapid expansion and contraction, leading to pops. I adjusted my radiant heat thermostat gradually over several days, starting at a low setting and slowly increasing to my desired temperature. This gentle approach allowed the wood and other flooring materials to adapt without stress. Always follow manufacturer recommendations, and consider consulting expert tips on heating control.
Regular Maintenance and Inspection
Lastly, periodic checks help catch early signs of movement or damage. I periodically inspect for loose planks or new creaks, addressing small issues before they escalate. Keeping the floor clean and avoiding excess moisture also preserves stability. For comprehensive maintenance strategies, visit hardwood care secrets.
Many homeowners believe that following basic instructions guarantees a flawless floor, but in reality, there are nuanced pitfalls that even seasoned DIYers often overlook. A common misconception is that leveling compounds and self-leveling underlayments are foolproof solutions. However, studies suggest that improper application—like pouring during cold weather or in high humidity—can cause cracks and uneven surfaces, undermining the entire project. According to experts, such as those featured on comprehensive leveling guides, meticulous surface prep and environmental considerations are critical for success. \n\nAnother widespread mistake involves ignoring subtle subfloor imperfections. The “oops” here is assuming minor deviations don’t matter, but even slight undulations can lead to squeaks, cracks, and premature wear. Properly assessing and repairing subfloor irregularities—using techniques outlined in floor repair strategies—can enhance the longevity of your flooring. \n\nFor hardwood flooring, many believe that acclimation isn’t essential if the wood feels dry. This is false; wood adapts to ambient moisture levels, and failure to allow acclimation can result in cupping or gaps later. Advanced installers often perform moisture testing, referencing professional standards in moisture management. \n\nWhen installing tile, newcomers might rely solely on thinset coverage, assuming thicker layers improve adhesion. Yet, excessive thinset can cause unevenness and trap air, leading to loose tiles. Smart application, following manufacturer instructions and expert advice from installation fundamentals, ensures a durable, level surface. \n\nOne crucial nuance is the importance of expansion gaps, often dismissed as optional. Overlooking these gaps, especially during hardwood installations, can lead to buckling and cracking as materials expand with temperature fluctuations. Professionals emphasize the necessity of this detail, which is discussed extensively in installation pitfalls to avoid. \n\nDo you see yourself in these common traps? Recognizing and addressing these nuances can prevent costly repairs down the line. For more expert insights and detailed techniques, check out pro tips for perfect installations. Remember, a successful flooring project involves more than just laying material—it requires precision, patience, and understanding of these subtle details. If you’re eager to improve your skills or diagnose issues, don’t hesitate to reach out. Have you ever fallen into this trap? Let me know in the comments.
Keeping It Working: Essential Tools and Maintenance Strategies
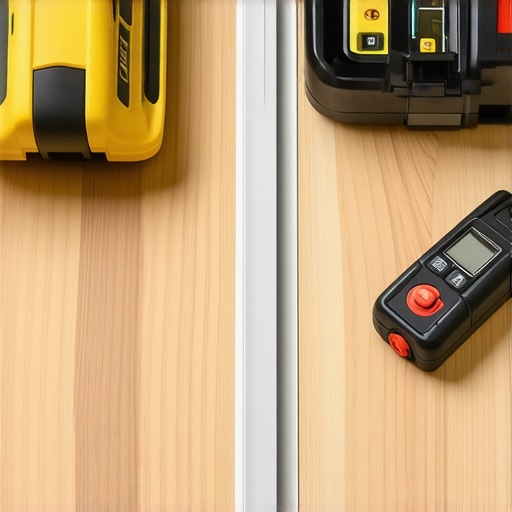
Maintaining your flooring over time requires the right equipment and a proactive approach. Personally, I rely on a few specialized tools that have proven invaluable in ensuring my hardwood and tile floors remain pristine and durable. One such tool is a high-quality moisture meter, which I use regularly to monitor humidity levels, especially in environments prone to fluctuations. This practice prevents wood from expanding or contracting excessively, thereby reducing the risk of gaps or buckling. For more on controlling environmental factors, see humidity management tips.
Another critical tool is a laser level, which I use to check for uneven surfaces after installation or during periodic inspections. Laser levels provide precise, easy-to-read measurements that help detect subtle deviations before they become problematic. Using a laser level is especially important when dealing with complex tile patterns or transitioning between different flooring types, like hardwood and tile. To learn more about achieving a seamless finish, visit floor leveling fundamentals.
Investing in good-quality cleaning equipment is also vital. I prefer microfiber mops paired with pH-neutral cleaning solutions, which effectively remove dirt without damaging the finish. Routine cleaning extends the life of your floor and maintains its aesthetic appeal. Additionally, I recommend periodic deep cleaning and inspections, focusing on areas near entrances and high-traffic zones, to catch early signs of wear or damage. For specialized hardwood care techniques, see hardwood flooring maintenance.
How Do I Maintain My Floors Over Time? A Personalized Approach
Routine upkeep isn’t just about cleaning. It involves preventive measures like using felt pads under furniture, avoiding excessive humidity, and addressing minor issues promptly. For example, addressing small gaps or squeaks early prevents costly repairs later. Additionally, scheduling professional inspections every few years can identify underlying problems such as subfloor movement or moisture infiltration. As trends evolve, new tools like smart sensors that monitor environmental conditions are becoming more accessible, promising even more proactive maintenance. In the future, integrating such technology could revolutionize how we care for our floors, shifting from reactive repairs to predictive upkeep.
If you’re ready to elevate your maintenance game, I suggest trying a moisture meter and laser level for your next inspection—these tools have genuinely transformed my approach. Remember, consistent, informed care is key to long-term flooring success. For more tips on perfecting your installation, check out professional installation steps.