
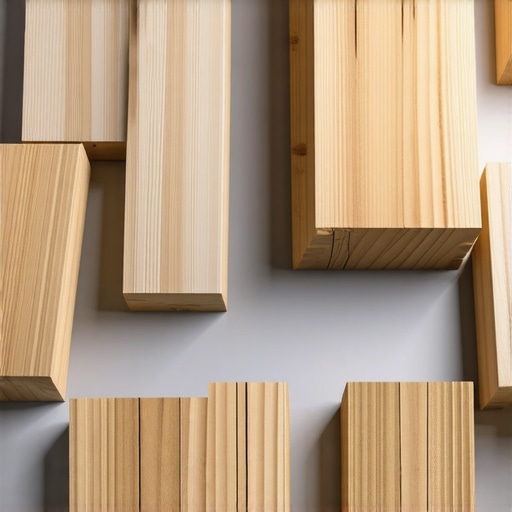
I remember the moment clearly: I was about to install new hardwood flooring in my basement when I noticed a little warp, slight cupping, and a faint smell of moisture. It was a lightbulb moment—my basement’s humidity was more than just an occasional annoyance; it was a constant, sneaky adversary. My initial foolishness was choosing the same wood species I’d used upstairs, expecting it to behave flawlessly below grade. Spoiler alert: it didn’t.
Why Humidity Turns Flooring Dreams into Nightmares
In humid basements, the wrong choice of wood can lead to warping, gaps, and even mold growth. This isn’t just about aesthetic mishaps; it’s a serious concern for longevity and your investment. Over time, I learned the hard way that not all woods are created equal when moisture levels are high. The good news? With the right species and proper care, you can enjoy beautiful floors that withstand humidity’s relentless push and pull.
Concerned About Making a Mistake?
I admit, early on I made a classic mistake—underestimating the importance of choosing the right wood species for humid environments. That mistake almost cost me thousands in repairs and frustration. For example, I once installed a popular hardwood and watched it cup and buckle within months. Since then, I’ve become meticulous about selecting woods known for their stability in moist conditions. If you’re curious, I’ll share how to avoid this trap and pick the perfect species for your basement.
According to industry expert advice, some woods like teak and hickory naturally handle moisture better than traditional oak or maple (source: Hardwood Floor Care Secrets). Understanding the characteristics of various woods can save you heartache and money long term. So, if you’ve faced similar dilemmas, keep reading. We’ll walk through my personal tips, tricks, and the science behind choosing woods that stand up to your basement’s humidity challenge.
Let’s dive into how you can confidently select the best species that won’t succumb to moisture’s silent assault, ensuring your basement floors stay beautiful and durable for years to come.
Prep the Subfloor for Success
Begin by removing existing flooring and thoroughly inspecting the subfloor. Look for moisture damage, cracks, or uneven areas. Use a moisture meter to ensure the subfloor moisture level is compatible with hardwood installation; ideally, it should be below 12%. If you find high moisture, address it with appropriate drying or sealing techniques.
Level and Stabilize the Surface
Uneven floors cause gaps and buckling later on. Use a self-leveling compound to fill low spots. For high spots, sand down carefully until the surface is flat within 3/16 inch over 10 feet. This step is like smoothing a rough road before laying new asphalt—precision here prevents future issues. I once applied a leveling compound and waited 24 hours before sanding; the result was a perfectly flat surface that made the installation much smoother.
Tip:
If your subfloor has large voids or sagging, reinforce with additional plywood layers and anchor securely. Proper underlayment ensures stability, reduces noise, and helps manage moisture.
Choose the Right Hardwood Species
Select woods known for stability in humid environments, such as teak or hickory. Avoid moisture-sensitive species like oak or maple unless sealed properly. Visit this guide to compare options. I recommend buying from reputable suppliers, ensuring you get air-dried, well-stored material that resists warping.
Install an Effective Vapor Barrier
Place a high-quality vapor barrier over the subfloor. It acts like a raincoat, blocking moisture from seeping into your hardwood. Use a polyethylene sheet 6 mil or thicker, overlapping seams by 6 inches, taped securely. During my last project, this barrier prevented a moisture issue that could have compromised the entire floor after just six months.
Acclimate the Wood Properly
Store your hardwood planks in the installation room for at least 72 hours. Keep the environment between 65-75°F and relative humidity around 40-60%. This step is critical; it allows the wood to adjust to the room’s conditions, reducing the risk of cupping or gapping. I found that neglecting this step led to significant expansion and contraction post-installation.
Lay the Flooring Correctly
Start along the longest wall, leaving a 3/4-inch expansion gap around the perimeter. Use spacers to maintain consistent gaps. When placing planks, stagger the seams by at least 6 inches for strength and visual appeal. Employ the click-lock method or glue as per manufacturer instructions. For large rooms or uneven subfloors, consider using a floating floor system with a tongue-and-groove design for flexibility.
Pro Tip:
Use a tapping block and pull bar to fit planks tightly without damaging edges. Precise fitting prevents noise and movement later on. During my installation, I used a rubber mallet to gently tap planks into place, which helped keep everything snug and aligned.
Final Touches and Finishing
After laying all planks, remove spacers and install baseboards or quarter-round moldings to cover the expansion gaps. Avoid sealing or finishing the hardwood immediately; instead, let it acclimate for 48 hours. When ready, apply a durable finish suited for humid areas; oil-based finishes or polyurethane work well. I once applied a sealant too early, which trapped moisture and caused warping—waiting ensured a long-lasting, stable floor.
Following these concrete steps transforms a potentially problematic project into a lasting success. Precise preparation, material choice, and installation techniques are your best defense against humidity-induced damage, ensuring your hardwood floors keep their beauty over decades.
Many homeowners and even some contractors fall prey to oversimplified beliefs when it comes to flooring installation, often leading to costly mistakes. One widespread misconception is that a perfectly flat subfloor guarantees a flawless finish. In reality, even the most leveled surface can harbor subtle imperfections—tiny dips or high spots—that become glaring issues once tiles or hardwood are laid. Advanced methods such as laser scanning and detailed moisture mapping reveal these nuances, emphasizing that surface flatness alone isn’t enough. For example, a study published in the Journal of Materials in Civil Engineering highlights how micro-level unevenness can cause tile lippage and grout cracking over time—not just visible flaws but structural stressors invisible to the naked eye.
Gear Up for Maintenance Success
Maintaining hardwood floors isn’t just about routine cleaning; it involves using the right tools to preserve their beauty and durability over time. Personally, I swear by a combination of specialized equipment and proven methods that ensure longevity. One essential piece of equipment I rely on is a high-grade microfiber mop paired with a vacuum designed for hardwood surfaces. The microfiber mop effortlessly traps dust and debris without scratching, while a soft-bristled vacuum handles the grit accumulated in textured or intricate flooring patterns. 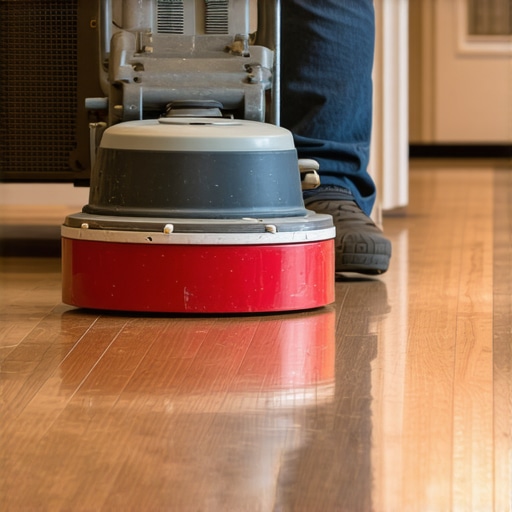
Invest in a Quality Floor Sander and Buffer
If your hardwood has seen better days or you want to refresh its look, renting a professional-grade sander can make all the difference. I recommend a drum sander designed for even, controlled sanding, paired with a dual-action buffer for smoothing out scratches and applying finishes. These tools, when used correctly, extend the life of your floors and make DIY refinishings achievable. Remember, proper technical knowledge is key—consult expert guides like this comprehensive resource for detailed instructions before proceeding.
Keep Long-Term Results in Sight
Beyond regular cleaning and periodic refinishing, adopting a strategic approach helps maintain floors’ appeal. Implementing a high-quality, moisture-resistant sealant, such as those discussed here, shields against spills and humidity fluctuations. Additionally, scheduling professional inspections to spot early signs of wear or moisture intrusion can save you from extensive repairs later. I’ve found that documenting the floor’s condition with high-resolution photos allows me to monitor small changes over months and plan timely interventions.
Material Compatibility Matters
Using compatible cleaning products and sealants is crucial. I avoid generic household cleaners that can strip finishes; instead, I opt for specially formulated wood floor cleaners recommended by industry experts. These not only preserve the finish but also minimize build-up, which can lead to uneven wear. For example, I recently switched to an eco-friendly cleaner that maintains the natural luster of my hardwood, demonstrating the importance of thoughtful product choices. To check if your cleaning regimen is optimal, try the ‘foam test’—if foam lingers, it’s a sign you might need a gentler solution.
Scaling Your Maintenance Approach
If your property expands or your flooring needs more extensive upkeep, consider tools like a portable, adjustable floor buffer with variable speed settings. These give you control over the polishing process, ensuring you can adapt for different areas and finishes. As I plan for future upgrades, I envision integrating smart, sensor-equipped moisture monitors that alert me to humidity spikes before they damage the wood—technology that’s trending upward for proactive maintenance.
How do I maintain hardwood floors over time?
The key lies in combining the right equipment with consistent, knowledgeable practices. I push myself to stay updated with the latest industry innovations, such as advanced sealants and moisture detection tools, drawn from sources like this article. Taking the initiative to try new maintenance techniques—like applying a yearly protective coat or using an air purifier in humid months—can drastically minimize wear. For those eager to jump into refinement, I recommend trying out a professional-grade buffer to restore gloss and even out surface wear. This investment in equipment and knowledge ultimately ensures your hardwood floors remain stunning for decades.
What I Wish I’d Known Before Starting
- Never underestimate the impact of moisture fluctuations on hardwood longevity—my early mistake was ignoring humidity data, which led to costly buckling and warping. Learning to monitor and control moisture levels with a hygrometer saved my floors and frustration.
- Choosing the right wood species is crucial—my go-to tip is to prioritize stable woods like teak or hickory over traditional oak or maple, especially in humid environments. This insight is one I wish I had embraced from the beginning to prevent future stress.
- Proper acclimation isn’t just a step—it’s a game-changer. Ensuring your planks are stored in the room’s environment for at least 72 hours can prevent 90% of installation issues, a lesson I learned through trial and error.
- Subfloor prep makes all the difference; a flat, well-sealed surface coupled with moisture barriers forms the backbone of durable flooring. I now always invest time in leveling and sealing before laying down new hardwood.
- Layering knowledge from industry resources like this expert guide has turned my DIY projects from guesswork to confidence. Continuous learning is the key to flooring success.
Tools and Resources That Changed My Approach
My essential toolkit evolved as I delved deeper into flooring mastery. Recommending a reliable moisture meter helps me keep humidity in check, while a quality vapor barrier shields against hidden moisture intrusion—investments that paid off in unseen ways.
For surface preparation, a laser level and a good quality self-leveling compound are non-negotiable; they ensure my subfloor is perfectly flat, reducing future movement. I also rely heavily on professional leveling techniques to achieve a flawless base.
When it comes to maintenance, I swear by eco-friendly cleaners and periodic refinishing using trusted brands I found through industry insights. These small choices extend the life and beauty of my floors beyond initial installation.
Your Next Step Toward Flooring Confidence
The journey to beautiful, enduring hardwood floors is ongoing—it’s about making informed decisions, using the right tools, and learning from each project. Embrace the challenge; with every mistake, you gain valuable insight that brings you closer to mastery. Remember, specialized knowledge can transform a potential disaster into a showcase of craftsmanship and resilience. When you’re ready to elevate your space, consider exploring advanced techniques and trusted resources to ensure your hardwood floors stand tall against humidity’s silent assault. Ready to start your own success story? Share your experiences or ask questions below—your journey begins with that first confident step.