
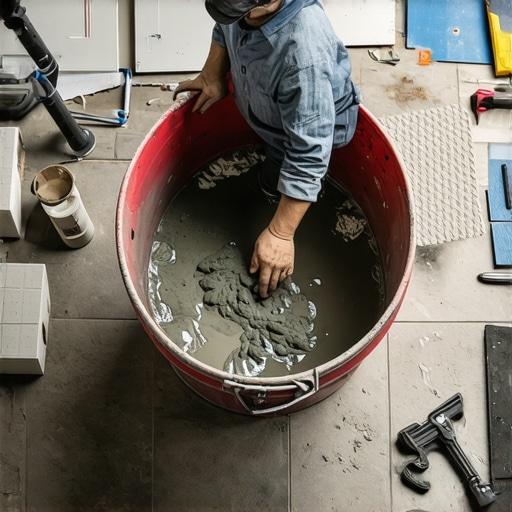
I remember the first time I tried to lay heavy tiles in my living room. I eagerly prepared my thinset, only to realize halfway through that it wasn’t adhering properly. The tiles were heavy, unforgiving, and I wasn’t getting the bonding strength I needed. The frustration was real—I had underestimated the importance of mixing my thinset correctly, and it showed in the final result. That moment was a lightbulb for me: the right mix makes all the difference in tile installation success.
Why Your Thinset Mix Matters More Than You Think
Getting your thinset right isn’t just a technical detail—it’s the foundation of a durable, long-lasting tile surface. When heavy tiles are involved, improper mixing can lead to cracked tiles, uneven surfaces, and the nightmare of rework. I learned this the hard way, and so did many homeowners I’ve befriended during my DIY adventures. Trust me, mastering how to mix your thinset is a skill worth honing if you want to avoid costly mistakes.
Is Overhyping Thinset Mixing Actually Worth the Fuss?
Early on, I made the mistake of rushing the mixing process, thinking a quick stir would suffice. That led to a lumpy, inconsistent compound that didn’t bond well. The truth is, perfect mixing isn’t just about following a recipe—it’s about understanding the properties that give your tiles the strength they need. Properly mixed thinset ensures maximum adhesion, reduces air bubbles, and even helps with leveling issues. If you’re skeptical, I get it—some folks think it’s overkill. But in my experience, it’s the little things that prevent big headaches down the road. Curious how to do it right? I’ll walk you through the exact steps in our upcoming sections, and you’ll learn tips from my personal toolbox and trusted experts. For more detailed strategies, you can explore our comprehensive guide on [floor leveling](https://tiletrendshop.com/mastering-floor-leveling-pro-secrets-for-perfect-installations) to set the stage for a flawless tile job. So tell me—have you faced issues with thinset adhesion or uneven tiles? You’re not alone, and the good news is, with a few simple tweaks, you can transform your project into a professional finish.
Get Your Thinset Just Right — The Concrete Steps
Once I replaced my hurried approach with a meticulous mixing routine, the difference in my tile adhesion was night and day. Here’s exactly how to replicate that success. First, choose a high-quality, polymer-modified thinset suited for heavy tiles. Then, measure your clean, cold water carefully—using a bucket and a measuring cup ensures consistency. Pour the water into a clean mixing container, ideally a sturdy bucket that allows thorough mixing and minimizes splashing. Gradually add the dry thinset powder into the water, not the other way around, to prevent clumping. Think of it like adding flour into milk — slow and steady.
Mix Like a Pro from the Start
Use a slow-speed mixer or a margin trowel to blend the mixture. Start mixing at low speed or manual stirring to incorporate the powder without creating air bubbles. As the mixture begins to thicken, switch to a higher speed or vigorous stirring. Your goal is a smooth, peanut butter-like consistency, without lumps or runny spots. During my own project, I used a hand-held drill with a paddle attachment, and within 5 minutes, I achieved a perfectly lump-free mix.
Authenticate Your Mix — The ‘Sniff’ and ‘Sight’ Test
Check the mixture’s appearance — it should be uniform and free of any dry patches. Smell it; a fresh, slightly earthy smell indicates proper mixing, not sour or moldy odors. When I struggled with adhesion issues early on, I realized my mix was too watery—an easy mistake that compromised the bond. Adjust by adding small amounts of dry thinset if the mixture seems too thin or a splash of water if too thick.
Timing is Everything
Let the mixed thinset sit for 5 to 10 minutes before use—this ‘slake’ time allows the chemicals to activate fully, improving adhesion and workability. During my project, I found that mixing in small batches prevented the mixture from drying out before application. If you don’t use the thinset promptly, it can start to cure and become unusable, so plan your work accordingly. Keep in mind, re-mixing stored thinset isn’t recommended—discard any unused material. For advanced tips to ensure level and durable installations, consult our detailed guide on floor leveling. Proper mixing is the foundation of your tile’s longevity, especially when working with heavy materials that demand maximum bonding strength. Have you encountered adhesion troubles? Often, it’s just a matter of mixing correctly. By following these detailed steps, you’ll prevent issues before they start and lay the groundwork for a flawless surface.When it comes to laying hardwood floors, tile, or engaging in floor leveling, many DIY enthusiasts and even professionals fall prey to misconceptions that can compromise the entire project. A common myth is that *more adhesive or thicker mortar equals better adhesion*, but in reality, excess material can lead to uneven surfaces and long-term damage. Properly calibrated thinset or leveling compounds, applied in optimal quantities, ensure stability without unnecessary excess—learn more about mastering these techniques in our [step-by-step guide](https://tiletrendshop.com/step-by-step-guide-to-flooring-installation-and-leveling-success).
Another nuanced misconception revolves around the idea that all floors are equally easy to level; however, complex subfloor conditions or varying moisture levels demand advanced techniques. For example, using a simple self-leveling compound without addressing underlying issues might give a false sense of accomplishment, but often results in cracks and weak spots over time. Specialty methods, such as incorporating perimeter dams or moisture barriers, can make a significant difference—details covered in our [comprehensive article](https://tiletrendshop.com/floor-leveling-challenges-common-mistakes-and-how-to-avoid-them).
You might also hear that the best way to achieve a perfectly level surface is to ‘eyeball’ it by eye—dangerous in practice. Expert-level floor leveling involves meticulous measurements with laser levels, understanding subfloor deformation, and choosing appropriate patching materials. Overlooking these advanced nuances can leave you with wavy tiles or uneven hardwood planks, which is why I recommend following proven techniques from industry insiders. Consult our [precise leveling methods](https://tiletrendshop.com/precise-floor-leveling-techniques-to-achieve-flawless-surfaces) to elevate your skills.
One particularly tricky aspect is the trap of underestimating the importance of environmental conditions. Excess humidity or dryness affects compound curing and bond strength. Applying a vapor barrier or controlling the workspace climate reduces these risks. For example, I once rushed a project during high humidity, only to find my tiles bubbling after a few weeks. Preventing such pitfalls requires attention to detail and understanding the science behind floor installation—Susceptible to moisture-related issues? Check out the expert insights in our guide on [moisture control](https://tiletrendshop.com/why-most-waterproof-flooring-still-needs-a-vapor-barrier).
Perfecting your floor installation is about embracing the little details that many overlook. Are you aware of the common
Keeping Your Floors in Peak Condition with the Right Tools
When it comes to maintaining hardwood floors or ensuring tile installations stand the test of time, having the right tools is crucial. I personally swear by a high-quality oscillating multi-tool for detailed sanding and scraping, especially when removing old adhesive or leveling minor imperfections. Its precision allows me to delicate spots without damaging surrounding areas, making routine upkeep and repairs far easier.
Another indispensable item in my toolkit is a moisture meter. Monitoring moisture levels in subfloors and wood planks helps prevent issues like cupping or buckling before they occur. As moisture-related problems become a leading cause of flooring failure, investing in a reliable, dual-type meter (pin and pinless) has saved me countless headaches down the line. For ongoing maintenance, I recommend a soft microfiber mop paired with a pH-neutral cleaner, which preserves the finish without stripping protective coatings.
Embrace Cutting-Edge Software for Precision
For large-scale projects, I rely on a laser level combined with digital apps to maintain impeccable flatness across expansive surfaces. These tools give me the confidence that my leveling is spot-on, reducing rework and ensuring tiles or hardwood planks are perfectly aligned. Looking ahead, I believe the integration of AR (augmented reality) into floor leveling software will become a game-changer, enabling real-time visualization of surface flatness during installation.
Schedule Regular Upkeep to Extend Your Floor’s Life
Routine cleaning and strategic maintenance are vital. For hardwoods, occasional reapplication of a quality polyurethane finish maintains shine and resistance. Tile floors benefit from periodic grout sealing—especially in high-traffic areas—to prevent staining and moisture intrusion. I recommend following expert-guided routines, like those outlined in our hardwood floor care secrets, to maximize your investment.
How do I maintain my installation over time?
Maintaining your flooring’s integrity involves a mix of proactive inspection and timely interventions. Use a damp sponge to wipe down surfaces, avoiding excess water that can damage wood or loosen grout. Regularly check for loose tiles or creaking hardwood, and address issues promptly with appropriate tools—like a manual chisel or a specialized adhesive applicator—to minimize long-term damage.
For large repairs, I turn to professional-grade leveling compounds, ensuring that any surface inconsistencies are gently corrected without disturbing the overall structure. Incorporating these practices and tools, such as my trusty moisture meter and laser level, keeps my floors looking pristine and performing at their best for years to come. Want to ensure you’re prepared for future challenges? Try using a point laser combined with mobile measurement apps for near-perfect floor assessments—an investment that will pay off in flawless results. For more insights, explore our detailed guide on mastering floor leveling.
What the Heaviest Mistake Teaches About Flooring Success
One of the most valuable lessons I learned involved rushing the thinset mixing process. I once thought quick preparation would save time, but it resulted in weak bonds and uneven tiles. Patience in mixing is what guarantees a solid foundation, especially for heavy tiles. The moment I slowed down and followed proper mixing techniques, fixing my adhesion issues became a thing of the past.
Crucial Tools That Elevate Your Flooring Game
There are a few tools I can’t imagine installing heavy tiles without: a reliable drill with a paddle bit for consistent mixing, a high-quality moisture meter to assess subfloor conditions, and a laser level to ensure perfect flatness. These tools aren’t just gadgets— they’re the secret weapons that turn a nerve-wracking project into an achievable one. To get expert-recommended gear, explore our guide on floor leveling.
The Hidden Power of Proper Preparation and Mindset
Preparing your workspace with the right mindset can make or break your project. I’ve realized that understanding the science behind thinset chemistry and environmental factors—like humidity or temperature—can help you anticipate issues before they arise. Embracing a meticulous approach, rather than rushing, leads to not just a successful install but one that lasts for years. Remember, every detail counts, and embracing the learning process transforms frustration into mastery.
What You Should Do Next to Elevate Your Flooring Skills
If you’re ready to elevate your flooring project, start by reviewing the detailed techniques in our guide on flooring installation and leveling. Invest time in selecting quality materials and tools, and don’t be afraid to take your time with mixing and preparation. Your future self will thank you for the sturdy, beautiful finish that only proper technique can deliver. And remember, mastering these details isn’t just about today’s project—it’s about building skills that will serve you through many successful installations ahead.