
I remember the first time I stepped onto my dark hardwood floor and noticed a tiny scratch shimmering under the light. At first, I thought, “No big deal, I can live with that.” But then, more scratches appeared, like a roadmap of every clumsy step I took. That lightbulb moment hit me—those scratches were not just bothersome; they werearning my entire home’s elegance.
Dark hardwood floors are stunning, adding warmth and sophistication to any space. Yet, their deep, rich tones make scratches and dents glaringly obvious. It’s almost as if every footprint, pet paw, or dropped utensil shouts for attention. Speaking from experience, trying to ignore these imperfections only makes them worse. Over time, I realized that tackling scratches early could save me hundreds in repairs and a lot of frustration.
So, today, I promise to share four simple, effective methods to erase those stubborn scratches in your dark hardwood floors. Whether it’s a light surface scuff or a deeper mark, these tips are practical and doable—even for a DIY enthusiast like me who’s learned the hard way. Plus, I’ll sprinkle in some insider knowledge to help you avoid common mistakes, like neglecting regular maintenance or using the wrong products, which can sometimes make things worse.
Are you tired of seeing those scratches every time you look at your floor? Have you ever tried to fix them only to make the problem worse? If so, you’re not alone. Many homeowners underestimate how vulnerable dark floors are and the importance of quick, proper repair techniques. For instance, early in my own journey, I made the mistake of using abrasive tools that damaged the finish further, which I now understand could have been avoided by following expert advice.
According to research, proper maintenance not only prolongs the life of hardwood floors but also keeps them looking their best. It’s worth noting that small scratches, if addressed promptly, can often be repaired with simple household items or specialized products, saving you time and money.
Up next, I’ll walk you through each of these straightforward methods, starting with the most accessible solutions you can try today. Ready to restore your floors’ flawless appearance? Let’s dive into the first method and bring back that stunning shine.
Start by Cleaning the Surface
Use a soft cloth and a mixture of mild soap and water to gently remove dust and debris from the scratched area. Ensuring a clean surface is crucial for accurate color matching and adhesion when applying repair products. I once overlooked this step and ended up with uneven touch-up results, requiring me to redo the entire process for a smooth finish.
Identify the Depth of the Scratch
Run your finger over the scratch; if it’s smooth and flush with the surface, it’s a superficial surface scratch. If you feel a depression, it’s deeper. For shallow scratches, a simple pen touch-up can suffice, but deeper ones require more effort. I remember applying a wood marker on a visible deep scratch, which initially looked good but eventually wore off, reminding me to assess depth carefully before proceeding.
Choose the Appropriate Repair Method
For Surface Scratches
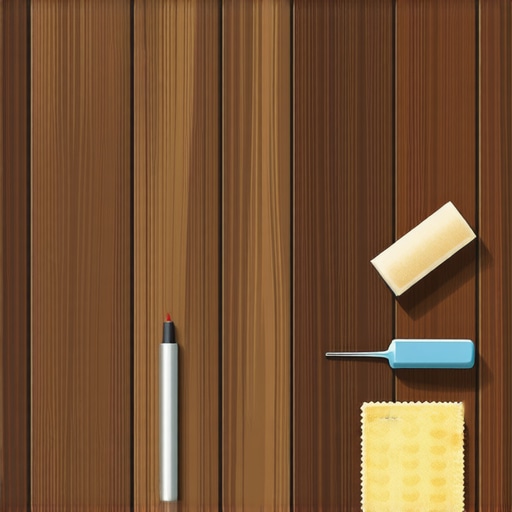
Use a matching wood stain pen or touch-up kit. Apply sparingly, following the manufacturer’s instructions, and buff with a soft cloth for blending. I successfully hid a minor scratch by gently dabbing with a walnut, which matched the floor’s color beautifully. Check out hardwood floor care secrets for more tips.
For Deeper Scratches
Sand the area lightly with fine-grit sandpaper (220 grit), being careful to avoid surrounding finish. Fill the depression with a wood filler that matches your floor color, pressing it into the scratch. Once dry, sand lightly again and apply a matching stain. This process may seem daunting, but I learned that patience yields seamless results, especially when combined with proper preparation. You can learn more about precise techniques at precise floor leveling techniques.
Blend and Finish
After applying stain or filler, buff the area gently with a soft cloth. For a glossy finish, apply a thin layer of polyurethane compatible with your floor’s sheen. To prevent mismatched patches, work in good lighting and regularly compare the repaired spot to the surrounding area. I found that minor color adjustments with a matching stain help achieve a near-invisible repair.
Optional: Use a Wax Stick for Minor Scratches
For quick fixes, a wax stick in a matching color can fill small scratches. Rub the wax into the scratch with a cloth, then buff. This method is ideal for high-traffic areas, offering a quick, durable solution. Remember, regular maintenance, like cleaning with suitable products, extends the life of your floors, as discussed in expert tips.
Prevent Future Damage
Place felt pads under furniture legs, avoid dragging heavy objects, and keep pet nails trimmed. Applying protective rugs in high-traffic zones minimizes additional scratches and dents. With consistent care and these repair techniques, your dark hardwood floors can maintain their elegance for years to come. For comprehensive maintenance advice, see floor care secrets.
 Many homeowners believe that achieving a perfectly level floor is as simple as pouring self-leveling compounds and waiting, but this oversimplifies a complex process that requires nuanced understanding. A common myth is that any unevenness can be corrected with large amounts of leveling material; in reality, improper application can lead to further problems like cracking or joint failure. Experts emphasize that meticulous surface preparation, including removing old adhesives and ensuring subfloor stability, is critical for lasting results. In fact, according to a study by flooring specialists, failure to address underlying subfloor issues is the leading cause of floor failures within five years of installation.
Another widespread misconception is that hardwood floors can hide minor subfloor imperfections—a dangerous assumption that invites long-term issues like squeaks, uneven surface, or finished floor damage. Advanced installers often advocate for precise floor leveling techniques, which often involve detailed subfloor assessments and targeted corrections, such as using a laser level for accuracy. For those interested in mastering these techniques, resources like this guide provide invaluable insights.
What about tile installation? The prevailing belief is that as long as the tiles are laid level, the subfloor doesn’t matter. Wrong. A stable, flat subfloor is fundamental, especially for large-format tiles prone to cracking on uneven surfaces. Failing to address subfloor anomalies can result in tiles flexing and breaking over time. Proper analysis using tools like a straightedge and a leveling laser can reveal subtle irregularities that are often overlooked. For a comprehensive approach, check out this expert tutorial.
When it comes to maintaining your floors, investing in the right tools and adopting effective practices can significantly extend their lifespan and keep them looking flawless. One essential piece of equipment I personally swear by is a high-quality rubber mallet. Unlike a standard hammer, it provides gentle, controlled force—perfect for tapping tiles into place without risking chips or cracks. Additionally, I always keep a laser level handy during installations and repairs; its precision ensures that tiles and hardwood planks are perfectly aligned, which is critical for both aesthetics and long-term durability. Using a laser level also helps identify subtle unevenness that the naked eye might miss, preventing future issues like squeaks or uneven wear.
Beyond tools, routine maintenance is vital. I recommend a soft microfiber mop combined with a pH-neutral cleaner specifically formulated for hardwood or tile surfaces. Regular cleaning removes abrasive debris that can cause scratches or dull finishes over time. For deeper issues, such as stubborn grout haze or ingrained dirt, I leverage equipment like a steam cleaner—just ensure it’s suitable for your flooring type to avoid damage. Incorporating such tools into your periodic maintenance routine keeps your floors in peak condition, reducing the need for costly repairs.
Looking ahead, I predict that smart technology will play an increasingly prominent role in flooring maintenance. Devices with sensors could soon monitor humidity levels, detect early signs of wear, and even automate cleaning schedules. This integration will help homeowners address issues proactively rather than reactively, saving time and money.
Curious about how to keep your floors in top shape over the years? How do I maintain hardwood and tile floors to prevent damage and ensure longevity? One advanced tip is to periodically perform a light sanding and sealing of hardwood surfaces using tools like a detail sander. This process restores the finish and counters the effects of foot traffic, spills, and environmental changes. It’s a more involved step but well worth it for those seeking a long-term, high-performance living space. For detailed guidance, check out this resource on precise floor leveling and finishing techniques. Dive into your next maintenance project with confidence—your floors will thank you for it.
The Hardest Lesson I Learned About Floor Leveling and Durable Flooring
Early in my flooring journey, I believed that applying a generous layer of self-leveling compound was enough to fix uneven spots. It wasn’t until I faced cracks and shifting a year later that I realized the importance of thorough surface prep and understanding subfloor stability. This lightbulb moment taught me that mastering proper surface assessment prevents future headaches and costly repairs.
Secrets That Changed How I Approach Hardwood and Tile Improvements
- Investing in a laser level transformed my installation accuracy, saving time and preventing misaligned grout lines. I now see this tool as an essential ally.
- Regular maintenance with pH-neutral cleaners and occasional touch-ups keeps my floors looking vibrant. Routine care is far more cost-effective than major restoration.
- Understanding the subtle differences between thinset formulas ensured my tiles adhered perfectly without cracks, especially on complex surfaces.
Where to Strengthen Your Floor Foundation and Elevate Your Space
If you’re serious about achieving commercial-grade results, I highly recommend exploring this comprehensive guide. It offers expert-level insights into subfloor evaluation and precise leveling techniques. Additionally, tools like the rubber mallet and laser level have become staples in my toolkit, enhancing every project I undertake. Remember, investing in quality tools and knowledge pays dividends in the longevity and beauty of your floors.
Nurture Your Floors, Nurture Your Home
Perhaps the most rewarding part of my flooring experience is noticing how proper care extends the life of my investment. Small steps like trimming pet nails and placing felt pads under furniture make a significant difference. Envision your home’s foundation as a living, breathing part of your sanctuary—giving it attention ensures your floors remain stunning year after year. Every scratch or uneven spot is a lesson guiding you toward mastery—so keep learning and staying proactive. What’s one flooring challenge you’ve faced recently? Share your story below, and let’s grow together in our home improvement journey.