

It was late afternoon, and I was all set to lay down that new layer of tile. But as I peered over my freshly mixed leveling primer, I noticed something alarming—hours had gone by, and it still hadn’t dried. Frustration crept in as I realized I’d be delaying the entire project, and I had no idea why my primer was taking so long to set. Ever been there? You think you’ve followed the instructions perfectly, but your floor refuses to cooperate. That lightbulb moment—when I realized I’d missed a crucial step—changed everything. And I bet you’re facing a similar headache right now. So, let’s decode this mystery together and get your flooring project back on track.
Why Your Primer Isn’t Drying Fast Enough—And How to Fix It
Is It Really Worth All This Hassle? True or Overhyped?’
I used to think that patience was my only option when a primer refused to dry, but I learned that rushing or misapplying could make things worse. Early on, I made the mistake of applying my primer in thick coats and in a room with high humidity. That-delay tactic? It backfired. According to flooring experts, improper application and environmental factors can significantly extend drying times, turning a simple task into a frustrating ordeal. When I finally researched the issue, I discovered that temperature, humidity, and surface prep are all vital for proper curing. To get reliable, lasting results, it’s crucial to understand these influences—something I wish I’d known from the start. For more advanced techniques, check out the comprehensive guide on floor leveling at this link.
If you’re experiencing prolonged drying times, you’re not alone. But don’t worry. There are practical steps you can take immediately, and I’ll walk you through them. Let’s unlock the secrets to a perfectly dried primer so your project can move forward without a hitch.
Ensure Proper Surface Preparation
Start by thoroughly cleaning your subfloor to remove dust, grease, or debris that could interfere with adhesion. Use a vacuume or broom, and wipe with a damp cloth if necessary. Inspect for any uneven spots, cracks, or loose areas that need repair. When I once ignored this step, I ended up with tiles that cracked and loosened over time. Proper cleaning and inspection set the foundation for a flawless finish.
Assess Flatness and Address High or Low Points
Use a straightedge or a laser level across the entire floor to identify uneven spots. For high areas, sand down with a belt sander or file to flatten the surface. Low areas can be filled with a patching compound or self-leveling underlayment. I once marked the high spots with chalk, then sanded carefully, which helped me avoid uneven tiles and save time on corrections during installation. This step is crucial to prevent future cracking or uneven grout lines.
Choose the Right Leveling Material
Select an appropriate floor leveling compound based on your subfloor type. For plywood or OSB, a self-leveling underlayment works best; for concrete, a more durable patching mortar is preferred. Refer to the guidelines at this expert resource to match materials with subfloor conditions.
Mix and Apply the Leveling Compound Correctly
Follow manufacturer instructions precisely when mixing the leveling compound. Use clean water, and mix thoroughly to avoid air bubbles. When I mixed too fast, I created bubbles that dried with streaks, complicating tile adhesion. To prevent this, mix slowly and for the recommended time. Pour the mixture onto the floor starting at the low spots, then spread using a trowel or a gauge rake. Work quickly, as self-leveling compounds tend to set fast. Ensuring even application here minimizes the need for additional sanding or smoothing later.
Allow Adequate Cure Time and Verify Flatness
Once applied, let the compound cure fully—usually 24 to 48 hours—before proceeding. Do not rush the process, as premature tile installation can lead to cracks or uneven surfaces. After curing, recheck the floor with a level; a straightedge should rest evenly across all areas. If discrepancies remain, repeat the patching process targeting those spots. For detailed curing times and techniques, visit this comprehensive guide.
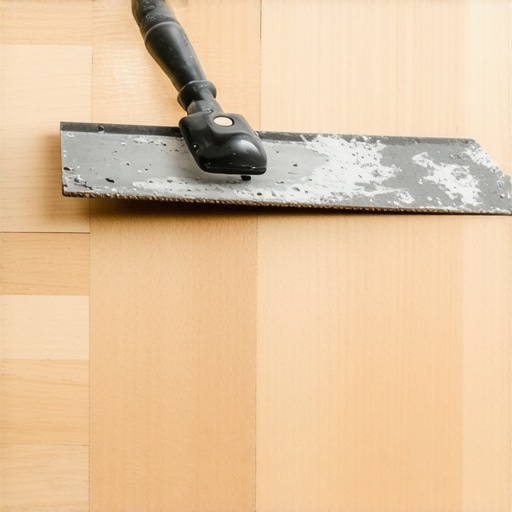
Many DIY enthusiasts and even seasoned contractors often believe they have mastered the basics of tile installation and floor leveling. However, my experience reveals that the devil truly lies in the details. One widespread misconception is that a perfectly flat subfloor isn’t critical, leading many to overlook the importance of meticulous surface preparation. Contrary to popular belief, even small dips or humps can cause tile cracking or uneven grout lines over time. This is why mastering advanced leveling techniques, such as the ones discussed at this resource, is essential for achieving seamless results.
Beware of the Myth that All Floor Levelers Are Equal
Not all self-leveling compounds perform the same, especially over diverse substrates like plywood or concrete. Using the wrong type can lead to issues such as cracking, bubbling, or insufficient adhesion. For instance, a common mistake is applying a general-purpose floor leveler over a substrate that requires a product with enhanced flexibility or bonding properties, leading to failures weeks after installation. An advanced mistake I’ve seen is neglecting to check for moisture before applying leveling compounds over concrete—an oversight that can result in cracks or delamination, as outlined in this article. Always match your products to the specific conditions of your subfloor for a durable finish.
Advanced Insight: The Nuance of Proper Expansion Gaps
The misconception that larger expansion gaps will prevent buckling is surprisingly common. In reality, gaps that are too wide or poorly sealed can lead to uneven movement, causing tiles or hardwood floors to shift or crack over time. For complex layouts or large-format tiles, attention to detail in sealing and accommodating natural expansion and contraction is critical. This nuance often separates a professional-grade installation from a subpar one. Experts, such as those referenced in this guide, emphasize the importance of understanding how environmental factors influence floor movement. Never skip the step of verifying your gaps and seals after installation to ensure longevity.
Have you ever fallen into this trap? Let me know in the comments. Remember, paying attention to these lesser-known nuances can save you from costly repairs down the line and ensure your flooring stands the test of time.
Keeping Your Floors in Top Shape: Essential Tools and Maintenance Tips
Once you’ve got your tile or hardwood floors installed perfectly, the journey doesn’t end there. Regular maintenance is key to preserving their beauty and lifespan. Investing in the right tools can significantly simplify ongoing upkeep and minor repairs, ensuring your floors remain stunning for years. For example, I always recommend a high-quality microfiber mop paired with a pH-balanced cleaning solution. This combo gently lifts dirt without damaging surface finishes, making routine cleaning both effective and safe. Additionally, a portable moisture meter is invaluable—by regularly checking moisture levels in your subfloor and hardwood planks, you can catch potential issues early before they escalate into costly repairs. In my experience, staying proactive with these tools has prevented many emergencies down the line.
When it comes to long-term results, scheduling periodic inspections helps identify early signs of wear or water intrusion. For hardwood floors, a simple test involves gently pressing a plastic film onto the surface; if it bubbles, moisture may be seeping in. For tiles, look out for loose grout or cracked tiles, which may indicate shifting or underlying moisture issues. Implementing protective measures, like entryway mats and furniture pads, further extends your floors’ vitality. Looking ahead, technological advancements—such as smart sensors that monitor humidity and temperature—are poised to revolutionize floor maintenance, offering real-time alerts to prevent damage before it starts.
How do I maintain my flooring over time?
Maintaining your floors involves more than just cleaning; it requires understanding specific needs of your materials and responding accordingly. For hardwood floors, periodic refinishing rejuvenates the surface and can be guided by expert tutorials like this resource. Tile floors benefit from re-grouting and sealing every few years to close small gaps and prevent water infiltration. Keep an eye on high-traffic areas, which tend to wear faster, and consider applying protective coatings or area rugs there. Remember, a meticulous approach—paired with the right tools—ensures your investment continues to shine.
Ready to elevate your flooring game? Try implementing a moisture check before future refinishing or reinstallation projects. Using a moisture meter has profoundly reduced unexpected issues, saving me time and money. Visit this detailed guide to see how precise moisture control can make all the difference in your flooring longevity.

Having the right tools at hand transforms maintenance from a chore into a manageable part of homeownership. Whether it’s a high-quality microfiber mop or a moisture meter, equip yourself with equipment designed for precision and ease. These investments pay off by keeping your floors looking impeccable and functioning flawlessly over the long haul. As technology advances, expect even smarter tools to help monitor and maintain your floors proactively, leading to fewer surprises and more enjoyable spaces.
3 Lessons That Changed My Flooring Approach
One of the toughest lessons I learned was the critical importance of thorough surface preparation; skipping this step led to uneven tiles and future cracks, reminding me that attention to detail upfront saves headaches later. I also discovered that testing moisture levels before applying leveling compounds over concrete can prevent costly cracks—this nuanced step was often overlooked but proved vital. Lastly, understanding the subtle differences between various self-leveling products and choosing the right one for specific substrates truly affected the durability and appearance of my floors, a realization that saved me from frequent repairs.
Tools and Resources That Elevate Your Flooring Game
My essential toolkit includes a high-quality moisture meter, which I’ve relied on to catch issues early, and a laser level to ensure perfect flatness across large surfaces—both have become game changers. For expert insights, I recommend this comprehensive guide; it has deepened my understanding of professional techniques. Additionally, the book “Mastering Hardwood Floor Refinishing” transformed my approach to restoring and maintaining floors. Lastly, trusted brands offering quality leveling compounds and tools have been my go-to, ensuring I deliver lasting results.
Keep Improving, One Floor at a Time
Your flooring journey is ongoing, and every project offers a chance to refine your skills. Remember, small details—like verifying expansion gaps or testing moisture—make all the difference in achieving professional results. Embrace the learning curve and stay proactive with maintenance; using the right tools and trusted resources can extend the life of your floors substantially. Are you ready to elevate your flooring projects and turn your home into a showcase of craftsmanship? Keep pushing your boundaries, and your floors will thank you for years to come.