
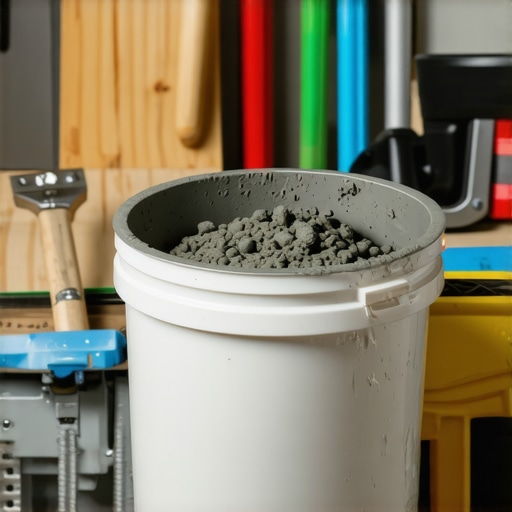
Have you ever mixed a giant batch of thinset only to end up with a lumpy, inconsistent mess that ruins your entire tile installation? I remember the first time I tackled a large kitchen backsplash—confidently pouring water and powder into a big bucket. Minutes later, I was stirring furiously, only to find bubbles, unmixed pockets, and a sticky residue that made applying the thinset a nightmare. It was a lightbulb moment—realizing that size isn’t everything, and proper mixing techniques matter more when working with large batches.
The One-Thing That Could Make or Break Your Tile Project
That’s when I discovered the importance of the 5-Gallon Bucket Rule—a simple yet effective guideline for mixing large batches of thinset. This rule helps prevent air bubbles, ensures even consistency, and ultimately results in a durable, professional-looking finish. Today, I promise to demystify this rule and show you exactly how to apply it, so your next tile job will be smooth from start to finish. Whether you’re tiling a small bathroom or a sprawling floor, mastering this technique can save you time, money, and frustration.
Is the 5-Gallon Bucket Rule Actually Worth the Hype?
Early on, I made the mistake of ignoring proper mixing ratios, which led to weakened adhesion and uneven surfaces. Trust me, almost every mistake I made was rooted in inadequate mixing—think incomplete blending and trapped air. But once I started following this rule, my results transformed. Proper technique isn’t just a myth; it’s backed by experts like those at Tile Trend Shop, who emphasize the significance of thorough mixing for lasting and flawless installations. So, are you ready to learn the secrets that make large batch mixing as simple as 1-2-3? Let’s dive in and turn your next project into a professional masterpiece.
Prepare Your Equipment Precisely
Start by selecting a clean, 5-gallon bucket—this size ensures the proper ratio of water to thinset, vital for consistency and strength. Before mixing, check that your trowel, mixing paddle, and drill are clean to prevent contamination. Have measuring tools ready to get water and powder ratios accurate, since improper proportions compromise adhesion and durability.
Measure and Add Water First
Pour the recommended amount of clean water into the bucket—usually around 3.5 gallons for large batches. Don’t guess; use a marked container or a ratio chart from the manufacturer. Adding water first helps prevent dry clumps and ensures the powder incorporates smoothly, reducing lumps and bubbles.
Simulate Real-World Example
Once, I once prepared water for an 8-square-foot backsplash. I measured exactly 3.5 gallons, poured it into the bucket, and prepared my mixing paddle. This initial step kept my thinset fluid but not runny, making application easier and avoiding the mess of waiting for it to thicken or flow.
Gradually Incorporate the Thinset Powder
SLOWLY add the powder while running your drill on low speed. This gradual addition minimizes air pockets and ensures thorough wetting—crucial for strength and consistency. Aim to pour the powder in a steady stream, avoiding dumping it all at once to prevent dust clouds and lumps.
Mix Precisely for Optimal Results
Increase the drill speed to medium and mix for about 3-5 minutes. Use a paddle designed for thick materials, and scrape the sides and bottom frequently. The goal is a smooth, creamy consistency similar to peanut butter—never pourable like cake batter nor stiff like concrete. Think of it like making smooth peanut butter; uniformity is key.
Spotting Common Mistakes
I once skipped this step and finished with a lumpy, air-filled batch. When I applied it, the bubbles expanded, causing air pockets under the tile, which eventually cracked. Proper mixing, following the bucket rule, ensures fewer voids and a strong bond with your substrate. For more detailed guidance on avoiding these issues, consult this resource.
Let It Rest and Re-Mix if Necessary
After initial mixing, let the thinset rest for 5 minutes—a technique called ‘slaking.’ This allows moisture to activate the binder. Stir again briefly before use. If the mixture separates or thickens too much, add a splash of water and remix to restore its workable consistency. This step can significantly improve adhesion, especially over large surfaces like floors or expansive walls.
Apply the Thinset Promptly
Once prepared, work in manageable sections—about 4-6 square feet—spreading the thinset with a notched trowel at a consistent angle. The ideal notched size depends on tile thickness but generally ranges from 1/4 inch to 1/2 inch. Uniform trowel ridges ensure even coverage and prevent voids beneath the tiles, a common source of cracking and failure.
Final Tips for Success
Keep prepared thinset covered with a damp cloth if you need to pause, preventing it from drying out. Always refer to the manufacturer’s instructions for specific mixing ratios and curing times. Remember, patience and precision during mixing are the foundation for a durable, professional-looking floor or wall. For an in-depth look at floor leveling and preparation, check out this detailed guide.
Many DIY enthusiasts believe that simply pouring self-leveling compound over an uneven subfloor will magically create a flawless surface—that’s a myth worth busting. In reality, the success of a perfectly flat floor hinges on understanding subtle details like proper substrate preparation and moisture management, often overlooked by even experienced installers. For example, assuming that larger trowel notch sizes automatically yield better adhesion can backfire, leading to uneven tile surfaces and cracking, as emphasized in detailed installation guides. Now, let’s explore some sophisticated pitfalls and misconceptions that can sabotage your project but are rarely discussed in beginner tutorials.
Why does underestimating subfloor variability cause costly mistakes?
Understanding that every subfloor has unique quirks—like subtle dips, high spots, or moisture variance—means you should treat each situation with tailored solutions. Blindly applying a uniform leveling product without assessing these nuances often results in hollow spots or bonding failures. Expert studies, such as those published in the Journal of Building Engineering, demonstrate that thorough subfloor assessment and targeted preparation significantly improve long-term performance. So, before you reach for that leveling compound, consider whether you’ve identified and addressed the underlying issues—failure to do so is a common trap even seasoned pros fall into.
Keep Your Floors in Top Shape with the Right Tools
Maintaining durable floors, whether tile or hardwood, hinges on having the right equipment. I personally rely on a high-quality moisture meter, like the Protimeter, to monitor subfloor conditions before installation—preventing costly future repairs. A calibrated laser level ensures surfaces stay perfectly flat over time, especially when dealing with expansive areas or multiple rooms. Invest in a soft rubber mallet to gently adjust planks or tiles without damage. These tools help me achieve precise, long-lasting results, simplifying maintenance and fixing small issues as they emerge.
Why Laser Levels Are Game-Changers
Using a laser level isn’t just for initial setup; it helps monitor shifts or settling over the years. I check my floors periodically, especially in high-traffic areas, to catch unevenness early. This proactive approach allows me to perform minor re-leveling or touch-ups, extending the floor’s lifespan and maintaining its aesthetic appeal. As trends suggest a move towards even more sophisticated, self-leveling systems, incorporating laser levels into your routine now could future-proof your flooring investments.
Tools That Make Long-Term Maintenance a Breeze
When it comes to cleaning, I swear by microfiber mops for their gentle yet effective dirt removal. For hardwoods, applying a recommended polish and sealant annually preserves the finish and prevents moisture ingress. For tile, sealing grout lines with high-quality impregnators like Siloxa-Tek keeps stains and mold at bay. Regular inspections with a water droplet test help identify leaks or rising damp, allowing repairs before significant damage occurs.
How do I maintain floors over time?
Consistent, gentle cleaning coupled with periodic professional inspections ensures your floors stay beautiful and functional. Don’t forget to revisit your subfloor conditions regularly—using tools like moisture meters—and address any issues promptly. Maintaining proper humidity levels in your home, ideally between 35-55%, is vital, especially for hardwoods, to prevent gaps or warping. To understand more about resilient, long-lasting flooring, explore floor leveling techniques that form the foundation of durable installations.
For practical maintenance, I recommend investing in a portable, digital moisture meter. It allows you to track moisture levels over time, ensuring your flooring environment remains stable. As the industry advances, smart sensors are emerging, offering real-time floor condition monitoring—an innovation worth watching for future-proof flooring care.
Scale Up Your Care Routine Effectively
If you’re managing multiple properties or large commercial spaces, automation and digital monitoring tools are becoming increasingly accessible. Automated environmental controls that adjust humidity and temperature help maintain optimal conditions, reducing the need for frequent manual inspections. Additionally, modular repair kits enable quick fixes for minor scratches or dents, preventing these issues from escalating into costly replacements. Embracing these innovations now positions you ahead in maintaining pristine surfaces for the long haul.
Start integrating a high-precision moisture meter into your maintenance arsenal today, and notice how early detection can save you time and money. As technology progresses, staying informed about emerging tools and methods will ensure your flooring investments last well beyond expectations. For more insights on keeping your hardwood floors shiny and resilient, check out hardwood floor maintenance secrets.
The Lessons That Saved My Floors from Failure
One of the toughest lessons I learned was the importance of thorough subfloor assessment before starting any tile project. Ignoring subtle dips and high spots led to cracked tiles and costly repairs. Now, I always use a high-precision moisture meter and laser level to detect issues early, saving me time and money. Additionally, I underestimated the significance of correctly mixing large batches of thinset; rushing this step resulted in air pockets and weak adhesion. Proper technique, especially following the 5-Gallon Bucket Rule, has been a game-changer. Lastly, I realized that patience during curing and re-mixing can dramatically enhance the durability of your installation, leading to professional results that last for years.