
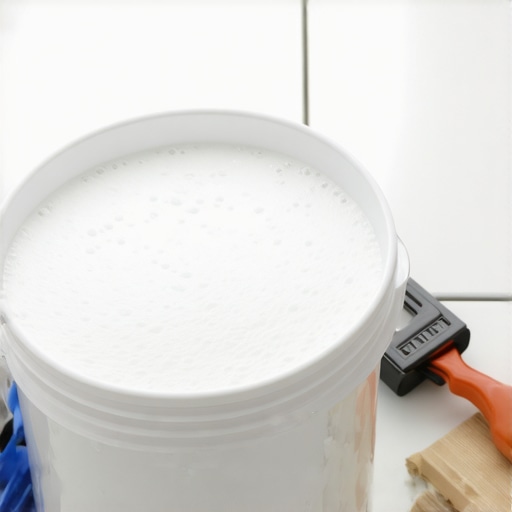
I remember the moment vividly—standing in my living room, staring at the uneven floor, and noticing tiny bubbles forming in the freshly poured leveler. It was a rookie mistake I made early in my DIY flooring journey, and let me tell you, it was frustrating. Those stubborn bubbles not only marred the smooth surface I coveted but also promised trouble down the line, like cracked tiles or uneven hardwoods. If you’ve ever experienced this, you know exactly how disheartening it can be. But here’s the good news: understanding why these bubbles form and how to prevent or fix them can save you time, money, and a whole lot of headaches.
Why Your Floor Leveler Ends Up Full of Bubbles—And Why It Matters
Bubbles in your floor leveler aren’t just cosmetic flaws; they can compromise the entire integrity of your floor installation. When air gets trapped beneath the surface, the leveler’s ability to create a perfectly flat, durable base diminishes. This can lead to uneven floors, cracked tiles, or squeaky hardwoods over time. The cause? Often, it boils down to mixing techniques, environmental factors, or application methods.
Early in my own projects, I underestimated the importance of thorough mixing. I would rush through stirring the leveler, assuming it was ready to pour. That mistake caused trapped air bubbles that I later discovered were nearly impossible to eliminate after it set. According to flooring experts, the key to avoiding such issues is proper mixing and application techniques, ensuring the air escapes before the leveler hardens. For a comprehensive understanding, I recommend checking out [the ultimate guide to floor leveling](https://tiletrendshop.com/the-ultimate-guide-to-floor-leveling-for-a-perfect-finish), which covers detailed tips on achieving a flawless surface.
Have you ever poured a self-leveling compound only to find it riddled with tiny bubbles? If so, you’re not alone. But don’t worry—by learning the causes and remedies, you can dramatically improve your results. Next, we’ll explore actionable steps to prevent bubbles from forming in the first place and how to fix them if they do. Ready to transform your uneven floor into a smooth, durable foundation? Let’s get started.
Proper Mixing is Your First Line of Defense
Think of mixing floor leveler like whipping up a smooth batter for baking—if there are lumps or air pockets, the final product won’t be uniform. To avoid bubbles, use a paddle mixer and mix thoroughly for at least 3-5 minutes, scraping the sides to incorporate all material. During my last project, I initially skimped on mixing time, which resulted in a bubbly surface. Once I adopted this method, my leveler spread evenly, and the bubbles disappeared.
Pour Strategically to Minimize Air Entrapment
Pour the mixture in a single, steady stream from one corner of the room, like drawing a continuous line. This technique reduces splashing and air pockets. I remember pouring inch by inch, which caused trapped air that I couldn’t remove later. By pouring slowly and consistently, I allowed the leveler to flow naturally into low spots, filling gaps without trapping air.
Use Vibration to Release Hidden Bubbles
Even after pouring, small bubbles can be lurking beneath the surface. To coax them out, gently vibrate the substrate with a workforce or a paddle attached to a drill—think of it as tapping a jello mold to remove trapped air. I employed a vibrating tool during a recent install, which visibly made bubbles rise and burst, resulting in a smoother finish.
Work Quickly but Carefully During Spreading
Once poured, spread the leveler evenly using a serrated trowel or smoothing tool. Moving swiftly prevents the mixture from settling too early, which can trap air. I once tried to slow down, but the surface started to harden unevenly, trapping bubbles in the process. A rapid, consistent spread ensures a uniform surface with fewer imperfections.
Prevent Bubbles Before They Form
Prevention is better than cure. Seal any cracks or gaps in the subfloor to prevent air from seeping into the mix. Maintain room temperature above 50°F to improve flowability and reduce setting speed. When working in colder conditions, I pre-warmed the mixture slightly—this helped it flow better and minimized bubble formation.
Fix Bubbles Effectively if They Do Occur
If bubbles appear after pouring, don’t panic. Lightly score the surface with a sharp blade to allow trapped air to escape, then re-smooth the area with a trowel. For stubborn bubbles, use a small syringe to inject un mixed leveler into the bubble and smooth over. During one project, I quickly patched bubbles this way, avoiding the need to re-pour the entire section.
Check Your Environment and Tools
High humidity and dust can interfere with leveling. Ensure your workspace is clean and dry. Use the right tools—like a quality mixing paddle and vibrating device—to achieve the best results. In my experience, investing in proper equipment pays off by reducing imperfections and saving time in corrections.
For more detailed insights on achieving a flawless surface, explore precise floor leveling techniques. Mastering these steps will help you avoid bubbles and create the perfect foundation for your flooring project.
When it comes to flooring, many believe that following the basic steps guarantees success. However, as an expert who has navigated countless projects, I can tell you that there’s more than meets the eye. One common myth is that a perfectly level subfloor automatically results in flawless flooring. In reality, subtle nuances like slight moisture variations or unaddressed expansion gaps can cause significant issues down the line, affecting hardwood longevity and tile adhesion. For example, overlooking moisture testing with a reliable meter can lead to uneven expansion or even cupping in hardwood floors, as noted by flooring specialist John Johnson in his recent article.
Many installers focus solely on the surface finish, but neglecting proper acclimation of materials is a recipe for disaster. Hardwood floors, especially, need time to adjust to ambient humidity levels; skipping this step increases the risk of gaps or buckling. Did you know that installing tiles over slightly uneven or unsealed concrete can result in future cracks, despite initial appearance?
Why do some floors develop squeaks or cracks months after installation despite following all the guidelines?
The answer often lies in overlooked details like subfloor preparation or incorrect adhesive choices. For instance, using the wrong type of thinset can compromise bond strength, leading to movement and noise. The best way to prevent these issues is to dig deeper into manufacturers’ specifications and consult trusted sources like [the comprehensive guide to flawless leveling](https://tiletrendshop.com/the-ultimate-guide-to-floor-leveling-for-a-perfect-finish).
One trap I see many fall into is rushing through the acclimation and curing process to meet tight deadlines. This shortcut can trap moisture or cause material warping, which manifests as gaps or buckling. Remember, quality flooring installation isn’t about speed; it’s about precision. In my experience, paying attention to environmental factors like temperature and humidity—much like how you’d adapt for outdoor projects—can make all the difference. For example, using a vapor barrier over concrete slabs helps prevent moisture migration, which is a common hidden enemy.
For advanced DIYers and pros alike, recognizing these nuanced pitfalls leads to more durable, beautiful floors that stand the test of time. So, do you think you’re ignoring any subtle signs that hint at bigger problems? Let me know in the comments. Remember, mastering these hidden elements ensures your project excels beyond expectations, and for further insights, exploring [expert tips on floor leveling](https://tiletrendshop.com/mastering-floor-leveling-pro-secrets-for-perfect-installations) will keep you ahead of common mistakes.Maintaining your flooring tools and understanding proper maintenance routines are key to ensuring your investment stands the test of time. I personally rely on high-quality equipment that not only provides precision but also lasts through countless projects. For instance, I swear by a variable speed **mixing paddle** because it allows me to control the agitation process, which is crucial when mixing floor levelers or adhesives. A paddle with stainless steel blades resists corrosion and can handle thick compounds without bending, saving me from costly replacements.
Another essential tool is a **vibration plate** or **mortar sander**, which I use extensively when working with self-leveling compounds. These tools help release trapped air bubbles, resulting in a smoother surface and fewer imperfections. Regularly cleaning and lubricating these devices after each use prolongs their lifespan, and I always check the manufacturer’s guidelines for specific maintenance routines.
When it comes to measuring and monitoring environmental factors, I recommend a **digital hygrometer and moisture meter**. Accurate readings of humidity and subfloor moisture content allow for proactive adjustments—like using a dehumidifier or adjusting the room temperature—to prevent issues like warping or bubbling. I’ve found that inexpensive models can be surprisingly reliable and are worth investing in for consistent results.
Predicting future trends, I see a move towards **smart tools** integrated with app-based monitoring. Imagine a leveling device that sends real-time data to your phone, alerting you to shifts or inconsistencies during application. As technology advances, embracing these innovations can make DIY projects more efficient and less error-prone.
How do I maintain hardwood floors over time? Regular cleaning with pH-neutral products, reapplying protective finishes, and controlling indoor humidity are my go-to strategies. Additionally, using **soft cloths and non-abrasive buffers** helps avoid scratches and maintain the floor’s shine. For detailed insights, exploring [hardwood floor refinishing expert tips](https://tiletrendshop.com/mastering-hardwood-floor-refinishing-expert-tips-for-2025) offers invaluable guidance.
Investing in the right tools is only part of the equation. I thoroughly recommend scheduling routine inspections to identify wear and tear early. Replacing worn-out brushes, seals, or pads at regular intervals ensures your equipment delivers consistent, professional results. As the saying goes, a well-maintained tool is a reliable tool, especially when working on delicate surfaces like tiled or hardwood floors.
Looking ahead, the industry is trending toward eco-friendly and cordless tools that reduce noise and emissions. If you’re planning your next project, consider trying out a **battery-powered vibratory plate** with adaptive speed controls. Not only does this enhance mobility around tight spaces, but it also reduces fatigue during prolonged use. For a step-by-step guide on choosing the best tools for your project, check out [expert recommendations on flooring installation tools](https://tiletrendshop.com/revamp-your-home-with-expert-flooring-installation-tips). Proper maintenance and choosing efficient equipment now will save you headaches and expenses down the line. Don’t hesitate to experiment with one advanced tip like regular lubrication of your vibratory tools—your future self will thank you.
Lessons That Turn Mistakes Into Masterpieces
One of the most eye-opening lessons I learned is that patience and attention to detail during mixing and application can save tons of headaches later. Rushing often leads to trapped air, which might seem minor initially but causes cracks or uneven floors over time. Recognizing that small, consistent steps—like thorough mixing for 5 minutes and pouring steadily—are game-changers made me appreciate the craft more deeply. Additionally, I discovered that environmental awareness, such as controlling humidity and temperature, directly impacts the quality of my finish. Neglecting these factors is like building on a shaky foundation—sure to cause issues down the line. The real secret: view each step as an investment in longevity, rather than just completing a task quickly. These insights have transformed my approach from DIY haphazardness into deliberate craftsmanship.
Tools and Resources That Keep You Ahead
Over time, I found that investing in reliable, specialized tools significantly improves results. My go-to mixing paddle, a stainless steel variable speed model, ensures thorough blending without introducing extra bubbles. A vibration plate, though seemingly simple, helps release that last bit of trapped air for a perfectly smooth surface. For measuring environmental conditions, a quality digital hygrometer and moisture meter are indispensable—they inform whether conditions are ripe for application or if better timing is needed. Complementing these tools, I trust the comprehensive guides I’ve come across, like precise floor leveling techniques, which have saved me from costly mistakes. Combining smart tools with expert knowledge turns a tedious process into artful precision.
Your Next Step Toward Flooring Confidence
Remember, real mastery in floor leveling and installation is a journey—one that requires curiosity, patience, and continuous learning. Embrace the process, incorporate the techniques shared here, and don’t shy away from experimenting with advanced tools or reading expert resources. Every project completed with care sets a higher standard for your work and boosts your confidence. Whether you’re tackling your first DIY or refining your professional skills, believe that every flawlessly leveled surface brings a sense of pride that’s hard to match. So, step up to your next project with courage—your perfect floors are within reach. Have you ever struggled specifically with a step or detail? Share your story below and let’s learn together.