

Ever spent hours sanding and staining a beautiful red oak floor, only to be greeted by a startling surprise—your once-rich, warm-toned wood now looks embarrassingly pink? I remember the moment vividly. There I was, eagerly inspecting my freshly stained floor, expecting that deep, reddish hue that I’d envisioned. Instead, I was met with what looked like a bad joke—the wood had turned a bizarre shade of pink. Frustration bubbled up as I wondered where I went wrong.
Uncovering the Mystery Behind Pinkish Tints in Stained Red Oak
It’s not just you. Many homeowners and DIY enthusiasts face this perplexing issue. What causes red oak to turn pink after staining? The answer lies in the unique chemistry of the wood and the staining process. In short, red oak contains natural tannins that react unpredictably with certain stains, especially water-based or light-colored ones. This reaction results in an undesired pink or blush hue, which can ruin an otherwise perfect finish.
Is This Problem Really Worth the Hassle?
At first glance, it might seem minor—just a weird color shift. But trust me, the impact on your space’s aesthetic can be significant. A pink cast can make your entire room feel off or outdated, forcing you to re-stain, sand, or even replace boards. Early on, I made a crucial mistake: assuming that all stains would behave the same on red oak. That misconception cost me precious time and effort—lessons I’d love to pass along to you.
If you’ve encountered this problem or are worried about it happening, you’re not alone. The good news is, understanding the causes and solutions will save you from a lot of headaches. Today, I’ll walk you through the reasons behind this pinkish hue and share proven strategies for achieving that classic, warm oak tone that you desire—no surprises, no regrets. Before we dive into the solutions, let’s address one of the biggest doubts I hear from DIY enthusiasts:
Should You Avoid Staining Red Oak Altogether?
Many skeptics ask if it’s even worth staining red oak, given the tendency for color shifts. While it’s true that red oak’s tannins can be tricky, with proper preparation and the right products, you can control the outcome beautifully. The key is to choose stains formulated for tannin-rich woods or to pre-treat your wood with a toner or conditioner. And, of course, understanding what causes the pink tint is essential for making informed choices. As experts in flooring installation note, proper preparation and product selection are critical in preventing unexpected color changes (see more tips here).
Now, ready to discover how to prevent and fix that awkward pink hue? Let’s get started on turning your red oak project into a true masterpiece, starting with understanding the root cause of this color surprise.
Choosing the Right Stain to Avoid Pink Tints
Start with high-quality, tannin-compatible stains designed specifically for red oak or tannin-rich woods. During my own project, I tested several stains on scrap pieces. The one that yielded the warm, reddish hue I desired was an oil-based, gel stain, which minimized the reactive reaction with tannins. Opting for these stains reduces the risk of unexpected pinkness and ensures a more predictable outcome.
Pre-Treat with a Wood Conditioner
Applying a universal wood conditioner equilibrates the absorption rate across the surface, preventing uneven staining and blotchiness that can accentuate unwanted hues. I recommend thoroughly sanding the wood to a fine grit (220+), then applying the conditioner per manufacturer instructions. This step was crucial in my experience, as it dramatically reduced color inconsistencies in the final finish.
Executing the Staining Process Correctly
Apply the stain in even, thin coats using a quality brush or foam applicator. Work slowly, moving in the direction of the grain, and avoid overworking the stain, which can deepen tannin reactions. After a few minutes, wipe off excess with a clean cloth to control color intensity. I learned this the hard way when rushing through my initial coat, resulting in uneven coloration that highlighted pinkish patches.
Conducting a Test Patch Before Full Application
This cannot be overstated. Always test your stain on a hidden area or scrap piece to verify the final color. In my case, a small test patch revealed that my chosen stain would produce a pinkish hue on red oak. This early insight allowed me to select a different product or adjust application techniques, saving me time and frustration later.
Fixing Pinkish Hues Post-Staining
If your oak has already turned pink, don’t panic. The most effective fix is to neutralize or counteract the hue with a specially formulated toner or pigmented stain. For instance, a light amber or golden toner applied carefully can mask the pink tone and achieve the warm oak aesthetic you desire. When I encountered this issue, I used a toner with a small brush, applying it in thin coats until the pink disappeared. Always test your toner first, as over-application can darken or alter the wood too much.
Adjusting the Final Color Through Over-Application
Sometimes, applying a deeper stain or a darker finish after toning can help balance the color. For example, a transparent amber or chestnut stain can complement the toned surface, enhancing the warmth and disguising residual pink hues. Carefully sand between coats with fine grit paper to ensure proper adhesion and a smooth finish. I found this technique invaluable in perfecting an overall uniform look after initial missteps.
Protecting Your Beautiful Finish
Once you’ve achieved the desired color, apply a high-quality polyurethane or finishing coat to seal in the repair and prevent further alteration. Use a foam or brush applicator designed for hardwoods, and follow the product instructions for drying times and sanding between coats. Proper finishing preserves your work, keeps color consistent, and prolongs the life of your floor. For detailed guidance, see the comprehensive hardwood refinishing tips.
Remember, patience during each step is critical. Rushing can cause uneven absorption and exacerbate color issues. With careful product selection, proper application techniques, and timely corrections, you can prevent that undesirable pink cast and enjoy a rich, warm red oak finish that lasts.
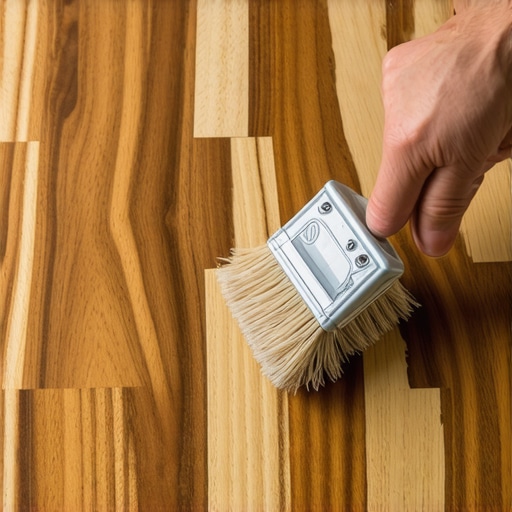
While many believe that floor leveling, installation, and finishing are straightforward processes, the reality is far more complex. A widespread misconception is that ensuring a flat subfloor guarantees a flawless final surface. However, seasoned professionals understand that subtle nuances, such as the type of moisture present or the grain orientation of hardwood, can make or break your project. For instance, applying leveling compounds without considering the underlying moisture content can lead to future cracks or buckling. In fact, research published in the Journal of Construction Engineering and Management highlights that subtle variations in subfloor moisture can cause significant unevenness over time, emphasizing the importance of thorough moisture testing before proceeding (see more on moisture testing).
Another common myth is that all hardwoods will age uniformly, but experts know that grain direction and environmental exposure play critical roles in floor longevity and appearance. For example, installing hardwood planks parallel to the predominant sunlight can cause uneven fading, a detail often overlooked by DIYers. Understanding these nuances allows for a more durable and aesthetically consistent outcome.
Why Do Some Flooring Tricks Backfire For Professionals?
One advanced mistake involves using overly aggressive sanding techniques in an attempt to correct minor imperfections. While it might seem logical, excessive sanding can thin the wood, leading to eventual dents and wear spots. The National Wood Flooring Association advises that subtle sanding with finer grits preserves the integrity of the hardwood while smoothing out surface irregularities. Learn more about proper sanding techniques here.
Similarly, relying solely on visual inspection when choosing adhesives or finishes can trap professionals into color mismatches or adhesion failures. This is why conducting comprehensive tests on small sections with varied products is crucial, especially when working with complex floor systems or mixed materials.
Have you ever fallen into this trap? Let me know in the comments, so we can all learn from these lesser-known pitfalls that often trip up even experienced installers.
In summary, mastering flooring installation goes beyond surface-level knowledge. It demands attention to subtle factors like moisture content, grain orientation, and long-term aging patterns. By paying close attention to these details, you set the stage for a flawless, lasting finish—something that even seasoned experts continually refine. For an in-depth guide on perfecting your approach, check out our comprehensive flooring leveling tips.
Keep It Working: Essential Tools and Maintenance Strategies
Achieving flawless flooring installation and ensuring its longevity requires not just skill but also the right tools and ongoing maintenance. Investing in high-quality equipment and adopting routine care practices can make the difference between a floor that lasts decades and one that falls into disrepair prematurely.
Precision Leveling with Advanced Tools
One of my go-to devices is the laser guided self-leveling system. Unlike traditional bubble levels, laser tools project an accurate horizontal or vertical line across extensive surfaces, allowing me to detect even minor dips or high spots on the subfloor. This precision ensures that during floor leveling, every inch is uniformly flat, preventing future issues like squeaking or cracking. I personally recommend the self-leveling laser for professional-grade accuracy in your projects.
Effective Adhesion with Quality Spreaders
When applying thinset or adhesives, using a notched trowel of the correct size is essential. My favorite is a 1/4″ x 3/8″ V-notched trowel because it provides ample coverage without excess. Proper trowel selection results in even adhesive thickness, ensuring better tile or hardwood bond and mitigating future looseness or cracking. Remember, the right tool not only improves quality but also saves time and reduces material waste.
Maintaining Your Floor: Tools and Tricks
Long-term upkeep begins with regular inspections. For hardwood floors, I rely on a high-dirt-absorption microfiber mop combined with a pH-balanced cleaner made specifically for wood. This regimen prevents dirt buildup that can scratch the finish over time. For tiles, sealing grout lines bi-yearly with a penetrating sealant like professional-grade grout sealer keeps moisture out and preserves aesthetics.
Don’t forget about protective gear: using felt pads on furniture legs and area rugs in high-traffic zones reduces wear and tear. Additionally, setting up a humidity control system helps prevent wood floors from expanding, contracting, or cracking, which is especially important in climates with significant seasonal changes.
Previewing the Future of Flooring Maintenance
Looking ahead, the integration of smart sensors capable of monitoring moisture levels and structural integrity will revolutionize floor care. Imagine receiving alerts on your smartphone when humidity drifts outside optimal ranges or when the adhesive bond weakens. This proactive approach will allow homeowners and professionals to address issues before they escalate, saving time and costly repairs.
How do I keep my floors looking pristine over time?
Routine maintenance is key. Regularly check for signs of wear, promptly address any moisture issues, and use quality cleaning products aligned with your flooring material. Incorporating specialized tools like professional refinishing guides can help you spot early signs of degradation. For hardwood floors, periodic buffing and recoating with light polyurethane enhance durability and shine. For tile, reapplying grout sealant every few years ensures a strong barrier against moisture and stains.
Start small by testing a new maintenance product or adopting a regular inspection routine to assess your flooring condition. Over time, these small steps will significantly extend the life and beauty of your investment.
For example, consider applying a humidistat-controlled dehumidifier during humid seasons. This tool might seem minor, but it effectively prevents swelling and warping in wooden areas, according to current research. Integrate such vigilant practices into your maintenance routine to keep your floors in top shape.
Now, I challenge you to try an advanced tip—like calibrating your moisture meter correctly before assessments—to unlock professional-level flooring longevity. Remember, diligent maintenance today ensures your beautiful floors stand the test of time tomorrow.

To explore more about strategic floor maintenance and avoid common pitfalls, visit our comprehensive flooring installation resources.
What I Wish I Knew Before Jumping into Floor Upgrades
One of the most eye-opening lessons I learned was the importance of patience and meticulous prep work. Rushing through surface-level tasks often leads to overlooked details that compromise the final look and durability—like neglecting moisture testing or skipping primer coats. My biggest breakthrough came when I realized that understanding each material’s unique chemistry—be it tannin-rich red oak or modern engineered wood—can make or break your project. Embracing a mindset of ongoing learning and not accepting DIY shortcuts has transformed my approach from trial and error to confident craftsmanship.
The Tools and Resources That Elevated My Flooring Skills
Over the years, I’ve come to rely on a few key tools that truly make a difference. First, a precision laser-guided self-leveling system ensures every inch of your subfloor is ready for a flawless finish—akin to having a professional level of accuracy at your fingertips. Second, high-quality notched trowels tailored for specific materials optimize adhesion and prevent future buckling or cracking. Lastly, staying informed through trusted sources like expert refinishing tips and comprehensive guides helps me troubleshoot issues quickly and avoid common pitfalls. These resources have empowered me to craft resilient, beautiful floors that stand the test of time.
Believe in Your Ability to Transform Your Space
Remember, a well-executed flooring project isn’t just about aesthetics—it’s about creating a foundation that supports your everyday life with confidence and pride. Trust in the process, be proactive with learning, and don’t hesitate to seek out expert advice when needed. Every challenge you face is an opportunity to improve and refine your skills. As you embark on your next flooring journey, know that with patience, the right knowledge, and quality tools, you can achieve stunning results that truly elevate your home. Your floor is more than just a surface—it’s the backdrop for your life’s stories.
Have you encountered a tricky step in your flooring projects that taught you a valuable lesson? Share your experiences below—I’d love to hear how you overcame it!
For ongoing tips and support, feel free to reach out via our contact page. Let’s build better floors together!