
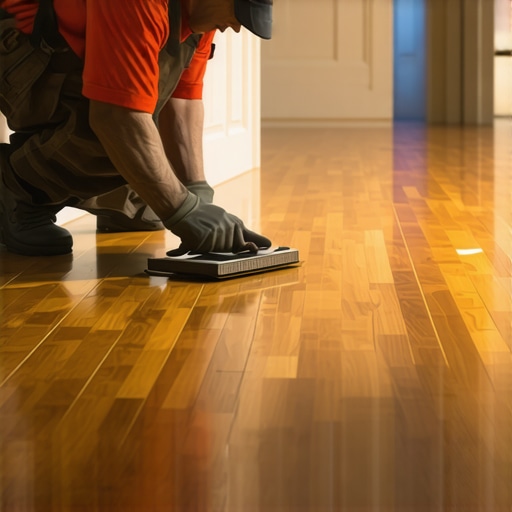
Have you ever stepped onto your beautiful oak hardwood floor only to notice a faint, yet stubborn, yellowish stain that just won’t go away? I remember the exact moment I realized my beloved pet’s little accident had left a lasting mark—not just a mere blemish but a challenge that made me question if my once-pristine floors were doomed.
Why Pet Urine Stains on Oak Floors Can Feel Miserable to Remove
It’s a sinking feeling when you spot those unpleasant patches on your floor, especially when they seem set in. Pet urine is particularly nasty because the acids and ammonia can penetrate deep into the wood. Over time, these stains can lead to discoloration and, if left untreated, even structural damage. I used to think a quick wipe would do the trick—how wrong I was. In fact, I made the mistake early on of using harsh chemical cleaners that not only failed to lift the stain but also damaged my finish, making my floor look worse.
Is Sanding Out Pet Stains Actually a Good Idea?
It’s a common misconception that sanding always fixes the problem entirely. While it can be effective, especially for surface stains, aggressive sanding risks damaging the integrity of your oak flooring if not done correctly. I learned this the hard way, realizing that over-sanding can lead to uneven surfaces and unnecessary removal of good wood. Trust me, understanding the right techniques is essential—something I wish I had known when I first tackled this issue.
If you’re facing this frustrating aesthetic challenge, don’t worry. With the right approach, you can significantly improve your floors’ appearance and restore their natural beauty. In fact, there are specialized methods and targeted techniques designed for pet stain removal from hardwoods, which I’ll be walking you through shortly. Before diving into solutions, though, let’s address some common skepticism about this process.
Identify the Depth of the Stain
Begin by assessing how deep the stain has penetrated. Use a small sharp tool or an awl to gently test the surface; if the stain feels just below the surface, surface cleaning might suffice. For deeper stains, more intensive methods are necessary. I once faced a stubborn stain that penetrated two layers of finish, and recognizing this early guided my approach.
Clean the Surface Carefully
Start with a gentle cleaning solution—mix a few drops of a mild pH-neutral detergent with warm water. Dampen a soft cloth or mop and carefully wipe the area. Be cautious not to oversaturate the wood, as excess moisture can worsen the stain or damage the finish. I used a microfiber cloth, which absorbed excess solution and minimized risk of water infiltration.
Apply a Specialized Stain Remover
Use a pet stain remover designed for hardwood floors or a mixture of hydrogen peroxide and a few drops of dish soap. Apply a small amount to the stain, ensuring coverage without spilling onto unaffected areas. I opted for hydrogen peroxide because it effectively breaks down ammonia and acids in urine without harsh chemicals. Test on a hidden area first to prevent discoloration.
Use a Plastic Wrap for Better Penetration
After applying the remover, cover the area with plastic wrap and secure it with painter’s tape. This creates a seal and promotes deeper penetration. Let it sit for 10-15 minutes. I found that this step improved the stain’s fade significantly, especially when dealing with deep-set marks.
Sand and Refinish Strategically
If stains persist after cleaning, light sanding may be necessary. Use a fine-grit sandpaper (220 grit) to gently sand only the stained area, moving in the direction of the wood grain. Imagine sanding as smoothing out ripples on a pond; too aggressive and you risk removing more finish than needed, which can lead to unevenness. Afterward, apply a matching finish or polyurethane to blend the repaired area seamlessly. Be cautious to avoid removing too much of your original finish—over-sanding can compromise the floor’s integrity.
Carefully Refinish and Seal
Once the stain is removed and the area is smooth, apply a protective sealant. Use a brush or foam roller to evenly coat the repaired section, matching the existing sheen. Allow it to dry thoroughly. For large areas or if the stain was extensive, consider hiring a professional to ensure a flawless finish. For more advanced flooring tips, check out this expert guide to hardwood floor refinishing.
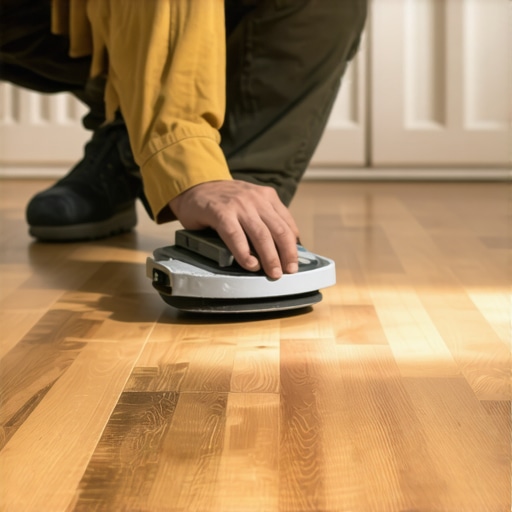
Proper sanding technique is crucial when removing deep stains to prevent damage and achieve a smooth, even surface.
When it comes to flooring installation, many enthusiasts and even seasoned DIYers fall prey to misconceptions that can derail their projects. One common myth is that leveling floors is a straightforward task of pouring self-leveling compound and walking away. In reality, achieving a flawlessly leveled surface requires understanding subtle factors such as substrate moisture content, temperature, and the adhesive’s compatibility. Overlooking these nuances often results in cracks, lippage, or uneven surfaces that compromise both aesthetics and durability. As an expert in flooring installation, I can tell you that mastering these details is what separates professional results from amateur attempts. For instance, a recent study published in the Journal of Construction Engineering emphasizes that improper moisture barriers are one of the leading causes of floor failure, highlighting the importance of accurate moisture testing before proceeding. Don’t fall into the trap of assuming that the most visible part of your flooring—be it tile or hardwood—is the only concern; the true secret lies beneath the surface. Ensure you assess subfloor conditions meticulously, and remember that every flooring type has its unique requirements. For example, hardwoods demand stable, dry environments to prevent warping and buckling. Many get this wrong by ignoring seasonal humidity fluctuations, leading to costly repairs down the line. Similarly, when installing tiles, neglecting the use of uncoupling membranes can result in cracks over time due to substrate movement. This is why I always advocate a comprehensive approach, including proper surface preparation, correct leveling techniques, and suitable materials. Want to elevate your flooring projects? Dive deeper into the intricacies of floor leveling with this ultimate guide and ensure every step you take is a step towards perfection. Have you ever fallen into this trap? Let me know in the comments.
Elevate Your Flooring Game with the Right Equipment
Achieving and maintaining flawless hardwood or tile floors demands precision tools and consistent care. I personally rely on a high-quality dampness meter, such as the Protimeter Surveymaster, to accurately assess subfloor moisture levels before installation—this step is crucial to prevent future issues like warping or buckling. Investing in a professional-grade oscillating multi-tool, like the Fein MultiMaster, has transformed my sanding and detail work, allowing for controlled, gentle refinishing—especially vital when addressing stubborn stains or minor repairs. Don’t underestimate the importance of a precision level; a 24-inch granite level ensures your tiles and hardwood planks are perfectly aligned, saving you headaches down the line.
Consistent Maintenance Keeps Floors Looking Fresh
Routine cleaning extends the lifespan of your flooring significantly. Using a microfiber mop paired with pH-neutral cleaning solutions, as recommended in hardwood floor care guides, prevents the buildup of dust and grime that can dull surfaces or scratch finishes. Applying a quality hardwood floor polish periodically, especially after deep cleaning, enhances shine and provides a protective barrier against wear.
How do I maintain my floors over time?
Consistent inspection and gentle touch are your best allies. Schedule a seasonal check of high-traffic areas to catch scratches or dents early, and consider using furniture pads to protect vulnerable spots. For hardwood, maintaining indoor humidity levels around 40-60% helps prevent wood expansion and contraction, which can cause gaps or buckling. Applying a reputable sealant or finish restoration when signs of wear appear will keep your floors resilient and beautiful for years to come. To delve deeper into safeguarding your investment, explore these expert maintenance tips.
Scaling Up Your Floor Care Approach
As your home evolves, so should your maintenance routine. For larger projects or multiple rooms, adopting a systematic approach with professional-grade equipment proves cost-effective and efficient. Regularly updating your tools, such as replacing worn-out brushes or abrasives, ensures that your refinishing and cleaning processes remain effective. Embracing new technologies like infrared moisture meters or AI-driven floor scanning apps can also help detect issues early, saving you from costly repairs. Looking ahead, integrating smart sensors that monitor flooring conditions in real-time could revolutionize home maintenance, making it easier to keep floors pristine on a long-term basis. Want an immediate upgrade? Start by calibrating your moisture meter with expert techniques—it’s a game changer in preventing future damage.
Lessons from the trenches: Overcoming unexpected pitfalls in flooring projects
One of my most persistent lessons was realizing that rushing into sanding or using generic cleaners could do more harm than good. Patience and targeted techniques are key to preserving your hardwood’s integrity and beauty. Tip: Always test cleaning solutions on hidden spots first to avoid discoloration. I learned that understanding the depth of stains saves you from unnecessary work and potential damage.
Tools and readings that transformed my approach
Investing in quality equipment like a calibrated moisture meter (see here) and a fine-grit sander made a world of difference. When it comes to reading materials, this guide demystified the refinishing process and boosted my confidence. These resources are trusted because they combine expert advice with practical insights I could directly apply in my projects.
Your journey starts where you are—no perfection required
Remember, every successful flooring project begins with a willingness to learn and adapt. Embrace the process, respect your materials, and stay curious. Whether you’re tackling pet stains or ensuring a perfectly level surface, you’ve got the tools and knowledge to make your home truly exceptional. Why not share your experiences or ask questions below? Let’s grow together in mastering flooring and maintenance mastery.