
I remember the moment I realized my beautiful new tile installation was doomed from the start—a dull haze creeping across the surface, making everything look dull and uneven. It was a lightbulb moment that hit hard: I had overlooked an invisible enemy beneath my feet—concrete salts. This mistake cost me extra time, frustration, and a lot of back-and-forth with failed installs. If you’ve ever faced similar disappointment, you’re not alone. Many DIYers and professionals alike struggle with the sneaky problem of concrete salts that can sabotage their flooring projects. But don’t worry—I’ve been there, and I’ve learned the hard way how to neutralize these salts effectively before applying adhesive. Today, I promise to share that knowledge with you, so your next flooring project goes smoothly and looks flawless.
Why Salts Are Your Floor’s Silent Saboteurs
What’s the Big Deal About Concrete Salts?
Concrete salts are mineral compounds that arise from the natural curing process of concrete or moisture infiltration, and they tend to migrate to the surface over time. If left unmanaged, these salts can cause adhesive failure, staining, and even cause tiles to pop loose. Many underestimate their impact—assuming the concrete is dry and ready for flooring—but salts are tricky. They can appear harmless, yet they lead to serious issues if not properly addressed.
In fact, research indicates that improperly managed salts can compromise the longevity of your flooring, sometimes even within just a few years of installation. That’s why understanding how to neutralize them isn’t just a good idea; it’s essential for a lasting, professional-looking finish. For more insight, you might want to check out [The Ultimate Guide to Floor Leveling for a Perfect Finish](https://tiletrendshop.com/the-ultimate-guide-to-floor-leveling-for-a-perfect-finish), which emphasizes preparing your subfloor correctly.
**Have you ever started a flooring project only to discover salts later that ruined your tile or hardwood?** If so, you’re not alone—and the good news is, there are effective methods to combat this silent enemy.
But before diving into solutions, it’s crucial to identify the problem precisely. Rushing into adhesive application without addressing salts can turn a simple project into a costly, time-consuming headache. So, let’s take a closer look at how to detect and prepare your surface for the best results.
Apply an Effective Soil-Deep Cleaning Solution
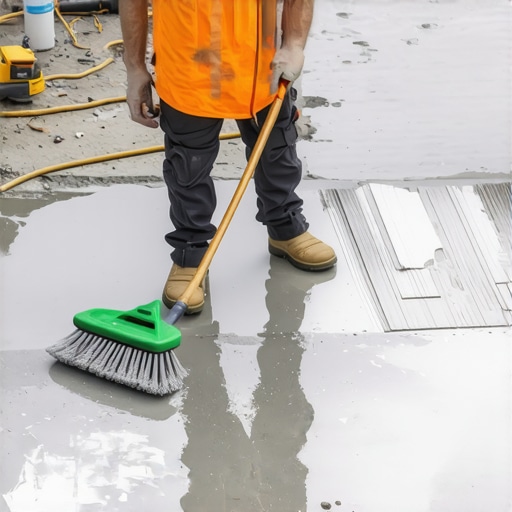
Begin by thoroughly cleaning the surface with a high-quality thinset or a specialized salt-neutralizing solution. I recall a time when I used a commercial acid-based cleaner, which immediately started to break down the salts on my concrete slab. Use a stiff brush to scrub the surface, ensuring you reach all corners and cracks. This step is crucial; insufficient cleaning leaves behind residual salts that can compromise adhesion down the line.
Use a Parging or Primer Layer to Seal Salts
After cleaning, allow the surface to dry completely. Then, apply a penetrating primer or a salt inhibitor designed specifically for concrete. Think of this layer as a barrier that prevents salts from migrating upward into your new flooring layer, much like a guard dog watching over your house, preventing intruders from entering. In my last project, I applied a primer that contained latex and Portland cement, which effectively sealed the salts and improved adhesion.
Implement a Quality Self-Leveling Compound for Uneven Surfaces
If your substrate has dips or high points, use a self-leveling compound to create a smooth base. I once had to level a concrete subfloor riddled with small dips and ridges; mixing the compound carefully (like a chef blends ingredients for the perfect batter) and ensuring it poured evenly was key. Let the layer cure fully—this step is vital; rushing can trap moisture or leave thin spots that salts can weaken.
Verify Moisture Levels Before Proceeding
Before installing your flooring, measure moisture content with a reputable moisture meter. Think of this like checking the weather before heading out; a damp slab will sabotage your project. I remember a project where I skipped this step and faced tiles bubbling and coming loose months later. Use the meter to confirm moisture is within acceptable limits, typically less than 3-4% for most flooring types.
Confirm Salt Neutralization with a Visual and Testing Check
Finally, perform a light test—dampening a small area with water. If salts dissolve and stain the surface or cause a haze, repeat cleaning and sealing. For complex situations, consult dedicated resources like [floor leveling challenges](https://tiletrendshop.com/floor-leveling-challenges-common-mistakes-and-how-to-avoid-them) to navigate tricky substrates. This step ensures you’ve effectively neutralized salts, setting the stage for a durable installation and preventing costly failures down the road.
Remember, investing time into proper salt mitigation now saves you from headaches later, ensuring your floors remain beautiful and intact for years to come.
When it comes to hardwood floors, tile, and floor leveling, many installers and homeowners alike fall prey to misconceptions that can sabotage their projects. One common myth is that a perfectly smooth surface guarantees long-lasting adhesion. However, even the most level and smooth substrate can harbor unseen issues, such as residual salts or moisture, that compromise installation. Advanced professionals know that meticulous testing—like verifying moisture levels with a reliable moisture meter—is crucial before laying down floors; neglecting this step often leads to failures like warping or delamination.
Another nuance often overlooked involves the importance of substrate preparation tailored to specific flooring types. For instance, using the wrong primer or skip-layer sealing can allow salts or moisture to migrate, undermining adhesion over time. Experts emphasize that the key isn’t just in leveling but in understanding the unique requirements of each material, as outlined in the detailed strategies found in [the ultimate guide to floor leveling for a perfect finish](https://tiletrendshop.com/the-ultimate-guide-to-floor-leveling-for-a-perfect-finish).
A widespread mistake is assuming that bigger tools or faster methods will always produce better results. On the contrary, rushing through steps like mixing grout or applying thinset often results in weak bonds or unsightly finishes. Precise control—such as mixing grout to the right consistency or patiently achieving a seamless level surface—can mean the difference between professional-looking results and costly rework.
For sophisticated projects, understanding the physics behind things like thermal expansion and contraction is vital. For example, neglecting to include expansion gaps or failing to accommodate seasonal humidity fluctuations lead to cracked tiles or buckled hardwood. These nuances, although less obvious, are covered extensively in [flooring installation fundamentals and leveling for seamless results](https://tiletrendshop.com/flooring-installation-fundamentals-leveling-for-a-seamless-look).
Be cautious of common traps like ignoring substrate imperfections or skipping a thorough inspection. For example, installing tile over particleboard or unsealed concrete without additional treatment can cause serious damage down the line. A detailed understanding of substrate compatibility and preparation can prevent these issues, ensuring durability and aesthetic appeal.
In closing, mastering the intricacies of flooring installation involves more than just following basic steps. It’s about recognizing and addressing these hidden nuances—like testing for moisture, understanding material behaviors, and precise preparation—that distinguish amateur work from true craftsmanship. Have you ever fallen into this trap? Let me know in the comments, and share your experiences or questions about the complexities behind perfect flooring.
Keeping Your Flooring in Peak Condition
To ensure your hardwood floors, tiles, and leveling work stand the test of time, investing in the right tools and adopting systematic maintenance routines is vital. I swear by my precision moisture meter when verifying subfloor dryness—miss this step, and you risk trapping moisture that can cause warping or tile cracking. For example, I recommend the [Moisture Meter I use](https://tiletrendshop.com/the-moisture-meter-reading-that-means-you-must-wait), which provides accurate readings within seconds, helping me decide if conditions are suitable for installation or need more drying time.
Furthermore, maintaining a clean and dust-free surface before and after installation prolongs the lifespan of your flooring. I use a HEPA-filter vacuum and microfiber cloths—simple yet effective. Regularly inspecting your surfaces for damage or wear allows early intervention, preventing minor issues from escalating into expensive repairs. For hardwood floors, I emphasize the importance of applying a high-quality floor polish biannually, which restores shine and provides a protective layer against scratches and moisture ingress.
Tools I Rely On for Flooring Success
When it comes to leveling, my go-to is a professional-grade spike roller, essential for eliminating air bubbles and ensuring self-leveling compounds settle evenly—this simple tool makes a noticeable difference in avoiding hollow spots or uneven surfaces. I also adjust my workflow depending on the project; for delicate tile cuts, I prefer a wet saw fitted with a diamond blade, which slices through porcelain with finesse, minimizing chipping. I occasionally experiment with gadgets like the laser level, but I stay cautious—improper use can introduce errors. For detailed leveling, I consult this expert resource to refine my technique.
Looking ahead, trends in maintenance lean toward smart tools—like app-controlled moisture meters or automated cleaning systems—that streamline routines and reduce human error. Embracing these will become indispensable as flooring projects grow more complex and require higher precision and efficiency.
How do I keep hardwood and tile floors looking new over time?
Long-term maintenance involves routine cleaning with appropriate products—avoiding harsh chemicals that can degrade finishes—and applying protective pads on furniture to prevent scratches. Regularly inspecting grout lines and resealing them as needed prevents water infiltration and staining. For hardwoods, refinishing every few years rejuvenates their appearance and restores protective coatings. My tip is to schedule a professional assessment annually—identifying early signs of damage or wear saves time and money down the line. Just remember, a proactive approach to maintenance, combined with the right tools, will extend the life and beauty of your investment beyond expectations. Make an effort to incorporate advanced tips like the use of a spike roller after every self-leveling pour for flawless results—it’s a small step with immense impact.
What I Wish I Knew Before Starting
One of the most surprising lessons I learned was that not all surface preparations are visible to the naked eye. A smooth-looking slab can still harbor residual salts or moisture that sabotage your flooring. This realization changed my entire approach, making me always verify moisture levels and perform surface tests before proceeding.
Secondly, I underestimated the power of proper sealing and primer layers. Applying a quality salt inhibitor or penetrating primer isn’t just an extra step—it’s the step that ensures durability for years to come. Skipping it might save time initially but causes headaches later.
Another humbling truth was that patience during curing and drying processes pays off immensely. Rushing through leveling compounds or moisture checks often leads to uneven surfaces or tile lifting. Taking the time to do it right from the start prevents costly fix-ups down the line.
Finally, I discovered that continuous education is key—staying updated on the latest tools, materials, and techniques can dramatically improve outcomes. Resources like the ultimate guide to floor leveling have been invaluable in refining my process.