
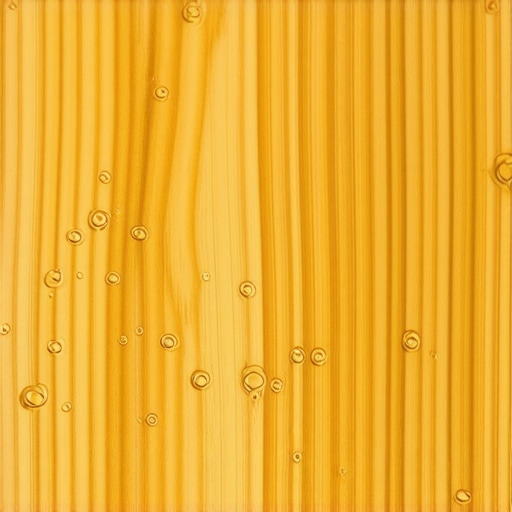
I vividly remember the moment I peeled back the drop cloth to reveal my freshly finished hardwood floor, only to be greeted by tiny concentric circles—like the surface of a disturbed pond. Those glossy, perfect-looking planks had transformed into a nightmare of numerous tiny fish eyes, ruining what I thought would be a flawless finish. It felt like all my effort was wasted in an instant. If you’ve experienced this frustrating phenomenon, you’re not alone.
Uncovering the Mystery Behind Fish Eyes in Polyurethane
Prepare Your Workspace and Materials
Begin by clearing the area of dust and debris, ensuring a clean environment essential for a smooth finish. Gather high-quality polyurethane, fine-grit sandpaper (220-grit), clean rags, and a foam brush or applicator. Remember, the key to a perfect finish lies in meticulous preparation and execution.
Sand the Affected Area Gently
Using the 220-grit sandpaper, lightly sand the fish-eyed spots. Think of this step as smoothing out tiny ripples on a pond surface; you want to remove the imperfections without damaging the surrounding finish. For instance, I once tackled a floors’ fish eye problem by gently sanding only the affected sections, which prevented the need for full re-coating and saved time.
Clean and Dust Off Residue
After sanding, remove all dust and residue with a tack cloth or a damp rag. This step is crucial because any leftover debris can cause more imperfections, similar to how dust can mar a finely painted surface. Ensuring a spotless surface is like cleaning your glasses—clarity depends on it.
Apply a Thin, Even Coat of Polyurethane
Using a foam brush or applicator, apply a thin, uniform layer of polyurethane over the sanded area. Avoid overspreading, which can lead to bubbles or drips; think of it like icing a cake—less is more. Work in long, controlled strokes to maintain consistency and prevent uneven layers. In a past project, I learned that patience here pays off; rushing often leads to more fish eyes or surface imperfections.
Allow Proper Drying and Cure Time
Let the newly applied finish dry according to the manufacturer’s instructions, usually at least 24 hours. Do not rush this process, as moisture trapped in the finish can create new fish eyes. Maintaining a dust-free environment during drying is vital; I once neglected this and ended up with a few new tiny imperfections, negating the previous efforts.
Evaluate and Repeat if Necessary
Inspect the surface after the curing period. If fish eyes reappear, repeat the sanding and recoating process. Sometimes, multiple thin coats produce a flawless result, much like building layers of paper mâché for strength. Stay patient, and remember that achieving a professional-looking finish requires multiple precise steps.
Prevent Future Fish Eyes
To avoid repeating the issue, control environmental factors like humidity and dust, and ensure proper surface preparation before application. For detailed techniques on floor leveling—integrate a seamless surface—visit this guide on floor leveling. Proper technique now saves headaches later, maintaining the glossy, flawless look you desire.
Many homeowners and even professionals fall prey to misconceptions when it comes to flooring installation, tile work, hardwood refinishing, and leveling. One of the most pervasive myths is that a perfectly flat subfloor isn’t essential for high-quality results. In reality, small dips and unevenness can lead to long-term issues like cracking or uneven wear. Experts emphasize that proper floor leveling techniques are critical for durability and aesthetics, yet many skip meticulous prep, assuming minor imperfections won’t matter.
Another misconception involves the use of cheap primers or sealers, which many believe can compensate for an uneven surface. In truth, using the wrong products can trap moisture or cause adhesion failures, leading to future peeling or bubbling, especially with hardwood refinishing projects. Advanced installers choose tailored solutions like moisture barriers and proper surface preparation, distinguishing themselves from novices who overlook this nuance.
A common trap is the belief that thicker coats of finish or endless sanding can fix initial mistakes. Overdoing these steps often results in a compromised surface—layering thin, even coats and understanding the importance of proper sanding stages are key to professional results. For example, a subtle but often overlooked detail is the timing of sanding between coats, which can affect adhesion and gloss; waiting for proper curing and using high-grit sandpaper yields superior finishes.
When it comes to tile installation, many underestimate the impact of substrate quality. Installing large-format tiles over a subfloor that isn’t perfectly supportively or level can cause lippage and cracking over time. Interestingly, a precision leveling approach ensures a seamless surface that enhances both appearance and longevity, and neglecting it is a shortcut that often backfires.
**Did you know that many assume owner DIY efforts are sufficient for tile or hardwood?** The reality is that small mistakes, like improper grout sealing or misaligned planks, compound over time, leading to costly repairs. There’s a lot more beneath the surface than what meets the eye—integrating expert tips and avoiding these pitfalls is what separates professional results from amateur fixes.
Now, let’s tackle a question that trips up even seasoned pros: **How does environmental control influence long-term flooring stability?** Temperature and humidity fluctuations can cause hardwood to expand or contract, leading to gaps or buckling if not carefully managed. According to industry research, maintaining a consistent environment is just as important as the installation process itself. Adapting your approach based on seasonal changes can significantly extend your floor’s lifespan.
**Have you ever fallen into this trap?** Let me know in the comments — understanding these hidden nuances can save you time, money, and frustration in your next flooring project.
Maintaining Your Flooring with Precision Tools
To keep your floors looking flawless over the years, investing in the right tools is crucial. I personally recommend using a high-quality belt sander with variable speed control. This allows for gentle removal of surface imperfections or old finishes without damaging the wood underneath. Pair this with a dust extraction system to minimize mess and airborne debris, which is vital for both safety and helping your finish adhere properly in future refinishing projects.
Personal Favorite Equipment for Floor Maintenance
One tool I swear by is the Mirka Deros random orbital sander. Its ergonomic design and even finishing capabilities make it ideal for refinishing sections or entire floors. Additionally, a good moisture meter is indispensable to monitor environmental conditions that could compromise your hardwood or tile adhesion. Keeping the humidity stable prevents warping or buckling over time, especially in climates with fluctuating seasons.
Effective Methods for Long-Term Durability
Regularly inspecting your flooring is key. Use a soft-bristle broom or microfiber mop for routine cleaning, avoiding harsh chemicals that can degrade finishes. For deep cleaning, I rely on pH-neutral wood or tile cleaners—these preserve the integrity of your surfaces. When applying new coatings, always follow manufacturer guidelines diligently, including proper surface preparation and curing times, to ensure a durable, long-lasting finish.
Scaling Your Flooring Projects with Advanced Techniques
If you’re considering expanding your flooring area or integrating new materials, precise floor leveling becomes even more critical. Modern methods like self-leveling underlayment with fiber reinforcement can create an ultra-flat base, accommodating large or uneven subfloors. For perfect results, I recommend reviewing these floor leveling techniques. Mastering these tools and methods now will set your projects up for success and avoid costly repairs down the line.
Future Trends in Flooring Maintenance
Looking ahead, automation and IoT integration might revolutionize how we monitor and maintain floors. Sensors embedded in underlayment could alert homeowners to rising moisture or temperature fluctuations before damage occurs. Embracing such innovations could save time and drastically extend your floors’ lifespan.
How do I maintain my floor’s appearance and structure over time?
Consistent vigilance coupled with the proper use of specialized equipment is essential. Regular inspections, gentle cleaning routines, and preventative measures like climate control will keep your floors beautiful for decades. For a detailed plan on long-term flooring care, consider exploring hardwood floor care strategies. Don’t forget to periodically evaluate if your tools are up to date—upgrading to professional-grade equipment can make all the difference in preserving your investment. Try incorporating a moisture meter into your routine, or consider renting a professional-grade sander for larger refurbishments; this proactive approach ensures longevity and aesthetic appeal.
Lessons from the Ground Up: What Nobody Tells You About Floor Perfection
One of the most profound lessons I learned is that patience truly is a virtue in flooring projects. Rushing through drying times or skipping surface prep may save time initially, but it often leads to costly imperfections like fish eyes or peeling. Recognizing that meticulous prep and controlled application are key has transformed my approach, saving time and frustration in the long run.
I’ve also realized that understanding your environment — especially humidity and dust levels — can make or break your finish. Controlling these factors during application prevents common issues like bubbles or surface blemishes, a tip I wish I had known earlier. It’s about creating an ideal ecosystem for your finish to cure flawlessly.
Another insight is that investing in the right tools, such as high-quality sanders and moisture meters, pays dividends in achieving professional-looking results. These tools provide precise control and data, guiding decision-making and ensuring longevity.
Finally, embracing the philosophy that perfect floors are a series of deliberate steps—each as important as the last—has been my guiding principle. Every thin coat of polyurethane and careful sanding layer builds toward a durable, glossy finish that elevates your space.